How to Find Out Where A Photo Was Taken? Get Instant Method


You can find out where a photo was taken by checking its EXIF metadata for GPS coordinates or using tools like Google Photos, iPhone/Android info menus, or Google Maps. If metadata is missing, try reverse image search or forensic tools to detect the location.
Overview- Do you want to know how to find out where a photo was taken? This is the best guide for you, whether you’re trying to track the GPS location of a picture for personal reasons or digital forensics. You’ll learn thoroughly how to extract metadata (EXIF), use free tools on Android, iPhone, PC, Mac, Google Maps, and even advanced photo location finders.
Table of Content
- Find Location Information From a Photo
- Why GPS Data Might Be Missing from a Photo
- Find GPS Info
- Find Location From Picture on Android
- Find Photo Location on an iPhone
- How to Find Out Location of Photo on Windows PC
- Find Location From Mac Devices
- Detect Location from Photo via Google Maps
- Forensics Extraction
- Find Out Where a Photo Was Taken Using Best Photo Location Finder
- Comparison Between the best Ways to to Find Location of Photo
- Conclusion
- FAQs
Photos capture memories, moments, and sometimes mysteries. This is so because sometimes you need to find location from picture due to various reasons.
You can use multiple methods to see exactly where a photo was taken. However, it is not a complicated task to manually track the exact location of the image. However, when it comes to forensic purposes, it is a very complex task to identify the location of old photos in batches.
Thus, in this blog, we will explore some tricks to get location from an image or a photo.
How to Get GPS Coordinates from a Photo (EXIF Guide)
To identify the exact location from a photo, a user searches for a solution on how to find where a picture was taken. Consequently, they will get various solutions on the web to identify the location from a photo manually or with the help of some advanced & professional utility.
Nowadays, almost every camera in the case of an Android or iPhone (and many digital cameras) has an inbuilt GPS function. When a person clicks any picture, the camera records GPS coordinates of the location at which the photo was taken. Evidently, this information holds the Geotag information which is also beneficial to extract Geolocation from images to identify the location of the photos respectively. This function will help to find GPS coordinates in photos/images.
Why GPS Data Might Be Missing from a Photo?
If you’re unable to find out where a photo was taken, there could be several major reasons behind it:
- Camera location settings were disabled: If the GPS or location feature was turned off when the photo was taken, no geotag data will be embedded in the image.
- Image has been edited or compressed: Editing or compressing a photo using certain tools or apps may remove the original metadata, including GPS coordinates.
-
Photo Shared Through Apps That Strip Metadata: Social media platforms and messaging apps like WhatsApp, Instagram, or Facebook often remove metadata for privacy or compression reasons.
-
Screenshot Instead of Original Image: Screenshots do not carry EXIF or GPS data, as they are captured by the screen, not the camera.
How to Find GPS Information in Photos?

The answer to “how to find out where a photo was taken?” can be obtained by accessing the location of the photo through the GPS method if the photo contains GPS coordinates only. GPS is embedded in its metadata, which is known as EXIF (Exchangeable Image File Format) data. Along with these coordinates, the user can also get information related to Camera Aperture Size, Shutter Speed, Focal Length, ISO speed, Camera Mode, etc.
All the modern and latest smartphones, cameras, and devices are usually built with this GPS functionality. But, this should be enabled in the respective devices, then only the information will be available when capturing photos.
Note: Only GPS-enabled devices provide Geotag information for images. If the location privacy in the Smartphone is ON, then only the clicked image will include the different attributes of GPS in the form of longitude, latitude, and altitude within the picture.
To view the information associated with the picture, follow the steps given below.
Find Location From Picture on Android
To find location from photo on Android phone perform the steps below:
Open image>>tap on three dots>>view the information of the image with metadata.
Note- For Android users it’s easiest to use the photos app which is the default gallery app for Android devices.
Find Photo Location on an iPhone
To view the complete image information on an iPhone, simply follow the steps :
Open image>> Tap in the “i” menu>>find GPS coordinates and see from where the photo is taken on a map.
How to Find Out Where a Photo Was Taken on Windows PC
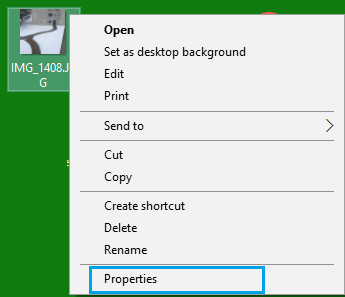
- Simply right-click the image
- Select properties> details>look latitude and longitude under GPS
As you can see in the screenshot below, in the GPS section, you will be able to see the 4 GPS Coordinates i.e., Latitude and Longitude.
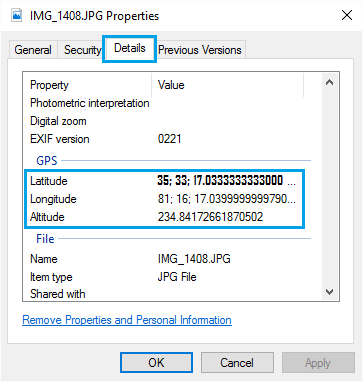
By accessing the geolocation data from the image the user can see exactly where a photo was taken. It also helps to find the date and time of the photo.
Note- The Properties window in Windows 10 and Windows 11 may not display GPS coordinates correctly. So, manually adjust these when entering coordinates into mapping software.
How to Find Out Where a Photo Was Taken From Mac Devices
- First, right-click on the image and select “Get Info.“
- Now see the latitude and longitude coordinates under the “more info” section.
Alternative Method
- Open the image
- Click the “i” button at the top
- Again, click “i” appears on the pop-up
- Lastly, select the “GPS” tab
Detect Location from Photo via Google Maps
After getting GPS information on the picture, a user can find the location where the picture was taken using Google Maps. The photo location search function integrated into Google Maps allows searching for a specific location by entering its GPS coordinates. The following are the steps for how to find out where a picture was taken.
1. First of all, you need to get the Latitude and Longitude coordinates from the Geotag information of the photo.
2. Now, open Google Maps on the system and enter the GPS Information from the image into the search bar of Google Maps.
3. Next, press Enter key on your computer and click on the Search icon.
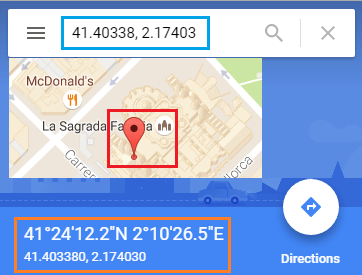
4. After a few seconds, Google Maps will point to the exact location, corresponding to the GPS coordinates that you have entered.
5. Google Maps accepts coordinates in any of the formats given below:
- Degrees, Minutes, and Seconds (DMS): 41°28’14.2?N 2°10’24.5?E
- Degrees and Decimal Minutes (DMM): 41 24.7036, 2 40. 6612
- Decimal Degrees (DD): 41.40228, 2. 17592
Note: Also, make sure that you have entered coordinates correctly using the correct symbols for minutes, degrees, and seconds. Failing in this can be a huge blunder to learn how to see the location of a photo someone sent you.
Also, keep in mind that these metadata details could be fake. So it becomes crucial to perform metadata analysis carefully because there is are very rare chance that someone has fake metadata. You can simply get solution of how to see exactly where a photo was taken from the picture properties itself. But, if in case your GPS settings are off, then your phone or camera may use the last known location. This can be done if it can’t get an up-to-date GPS signal taking a photo.
Forensics Extraction & Mapping of Geolocation from Images
Normally, manual methods are always time-consuming and quite disappointing. As a result, many users find these methods troublesome to detect location from photos promptly. Sometimes, this can also be a digital forensic investigation technique of examiners to fetch the details of where a picture was taken.
In such situations, Google Maps are not able to provide the perfect location of a photo. Therefore, users have to rely on an automated solution which is the Best Email Analysis Tool. With this utility, one can easily extract data from an image file. Moreover, one can easily perform raw image digital forensics using this utility.
How to Find Out Where a Photo Was Taken Using the Best Photo Location Finder
MailXaminer is the top email forensic solution used globally. If you are done with all the manual ways not found a solution for how to find where a picture was taken, then you can blindly trust this professional solution. This approach can simply locate the origin of a photo plus helps you in so many advanced ways while performing digital evidence collection.
Using a Photo Location Tracker Tool for Exact Results
- Step 1. Set up this advanced software on your system and start analyzing the images in detail without losing any properties of the image. First, create a new case to find where a picture was taken.

- Step 2. Now add evidence into the case to deeply analyze files and their attached photos for the location.
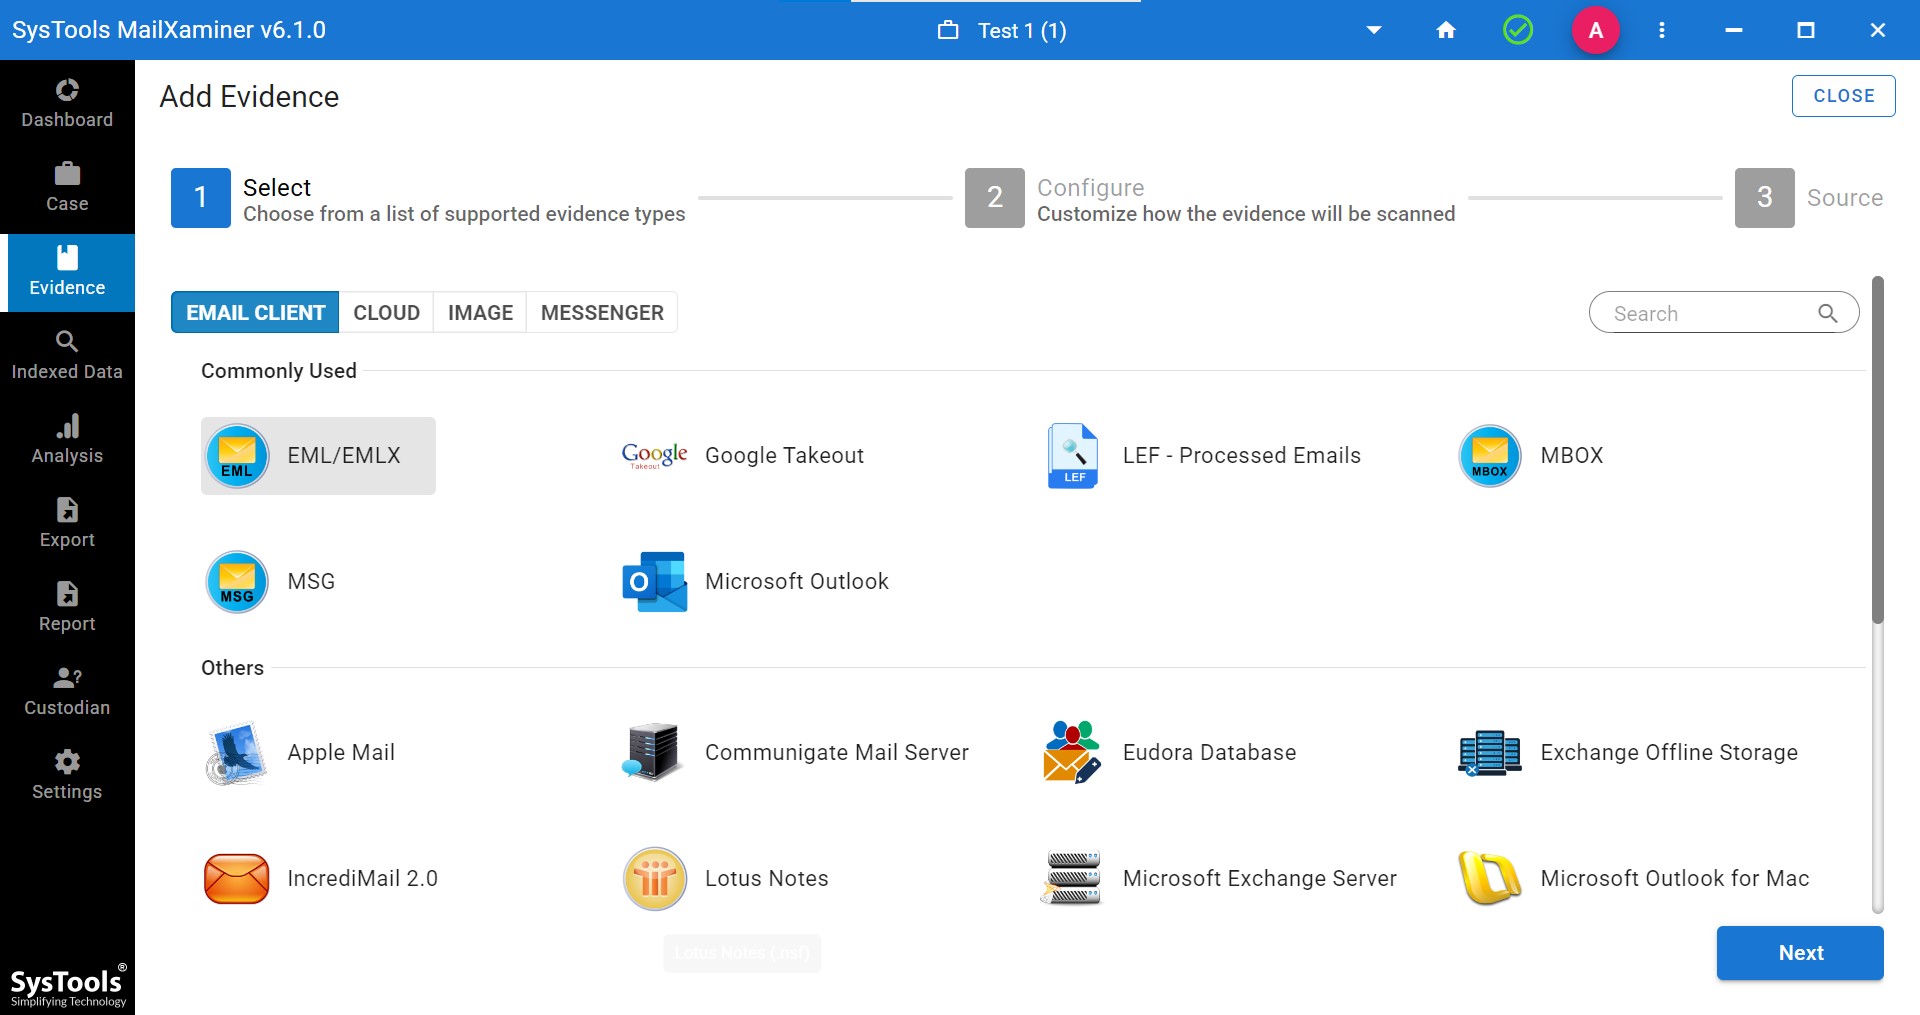
Note- Here we have selected EML as an email client. You will have various options to select as per your requirements, or your file consist of. Software will provide you 30+ file format with cloud applications and image formats as well.
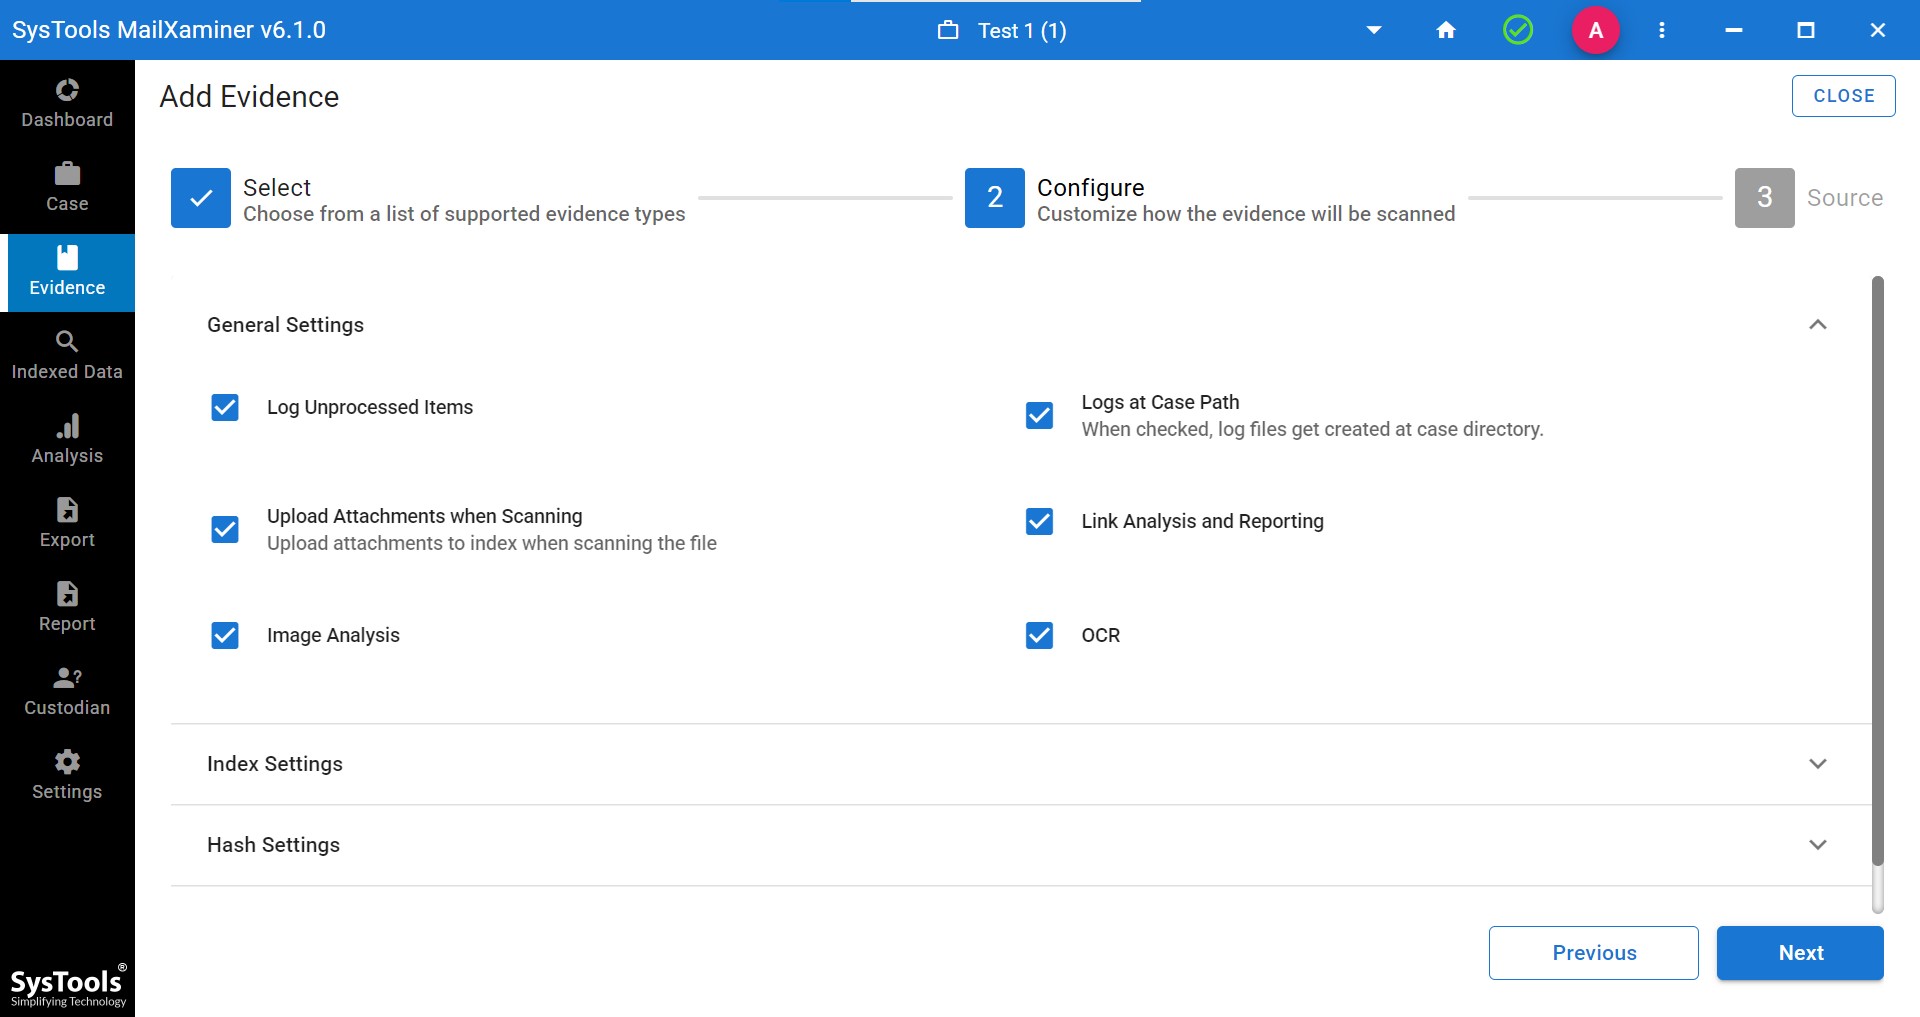
- Step 3. Then, apply the general settings as per your requirements. Here software asks you for the settings as per the required results, like OCR analysis, image analysis, logs, unprocessed items, etc.
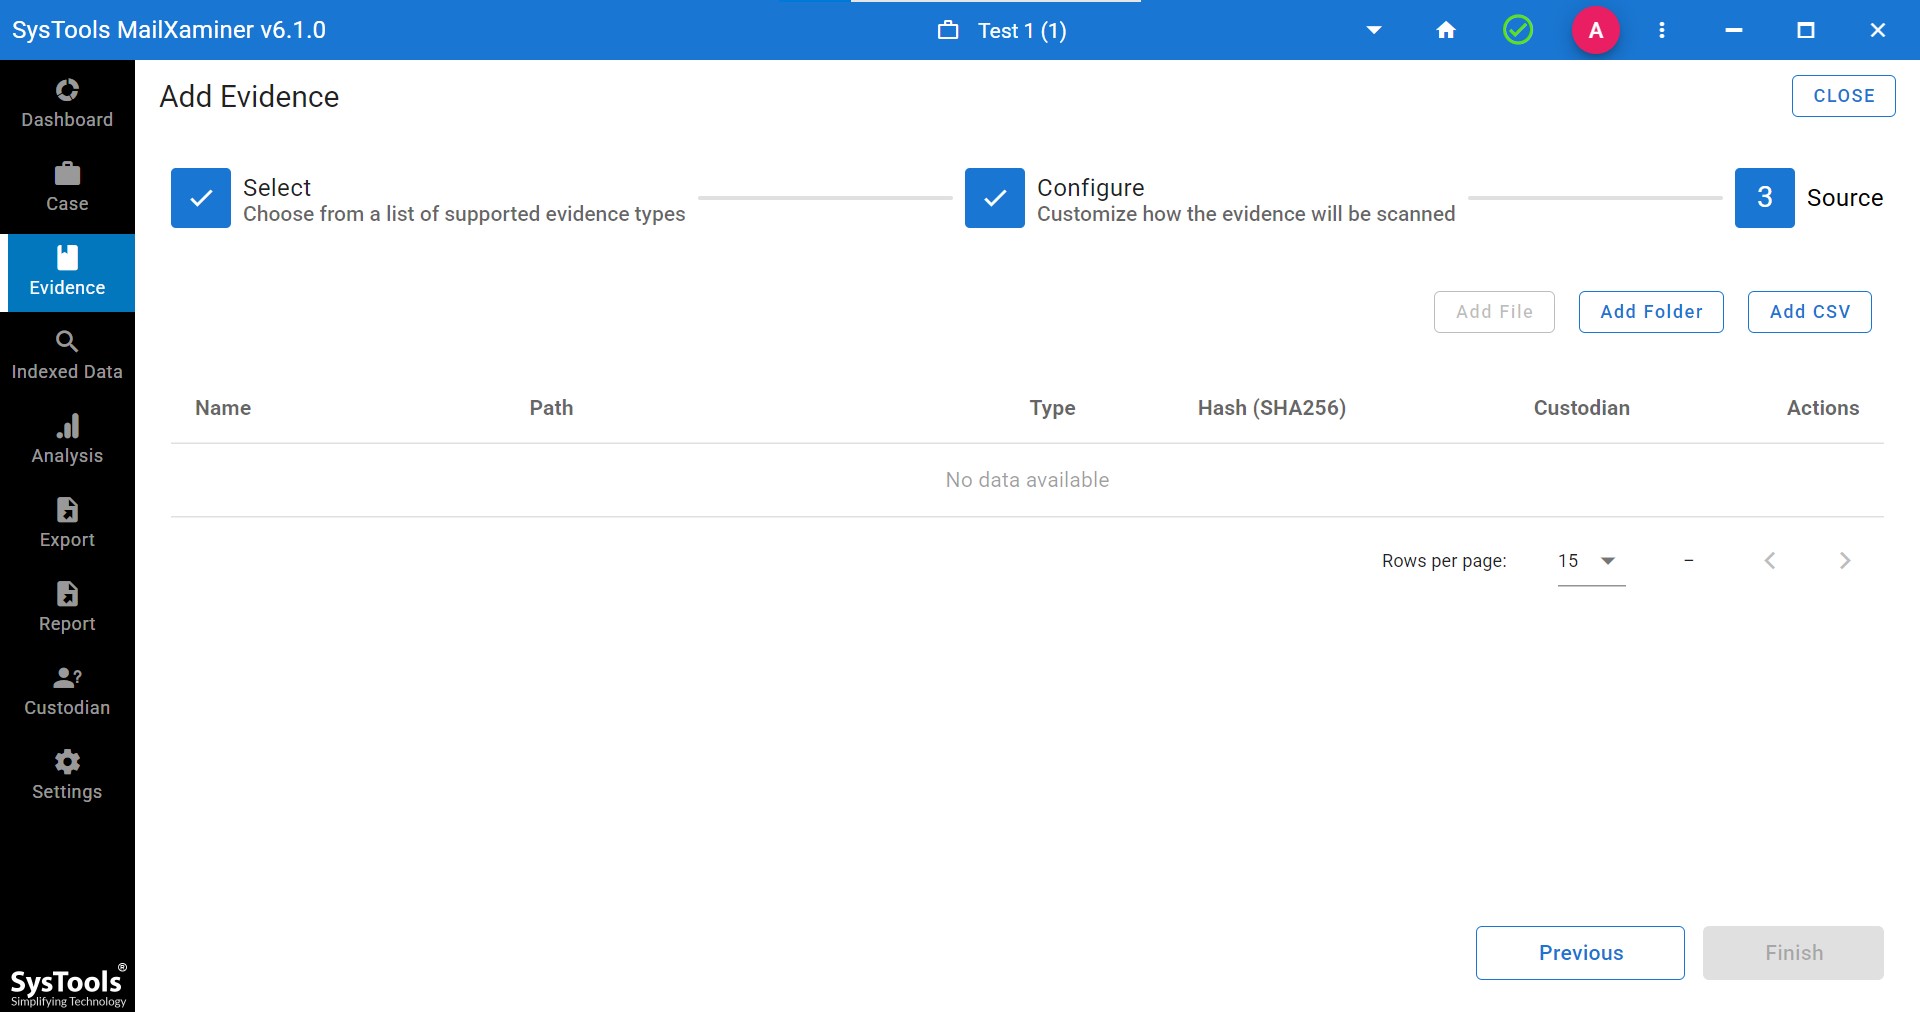
- Step 4. Now, the window to add a file/ add a folder opens. Add the file and proceed
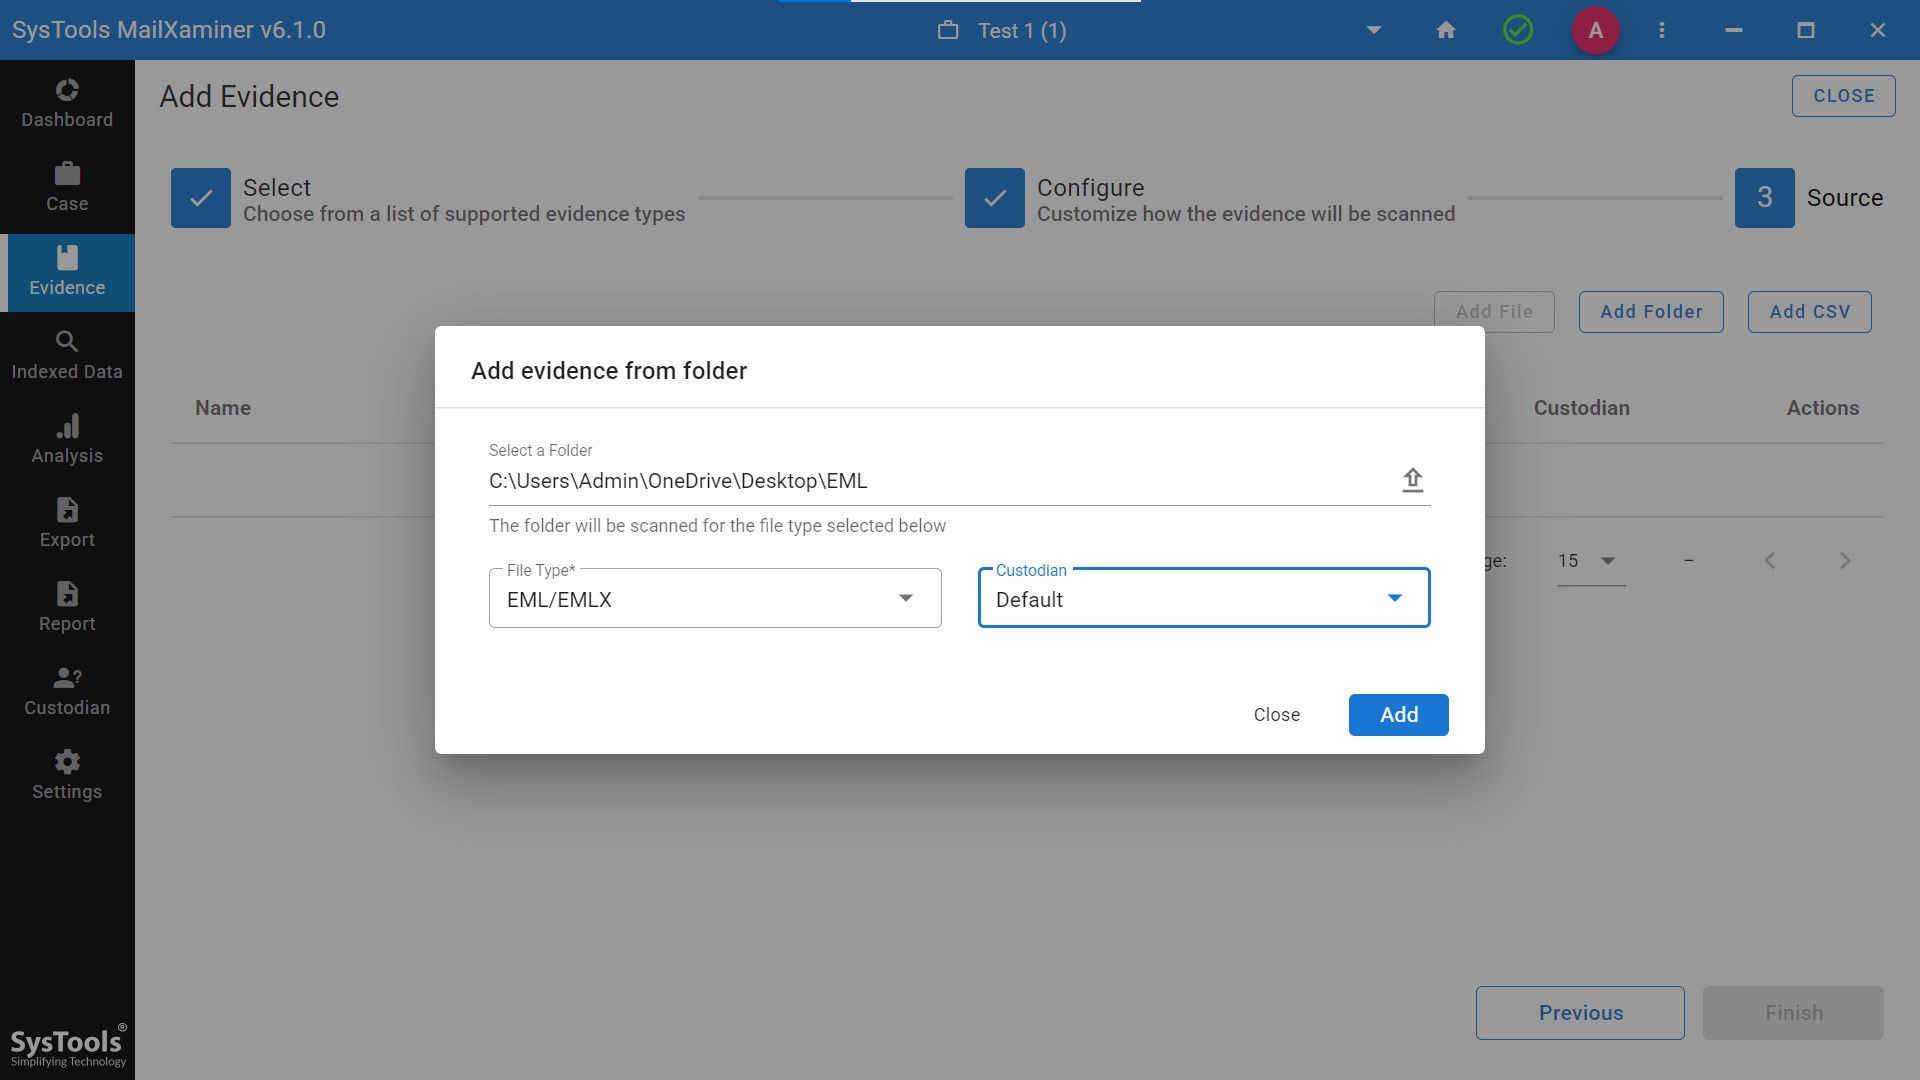
Note- Here we are proceeding by adding the folder as evidence into the software.
- Step 5. After the file/folder is added, you need to enter the folder path. It looks like this.
- Step 6. Now, the dashboard is visible with all the attached files icons displayed in every email.
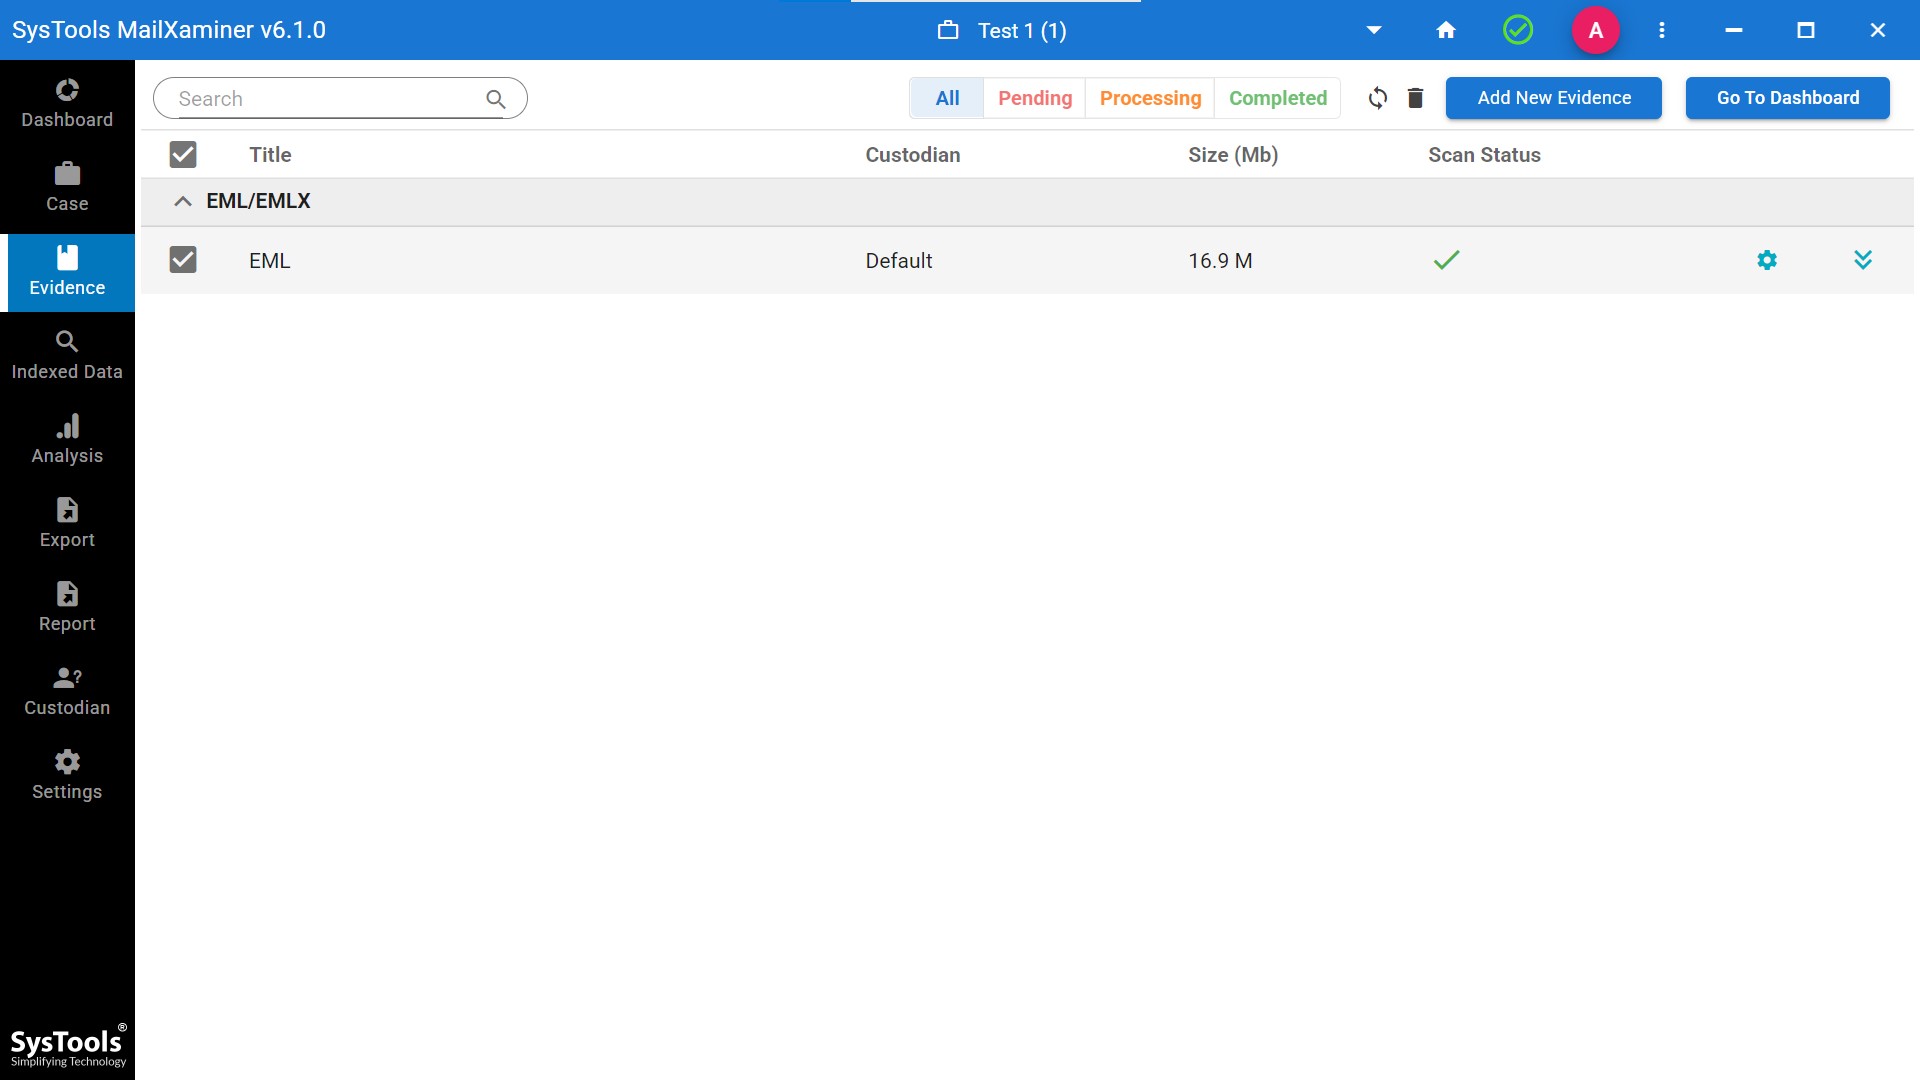
- Step 7. The software displays complete indexed data, including the subject and the source of the received file.
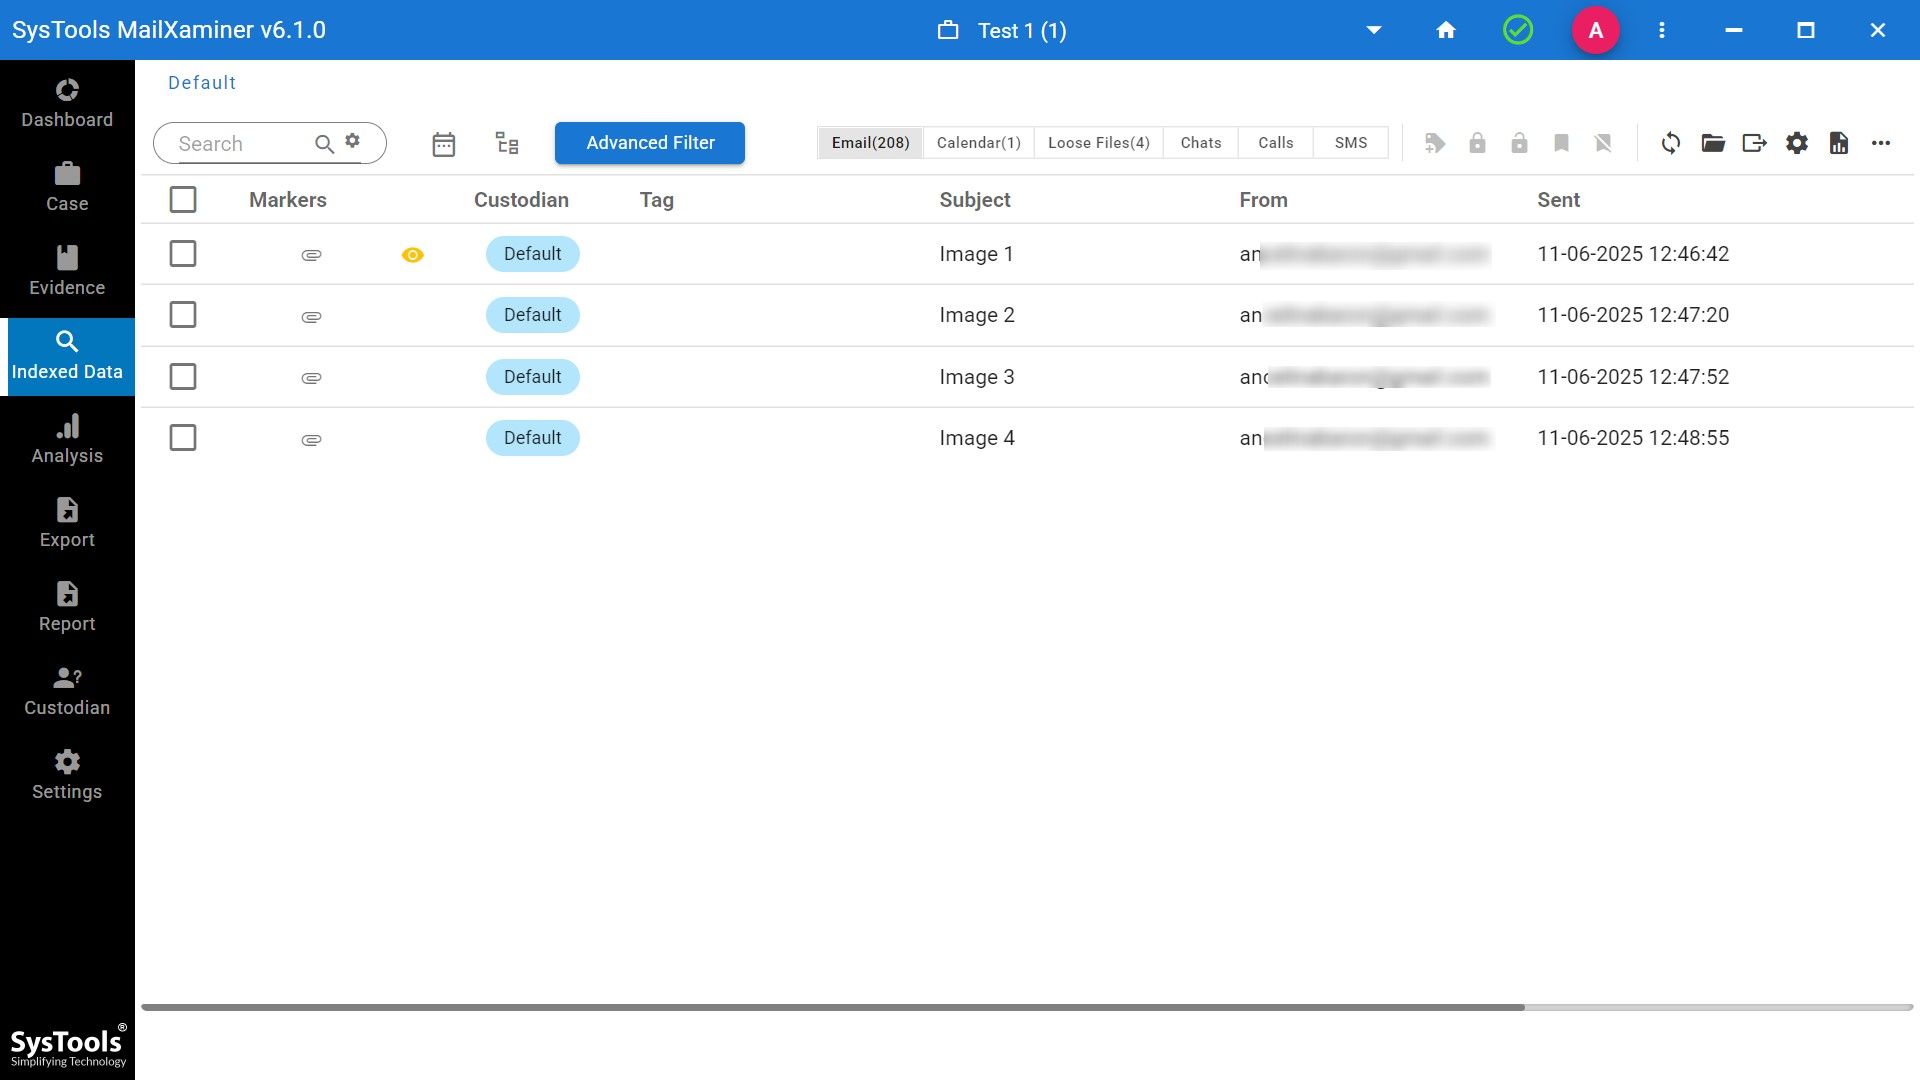
- Step 8. Now, check manually each email, and you will get the option of preview, properties, and Geomap.
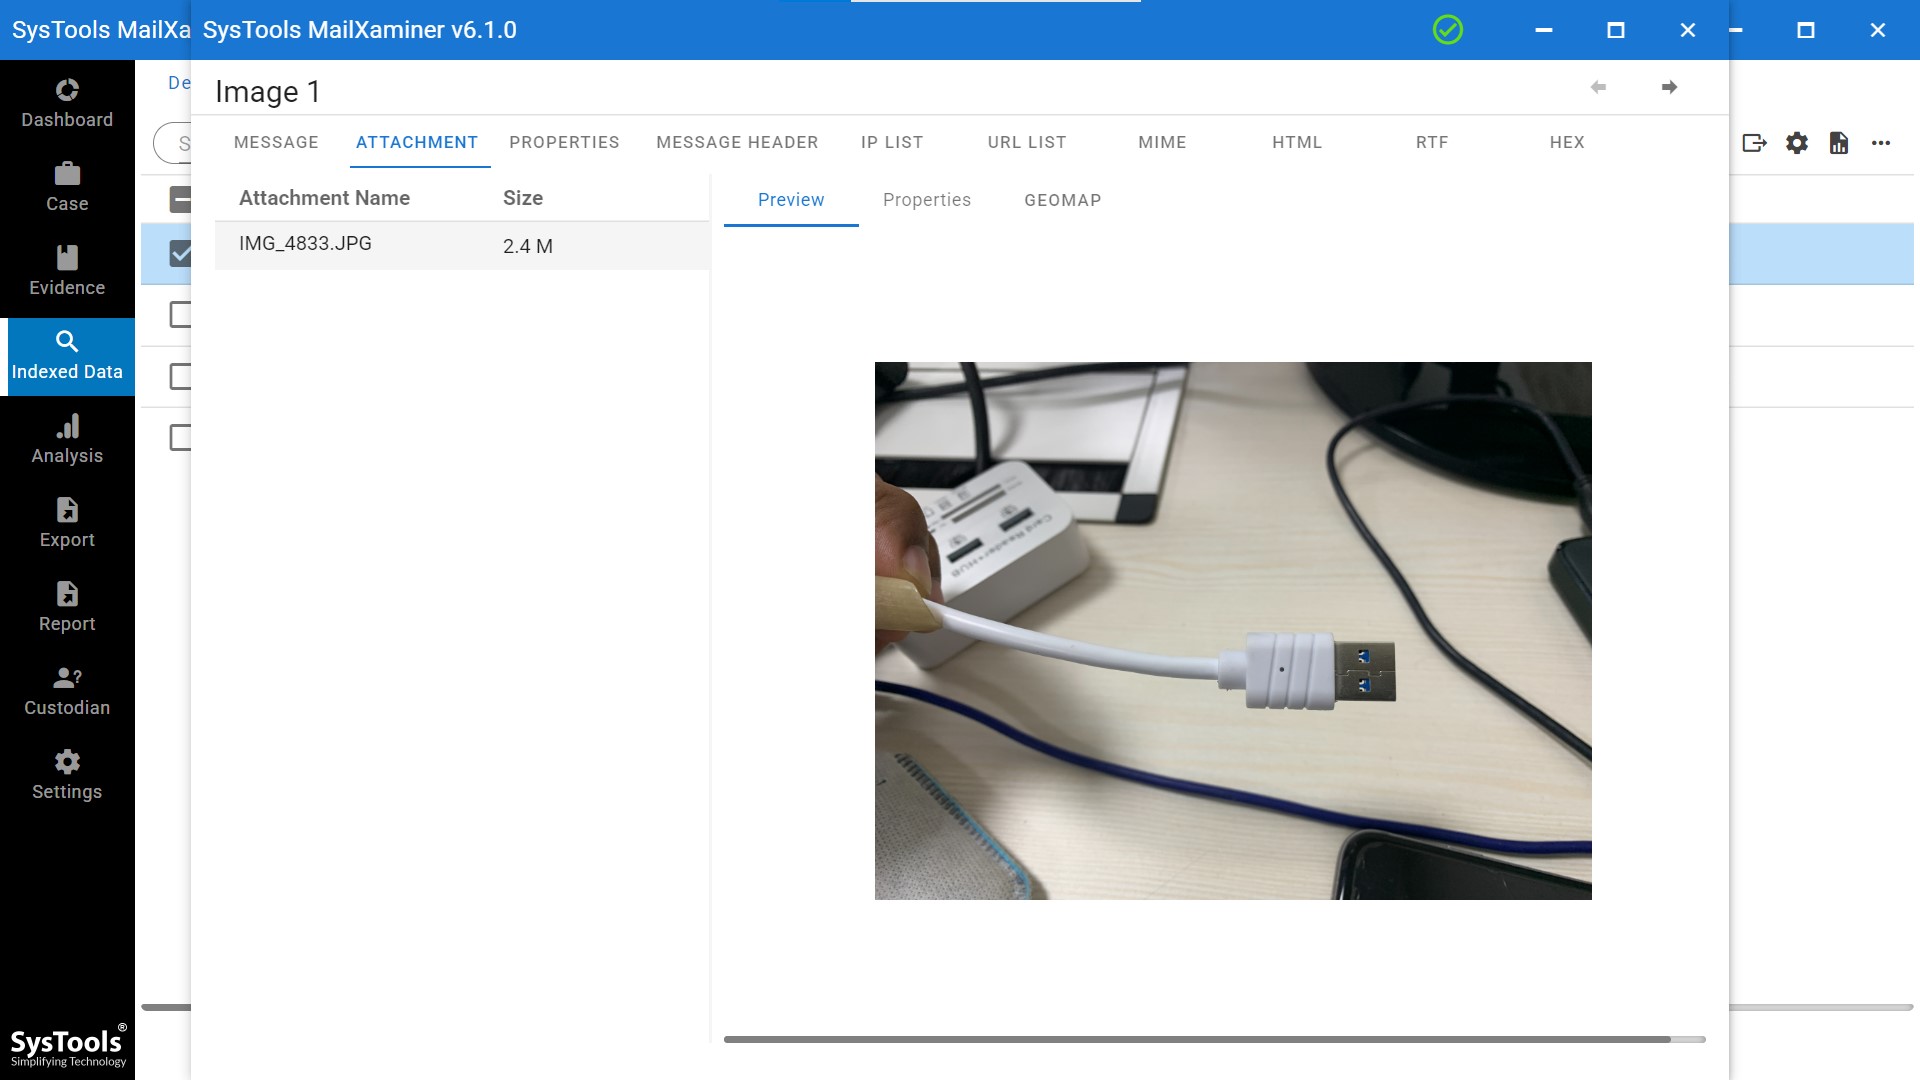
- Step 9. The software shows you advanced details like where a picture was taken and how to identify the location from a photo using the Properties feature.
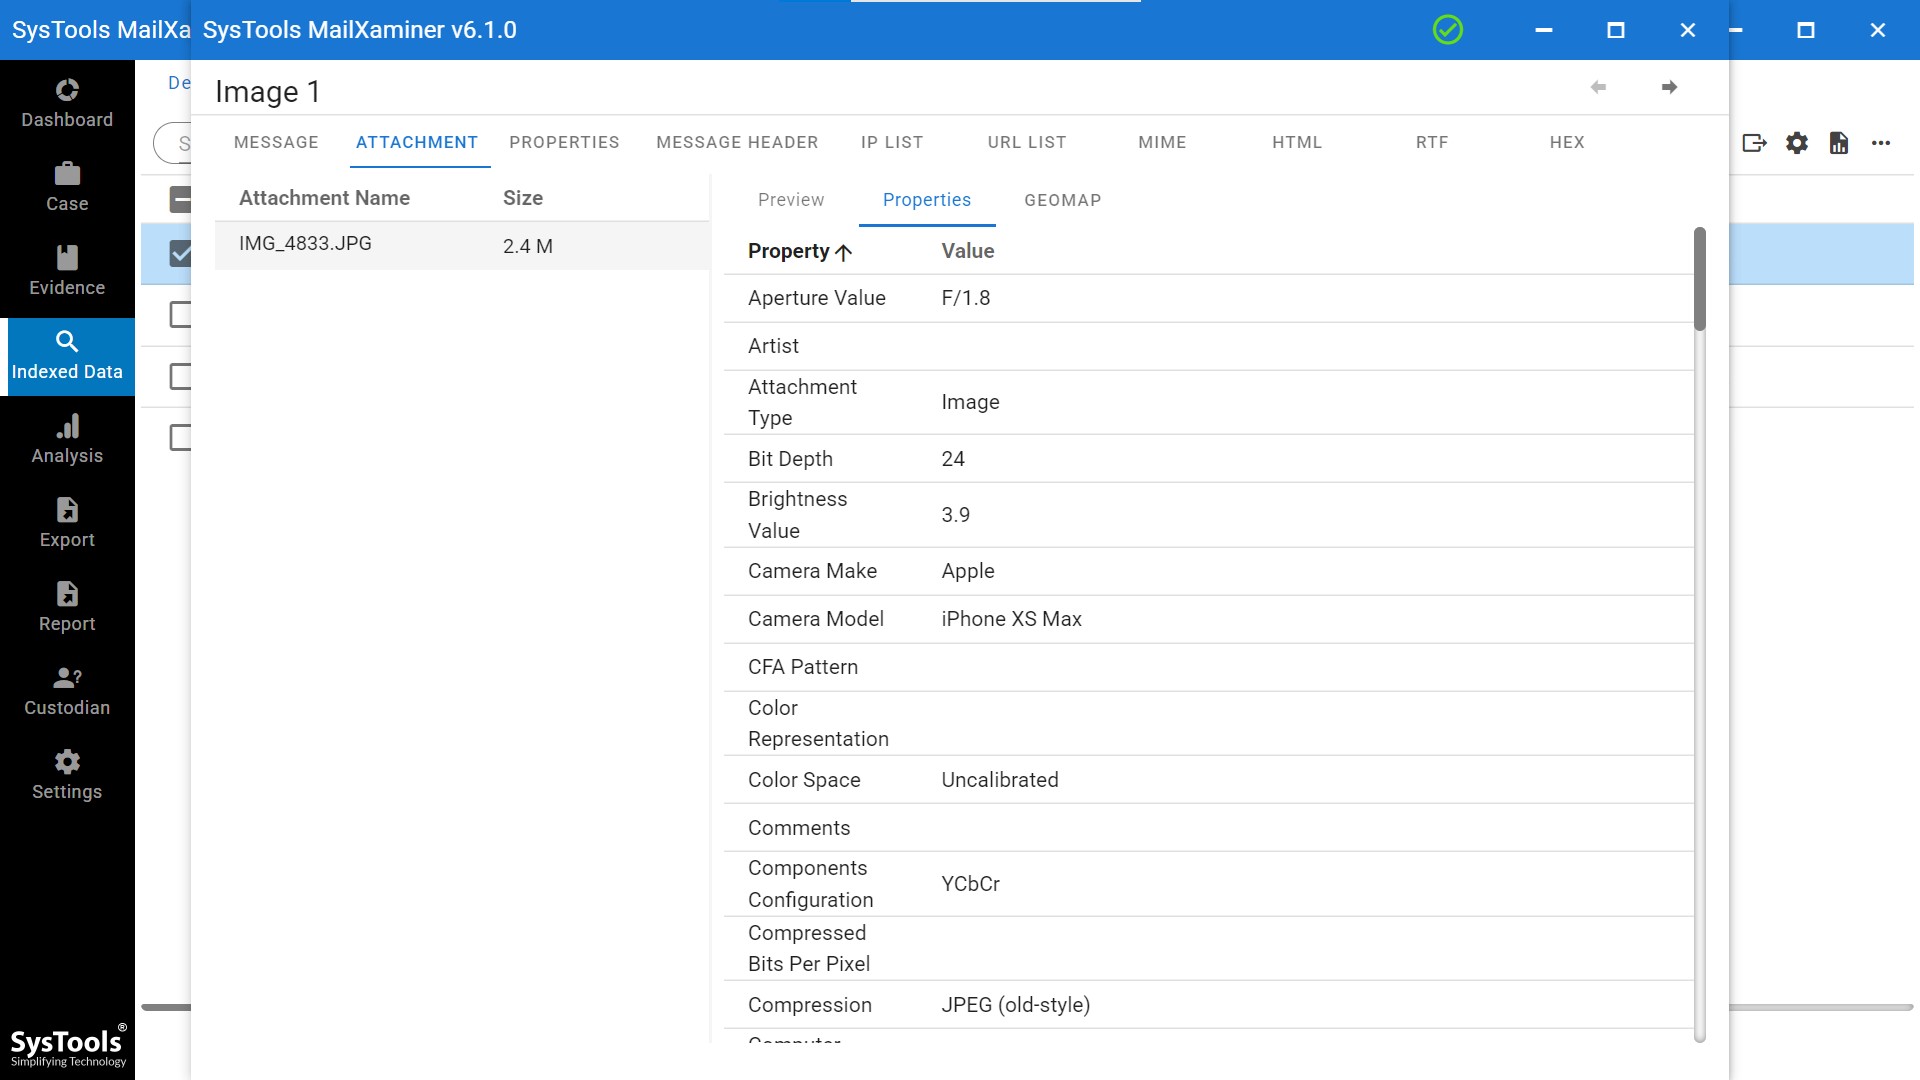
- Step 10. Lastly, software provides the Geomap feature through which you will be able to get gps location from a photo.
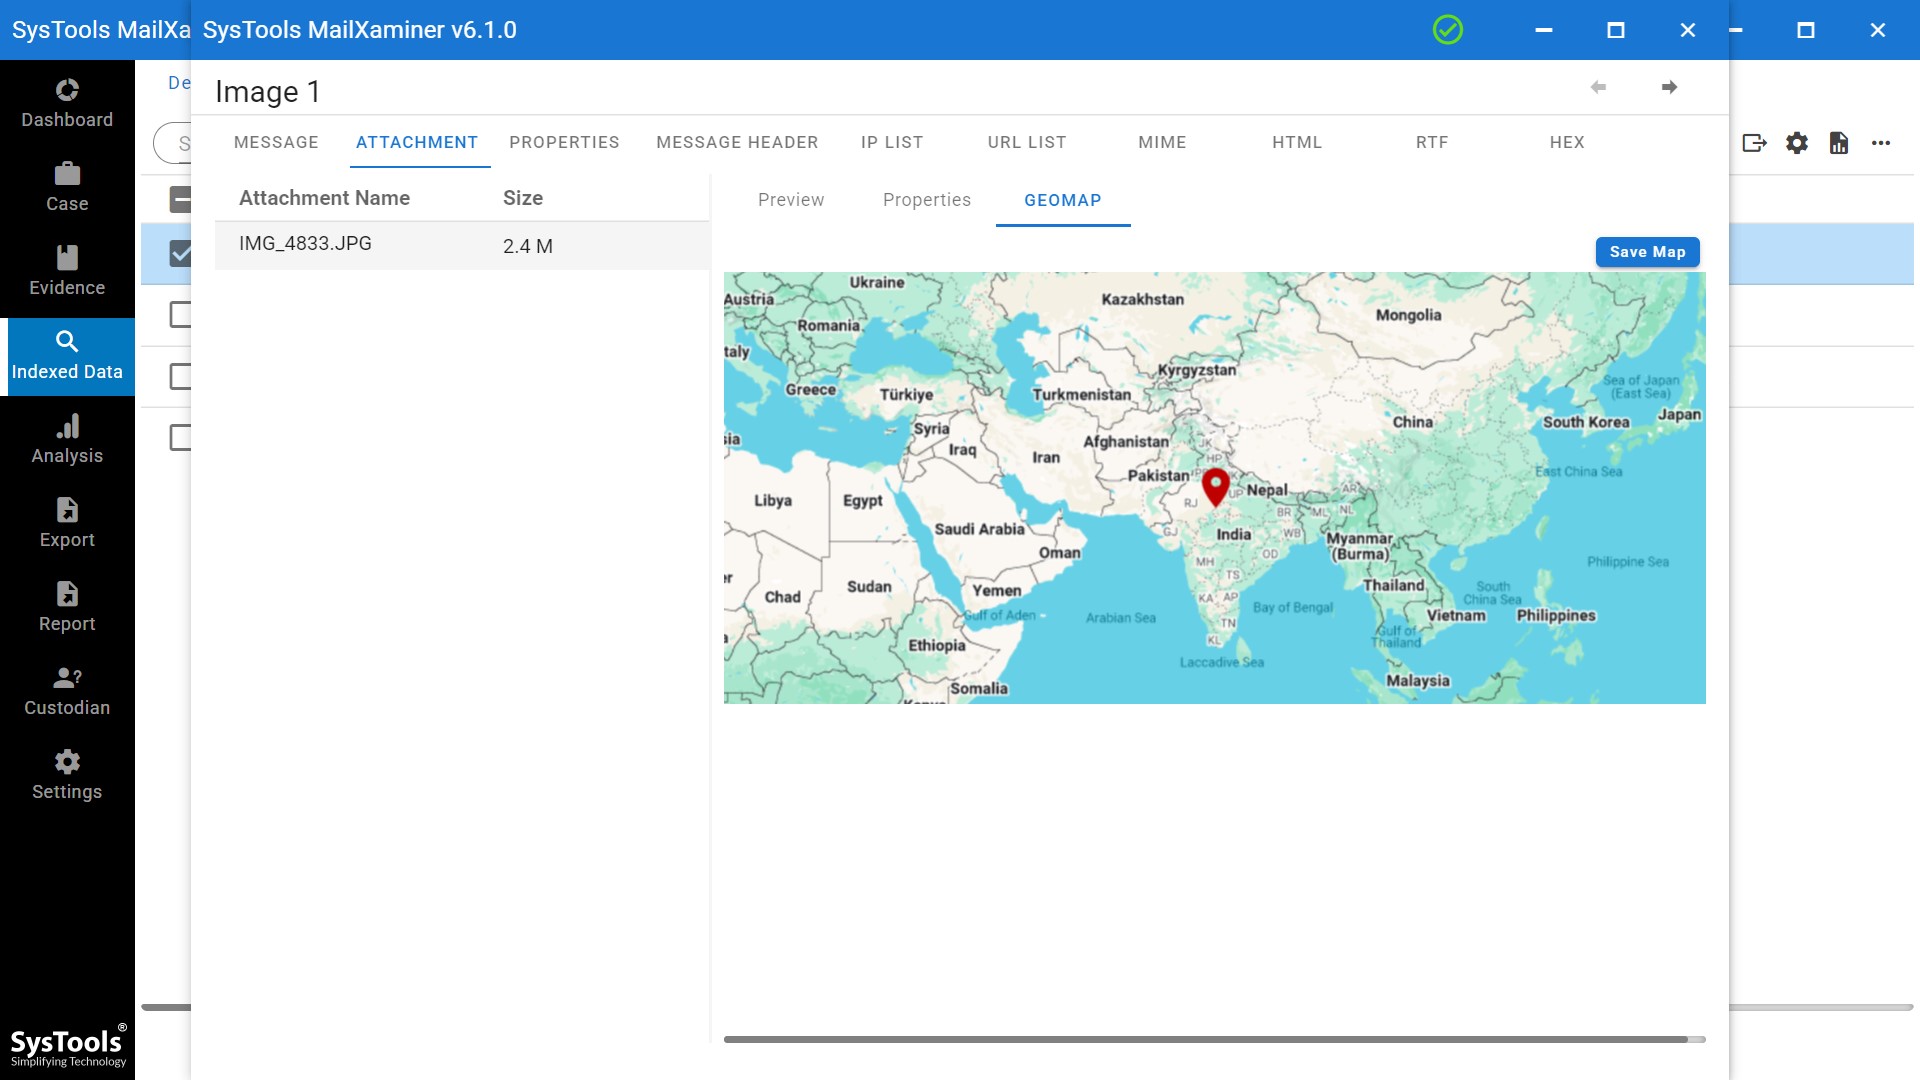
You can not only track the location where the photo was taken, but also view the complete longitude and latitude measurements by tapping on the location. The tool will display the GPS of the image along with details. Moreover, you can easily Zoom In and Zoom Out to view the details easily.
The user can also save the map and export image files into multiple export formats available. This will help the user to identify the location from the photo and view it in some other application like Google Earth.
Comparison of the Best Method to Find Where a Photo Was Taken
| Method | Accuracy | Best For |
|---|---|---|
| EXIF Metadata | High | Personal Photos |
| Google Maps | Medium | GPS-enabled Images |
| Reverse Image Search | Low–Medium | Web Images |
| Forensic Tools | Very High | Investigation |
Finally, Found the Exact Location of a Picture!
Now we are well aware of “how to find out where a photo was taken?” topic. In addition, we are aware of the most appropriate solutions as well. Most of the users need to find minute details such as date of creation, location, etc. associated with the images for analysis purposes.
The problem occurs when a user is not able to find the exact location where a user took a picture. Thus, the user can resolve the problem by implementing the manual way to find the information associated with the photo and then use Google Maps to identify the location from a photo.
Conclusion
In most cases, the users are not able to get the exact location via the manual method. Still unsure where a photo was taken? Try our advanced image location tracker and get precise GPS data in seconds. The solution must be an excellent photo location tracker. Simply, using image location finder software discussed in this guide can be a great utility, in that case, to find the location of the photo in just a few clicks.
Frequently Asked Questions
Q. How to find where a picture was taken using GPS data?
You can find out where a photo was taken by checking its EXIF metadata, which includes GPS coordinates. Use tools like Windows Properties, Mac Preview, or online EXIF viewers to identify location from photo online and extract latitude and longitude. Afterthat, paste those coordinates into Google Maps to view the exact photo location.
Q. Can I find a photo’s location if GPS metadata is missing?
You cannot find the location through EXIF if the GPS data is missing. This happens when you turn off location services or when you edit, compress, or share the image through apps like WhatsApp. In such cases, try reverse image search or use forensic tools like MailXaminer for deeper analysis.
Q. How to perform a reverse image search to find location?
- Go to images.google.com
- Click the camera icon (or use Google Lens)
- Upload the photo or paste its URL
- Check results for matching locations or landmarks
Q. Can someone fake or manipulate photo location data?
Yes. Various editing tools can modify EXIF data. That’s why digital forensics investigators use location finder by picture tools to validate and cross-check location data from image files.
Q. How can I extract the GPS from a batch of photos automatically?
Yes, this advanced photo location tracker described in the guide is capable enough to extract location data from multiple images in bulk. Moreover, these tools can export coordinates and provide you option to even save the geo map of the image.