Tags and Privileged File in Digital Forensics Investigations


While investigating a case in digital forensics, investigators must keep all security measures intact. The advancement and innovations in digital forensics science made it simpler to track cyber criminals with smart features like adding tags and privilege. During the investigation process, sometimes it becomes very hard to remember little findings in the case while handling a bulk set of data. To remember the things, Tagging is a special feature which can help investigators by attaching the finding note with the file.
During digital forensic investigation, some cases are handled by the entire team. In such cases, when confidential data within the case cannot be disclosed to everyone in the team the responsible person can use Privilege feature.
In this write-up, we will describe two important features, i.e., tagging and privilege files, which are incorporated in the MailXaminer Email Examiner. Both the feature plays a major role in the email investigation process.
Tagging
Tagging is a technique used to classify the specific email files by marking respective emails. While tagging the data, users can attach a note describing findings and important information within the emails.
Privileges
Privilege is a technique that is used to preserve private and confidential data so that any unauthorized person cannot access it. These files containing confidential evidential information will not be available to export and convert.
Tag and Privilege your Evidential Data Using Software
In cyber technology investigation process, investigators generally use robust and dynamic software solutions like digital forensic analysis tools. The widely used and trustworthy Email Forensic Tool provides a wide variety of amazing features, along with the solution to Tag and Mark As Privilege important and confidential data in a seamless way.
Using the powerful Tagging and Mark As Privilege features, the forensic investigators can unveil the actual truth through this efficient crime detection technique.
How to Add Tags to Documents with File Tagging System?
Tagging is a pretty common feature inbuilt with most of the e-discovery forensic analysis tools, which is believed to be helpful for cyber investigators. These active tags can play a significant role as they can be used to filter a large number of emails that are being examined. It can also be used to create a separate set of emails based on priority for investigation.
The email forensic software allows tagging feature to organize files based on priority by creating tags. The tool also gives the option to Remove Tag that can be used to delete the existing tags from the email files.
Steps to Add Tags in Email Files
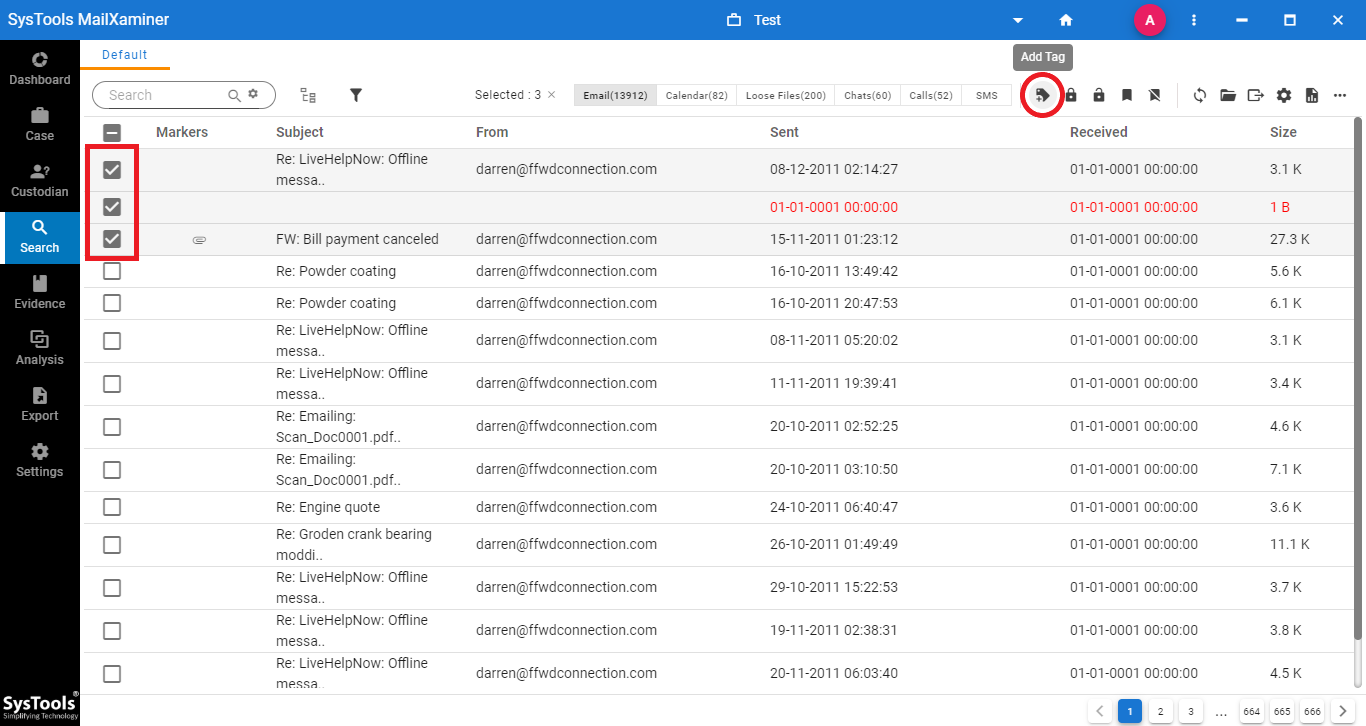
Step 1: To add or remove tags from the files, simply just select the files. Then, click on Add Tag option in the navigation bar.
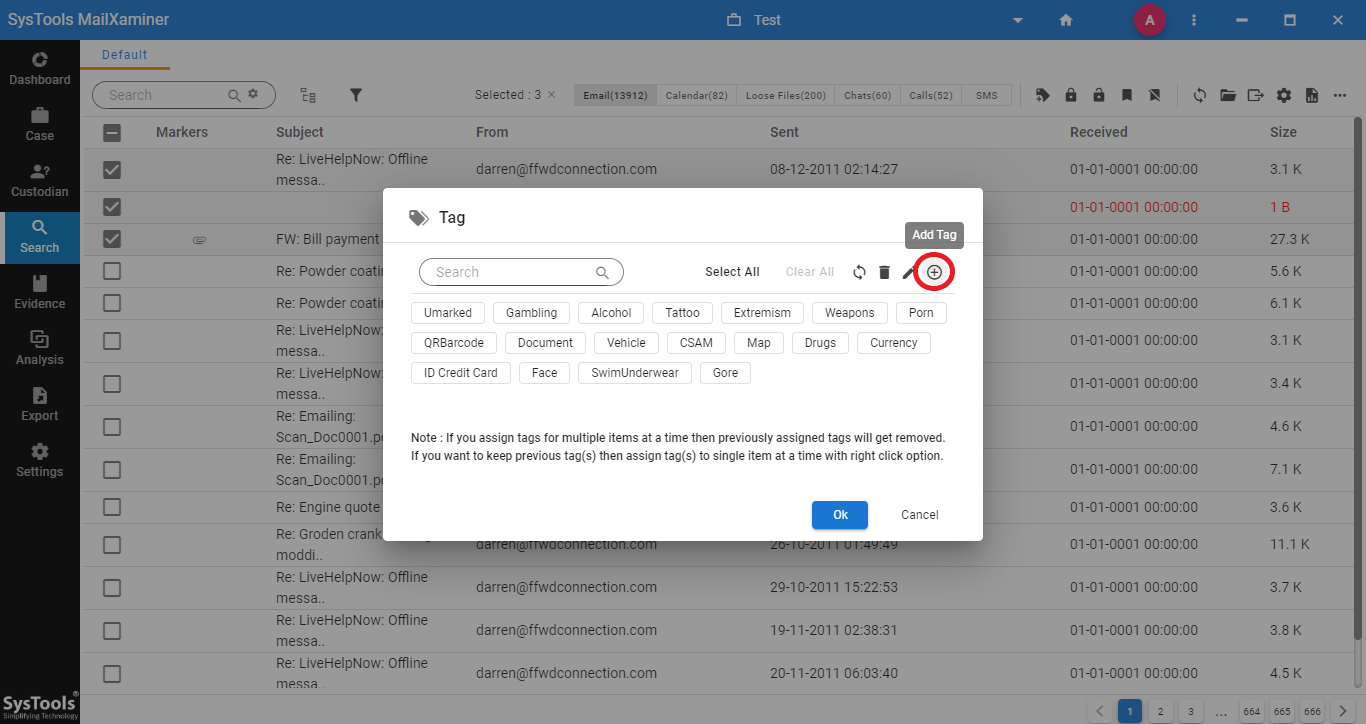
Step 2: User can either choose the existing tag from the list to categorize the selected files or click on “Create” option to create a new tag. To add a new customized tag into the software, click on Add Tag option from the opened window. An Add Tag window will open,
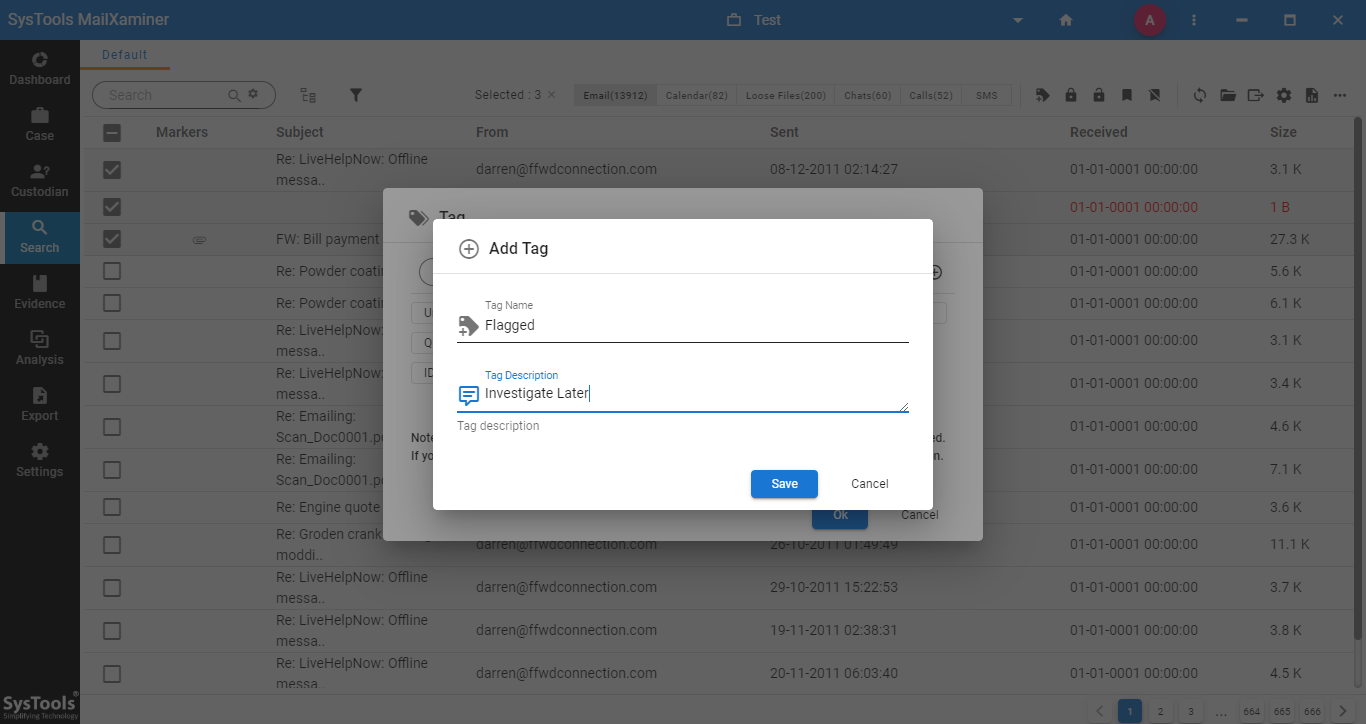
Step3: On the next window, user can provide any Tag Name and a Tag Description to the newly created tag.
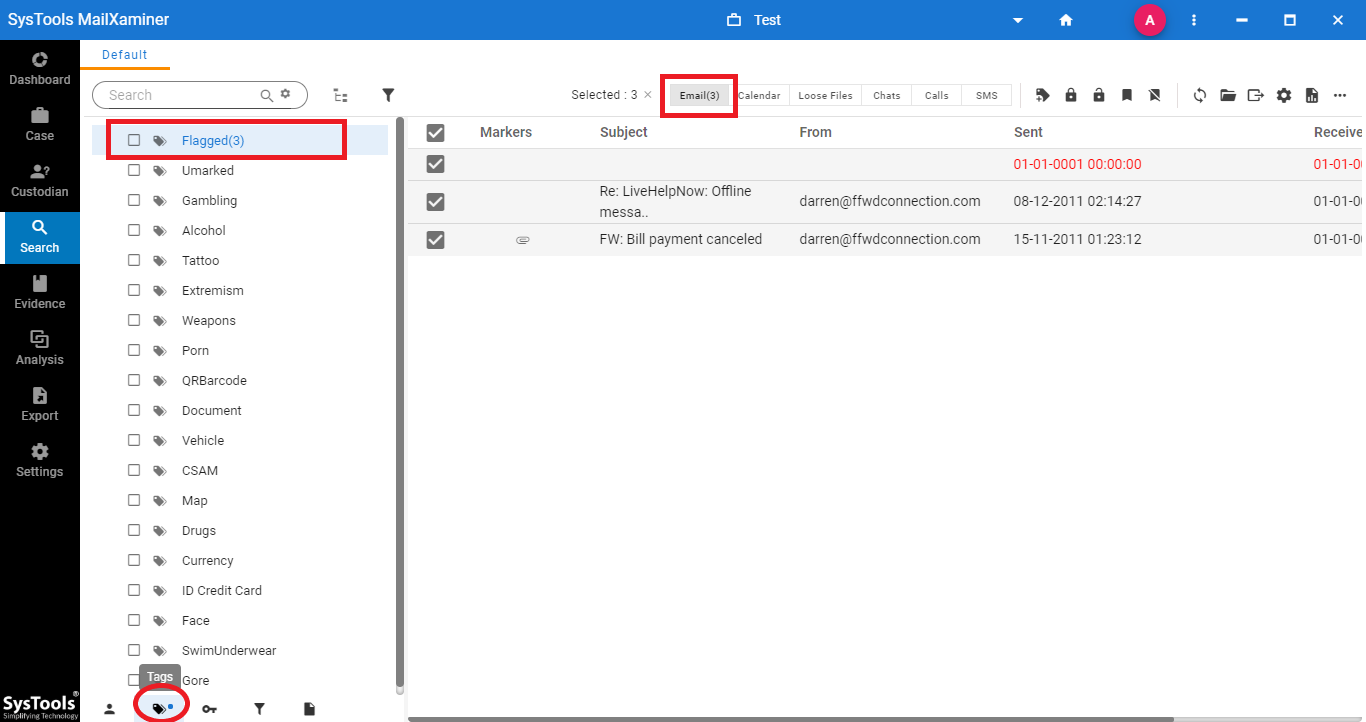
Step 4: After tagging the email files, user can view the tagged files under the Tags tab. To view the tagged emails, just click on the respective tag from the list.
How to Mark Emails as Privileged in the Email Forensics Tool??
The powerful Mark Privilege feature helps investigators to lock the confidential data files that prevent such files from unauthorized access. These files can be used later for evidence production by the respective person. Steps to Mark Privilege email files using the email forensic tool are as follows-
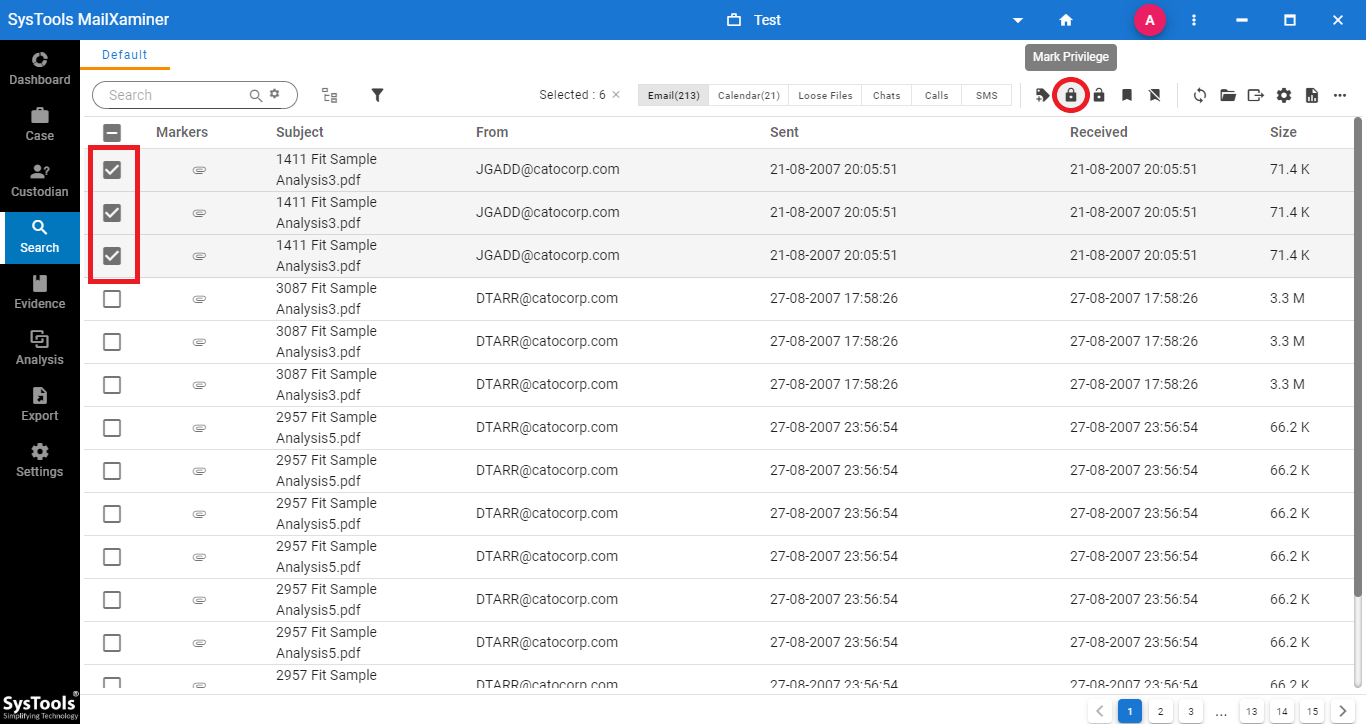
Step 1: To protect the confidential information within the email files, select the respective files from the mailbox.
Then, right click on the emails required to be marked as privilege. Now, select Mark Privilege option from the list. Or, select the Mark Privilege option from the navigation bar.
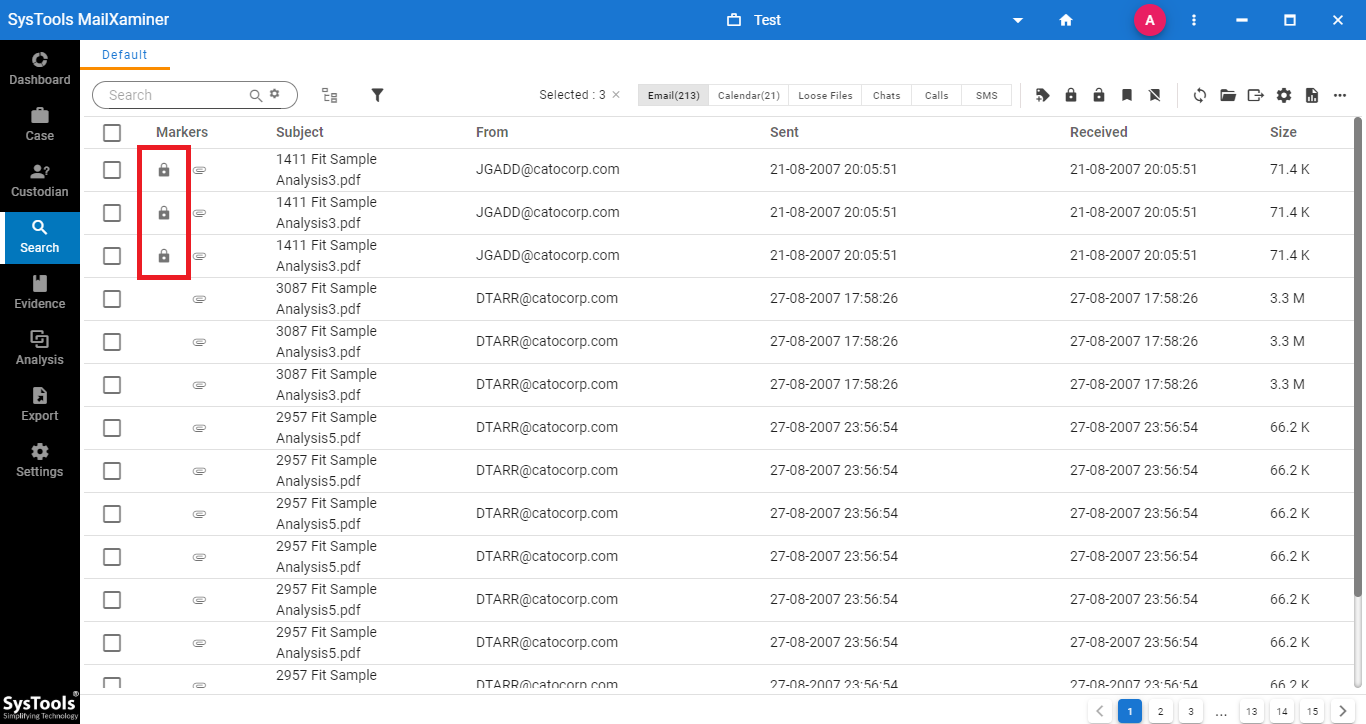
Step 2: After marking the email as a privilege, a lock icon will be displayed with the privileged email files. Now the files are protected and they cannot be easily accessed by any unauthorized person.
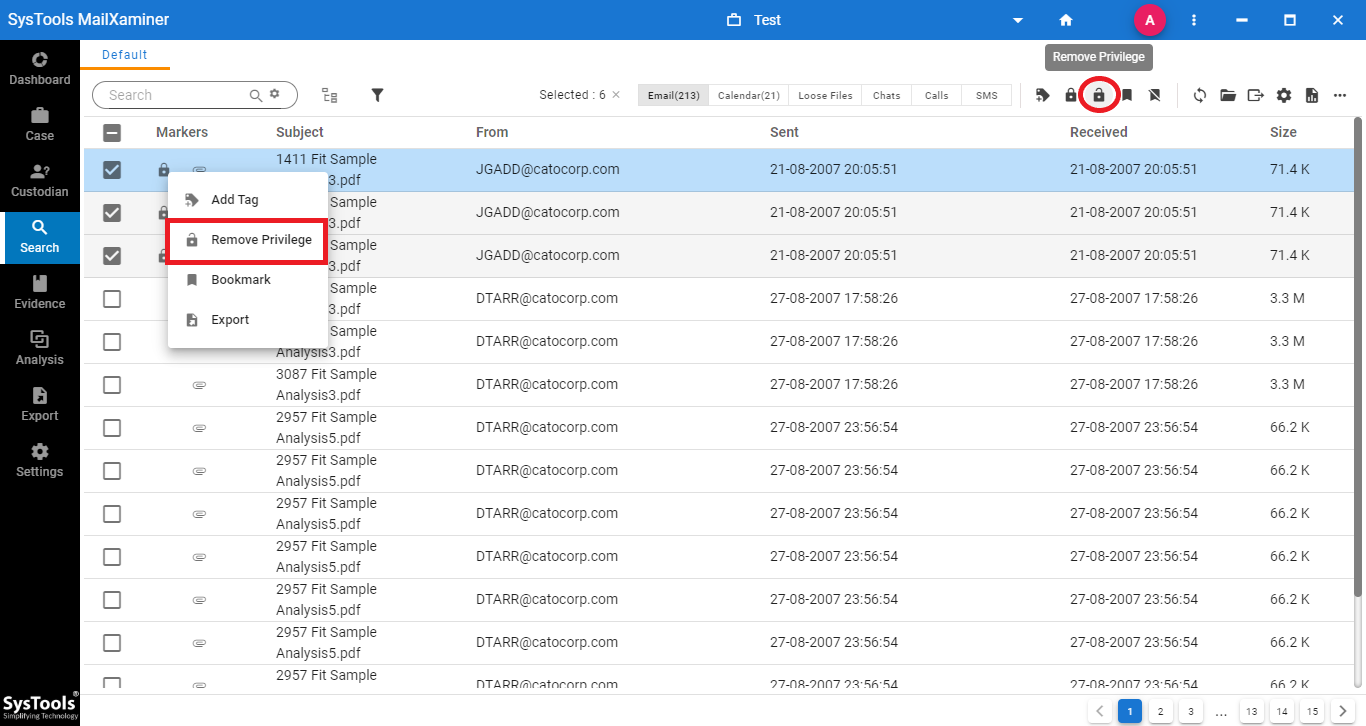
Step 3: To remove the privilege feature from the files, just select the privileged files. Then, click on the option Remove Privilege shown at the navigation bar. After removing the Privilege function from the emails, user can view the files for the further examination.
Conclusion
In the cyber forensics investigation process, tagging and privilege are the most essential feature while handling the data in bulk. This write-up, describes the various needs and techniques to tag documents and add privilege in the email file. This software helps the users to add tags and privileges to the email data files in a hassle-free way.