How to Export Office 365 Mailbox to PST Using eDiscovery, PowerShell & Outlook


In digital forensics, email communication and data play a pivotal role in digital investigations by experts. Exporting Office 365 mailboxes to PST files allows forensic professionals to extract, preserve, and analyze email evidence. This field of investigation needs a complete and accurate email verification record, whether you’re investigating internal fraud, corporate espionage, or cybercrime.
Table of Contents
- Why Export PST from Office 365 for Digital Forensics
- Why Do We Need to Export Office 365 to PST?
- Method 1. Export PST from Office 365 Mailbox Using eDiscovery from Admin Portal
- Method 2 – Exchange Online Export Office 365 Mailbox to PST Using PowerShell
- No Direct PowerShell Export Command in Office 365
- Steps of How PowerShell Can Help with PST Export
- Export Mailbox from Office 365 Using Outlook 2021, 2019, 2016, 2013
- Steps to Export Office 365 Mailbox Using Outlook
- Limitations of This Method
- Export Office 365 Mailbox to PST Using MailXaminer
- Working Steps of Software to Export Office 365 Online Mailbox to PST
- Verify the Integrity of the PST File
- Conclusion
Collecting cloud-based email data is usually the first step in any investigation. From financial fraud to data leaks, a single email thread can help trace user behavior, establish intent, or validate a chain of events. That’s why forensic investigators and IT professionals perform Office 365 email forensics and present mailbox data in a controlled and admissible way.
Office 365 (now Microsoft 365) is based on Exchange Online. It doesn’t offer any direct features for administrators. This creates a critical need for users to have an alternative plus secure method to extract complete Office 365 mailbox content, including emails, calendars, and contacts in PST format.
The most reliable way to export Office 365 mailbox to PST is by using the Microsoft 365 center’s eDiscovery tool or PowerShell commands like New-ComplianceSearch and Export-ComplianceSearch. But if these methods fail, we have one solution that fulfills your requirements and easily saves Office 365 files into PST file format with various advanced features.
So, without any further ado, let’s start the guide with all the possible methods to export PST from Office 365 with one automated software. Before proceeding, it’s important to know all about Office 365 and PST.
Why Export PST from Office 365 for Digital Forensics
Understanding data structures is as important as knowing how to retrieve them or transfer them to any platform. When we talk about mailbox exports in Microsoft 365, we’re referring to PST files (Personal Storage Table).
Exporting PST files from Office 365 is essential for forensic investigations that preserve email evidence’s authenticity and integrity.
A PST file is Microsoft Outlook’s native format for storing emails, calendar events, contacts, tasks, and more. It’s a structured and compact way to package mailbox content, which can be opened in forensic tools or Outlook itself for detailed analysis. For investigators, PST files are essential for conducting Outlook PST forensics, as they allow offline access to entire mailboxes without requiring a live Exchange connection.
Office 365 (now branded as Microsoft 365) uses Exchange Online to manage emails in the cloud. However, it doesn’t provide a simple GUI-based method to export mailboxes like desktop. This is why experts use PowerShell scripts and Microsoft’s Compliance Center methods, which provide that give you full access to download and preserve user mailbox data.
Why Do We Need to Export Office 365 to PST?
As we learn about both formats, we can see how both platforms are important. While exporting Office 365 mailbox to PST, it isn’t just a convenience, but it’s a necessity.
Why? It is so because cloud data is dynamic. Emails cannot be deleted or made inaccessible once the user account is removed or compromised. By transferring the mailbox content to a PST file, examiners will be able to freeze that data in time and uncover hidden evidence without it being misused or disappearing by someone. It is a critical requirement for maintaining evidence integrity.
Here are several scenarios where exporting mailboxes to PST becomes critical:
- Legal and Audit Purposes- As we discussed, email communications often serve as critical evidence. By exporting Microsoft 365 mailbox to PST, you can get the email data for legal review, and it is admissible in court as well.
- Hacked Admin Accounts- Imagine an Office 365 admin account being hacked. Attackers may manipulate or delete critical user data, including email communications. By having regular PST backups of sensitive mailboxes, organizations can restore emails and other vital communications that might have been compromised.
- Not Relying Solely on Microsoft for Data Control- Though Microsoft 365 provides cloud-based email services but many organizations prefer not to depend solely on Microsoft to manage their data. Exporting Office 365 mailboxes to PST gives businesses local control over email data. This can manage, backup, and secure their data independently from Microsoft cloud services.
Method 1. Export PST from Office 365 Mailbox Using eDiscovery from Admin Portal
- Step 1. Log in to your Office 365 admin account and open the Microsoft 365 Admin Center panel.
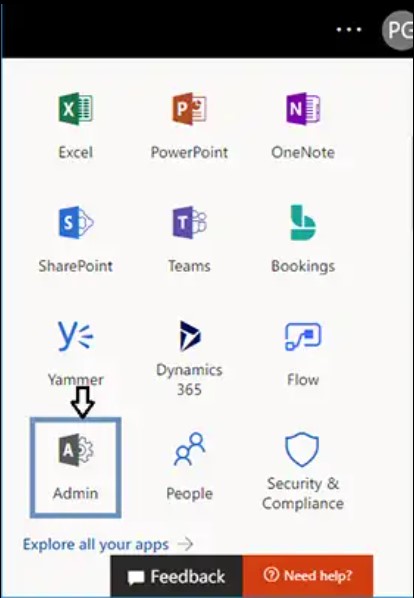
- Step 2. From Admin Centers, click on “Security & Compliance” to access Office 365’s compliance and export tools.

- Step 3. Under the Security & Compliance, go to Permissions and add yourself to the eDiscovery Manager role.
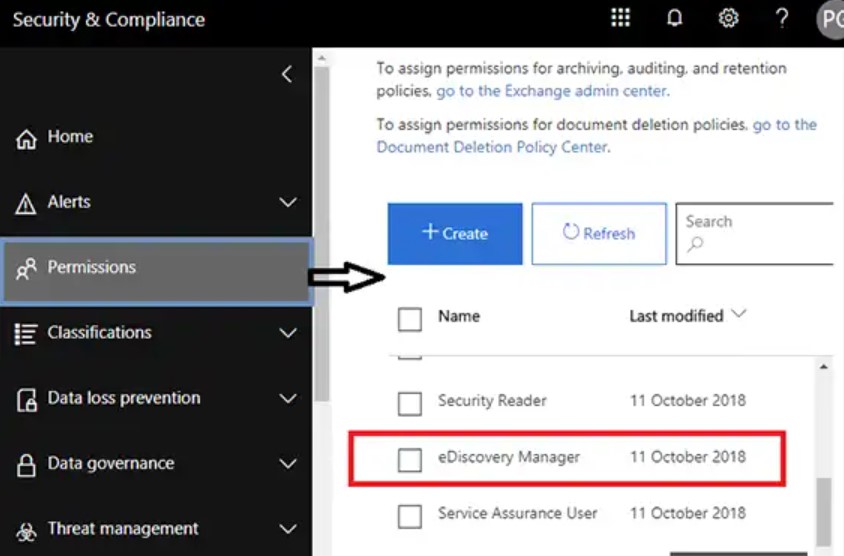
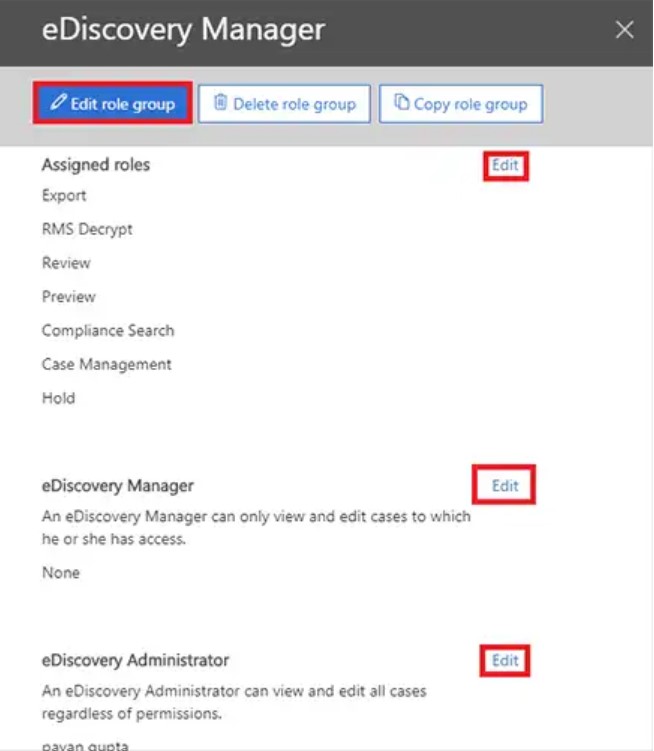
- Step 4. Tick the box for eDiscovery Manager, then click Edit to assign important roles to the group.
- Step 5. Ensure roles like Case Management, Export, Hold, Preview, Review, and Compliance Search are assigned.
- Step 6. If the Export role isn’t listed, edit the role group and manually add it from available roles.
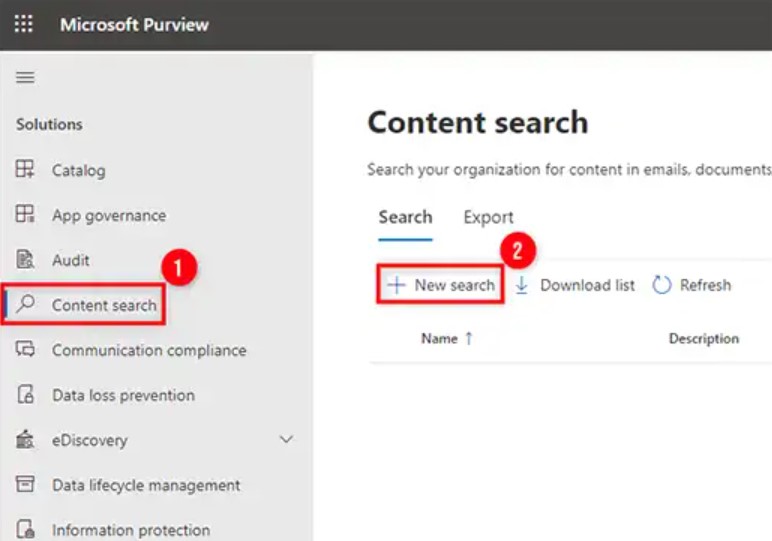
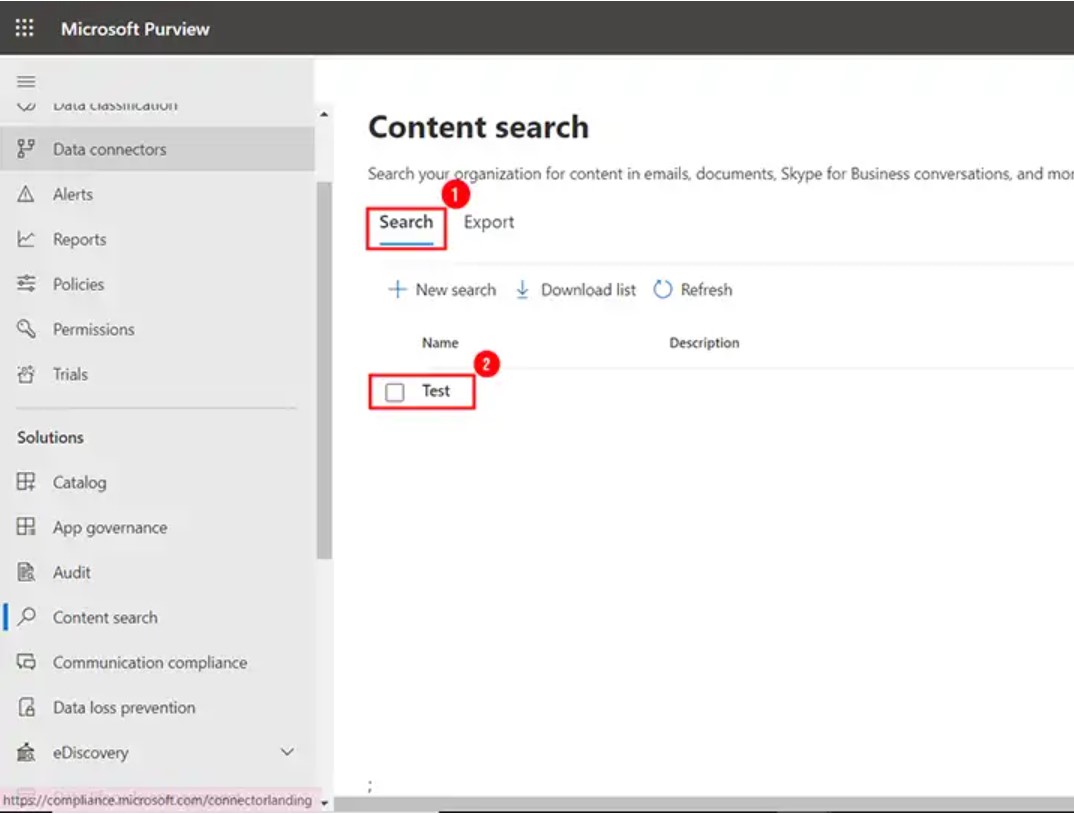
- Step 7. Now, go to More Resources, open Microsoft Purview, click “Content Search,” then hit “New Search.”
Note: Content Search may take 24 hours to appear if new permissions were recently added.
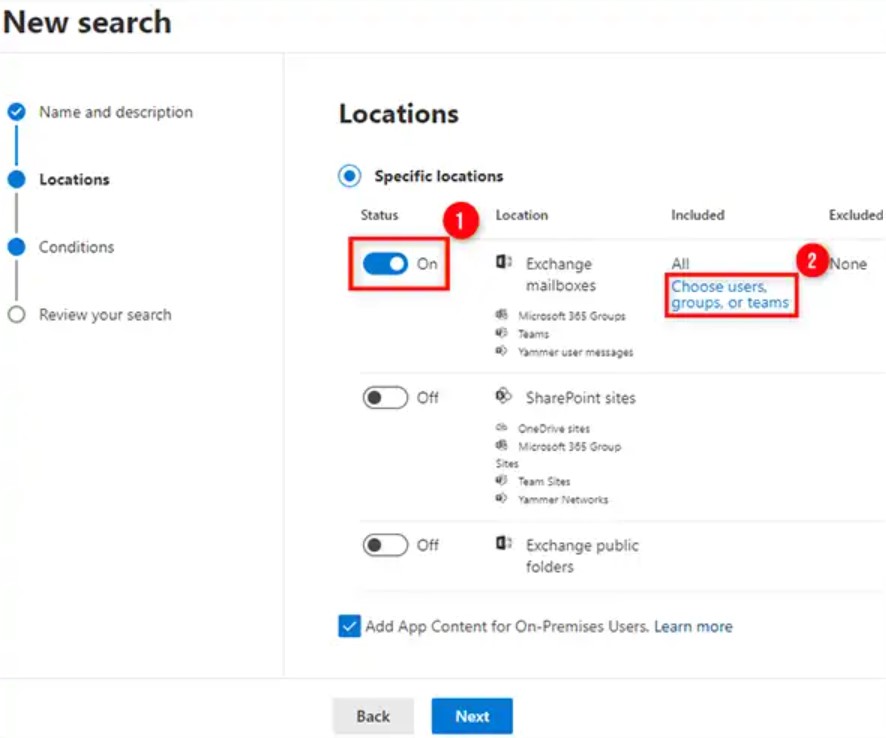
- Step 8. In the New Search wizard, enter a name and select mailbox locations for data export.
Note: Avoid selecting SharePoint or Public Folders unless needed, as they slow down exports.
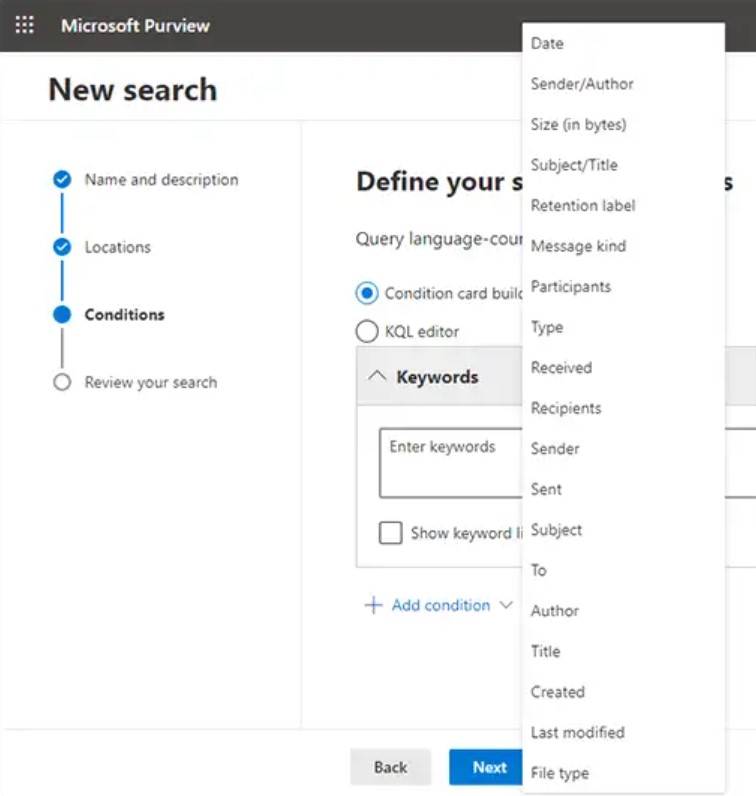
- Step 9. Apply filters under Conditions to narrow search by keywords, date, sender, subject, or message properties.
Note: Leave filters blank to export the full mailbox without excluding any content.
- Step 10. Once filters are set, click “Submit” then “Done” to begin the content search operation.
- Step 11. Your search runs in the background. Check progress by going to the Search tab anytime.
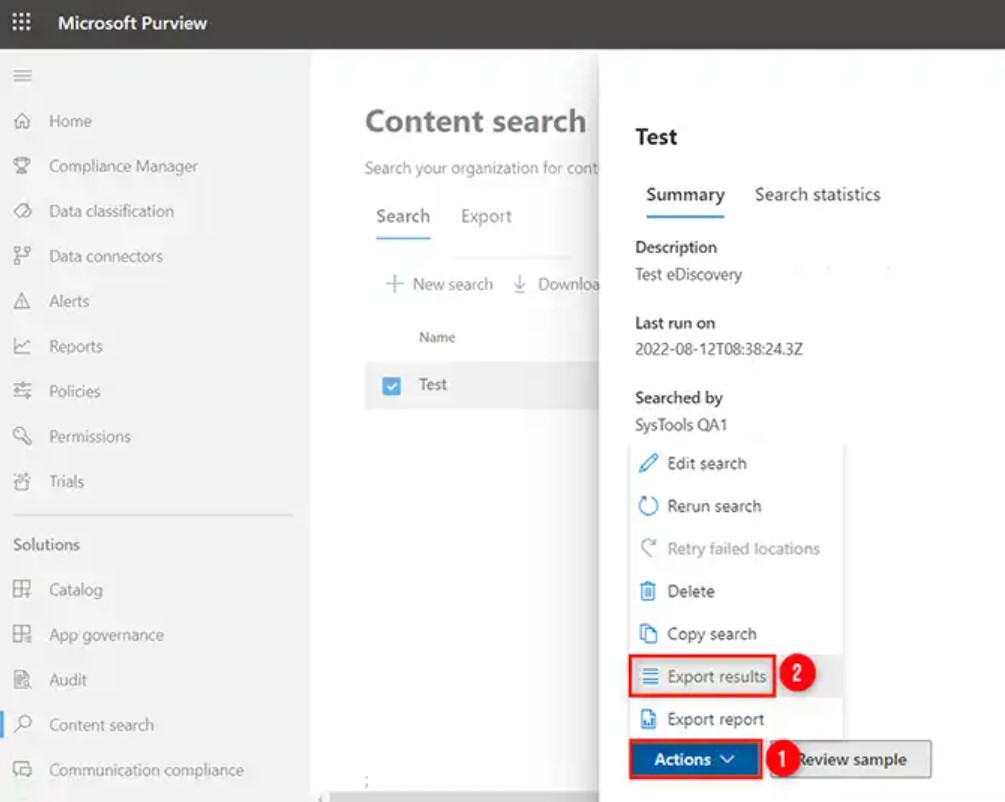
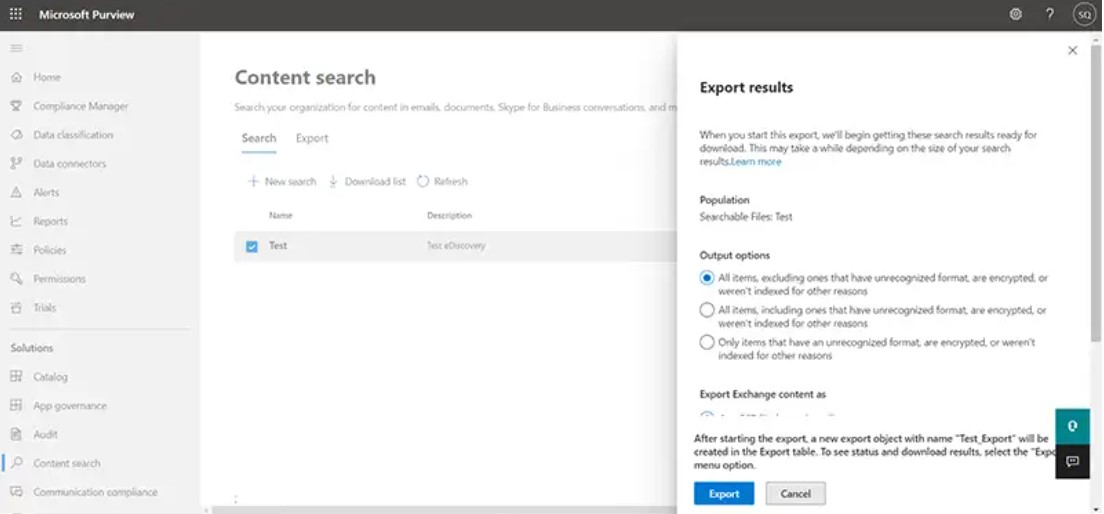
- Step 12. When the search finishes, click Actions > Export Results to begin exporting Office 365 mailbox data.
- Step 13. Choose to include encrypted files if needed, and export with default settings for better compatibility.
Note: Disable “Deduplication” if you want all results in one PST file.
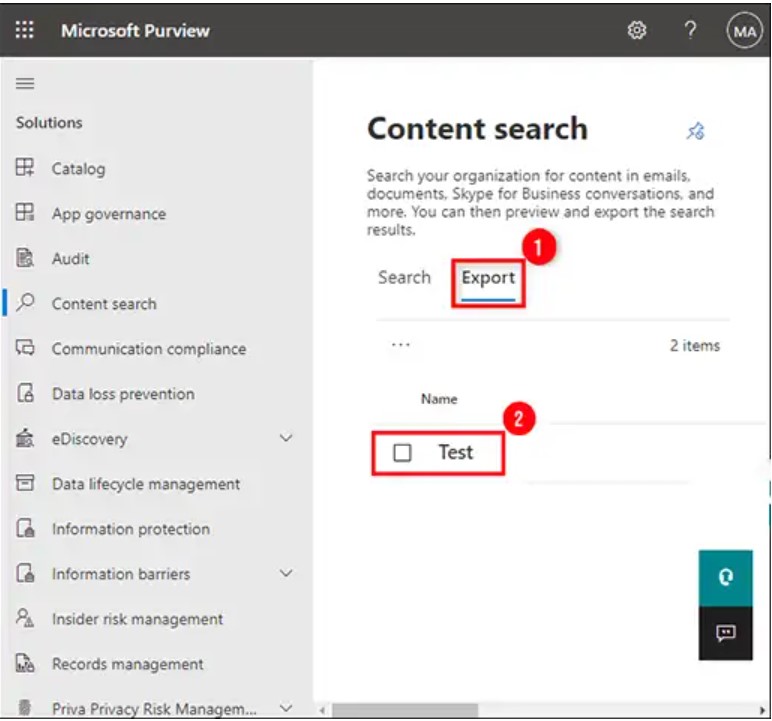
- Step 14. Go to the Export tab, select your search, and monitor the PST export progress in real-time.
- Step 15. Once export finishes, click “Download Results” and copy the Export Key for the next step.
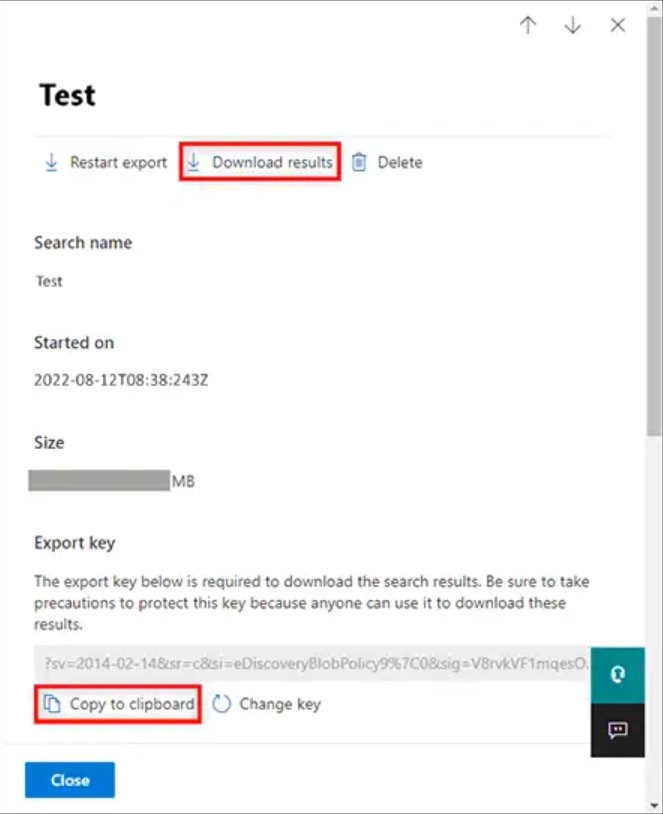
- Step 16. The eDiscovery Export Tool opens. Paste the Export Key, choose a save location, and click Start to export.
Important: Use Edge for this step. Chrome/Firefox users must install the ClickOnce extension.
Method 2 – Exchange Online Export Office 365 Mailbox to PST Using PowerShell
PowerShell is a powerful tool for IT professionals and forensic investigators alike, especially when working with Exchange Online mailboxes. It allows deeper control, batch processing, automation, and scripting flexibility, which is essential when handling large-scale exports or preserving digital evidence systematically.
However, you cannot directly export an Office 365 mailbox to PST using PowerShell commands alone. Microsoft 365 no longer supports the New-MailboxExportRequest command, which was available only in on-premises Exchange servers, not in Exchange Online.
There are technically valid and workaround methods using PowerShell, often paired with eDiscovery or desktop-based Outlook. These are particularly useful in digital forensic environments, where scripting, consistency, and automated workflows are essential.
Let’s understand the method in detail:
No Direct PowerShell Export Command in Office 365
If you’re searching for a direct PowerShell command like:
New-MailboxExportRequest
It does not exist in Exchange Online. That command only works on on-prem Exchange Servers, not Microsoft 365 cloud-based mailboxes.
Steps of How PowerShell Can Help with PST Export
You can use Exchange Online PowerShell to initiate Compliance Searches, then export results via the Microsoft Purview portal. Here’s how:
- Step 1. Connect to Exchange Online PowerShell and run it as an administrator. Follow the command given below to connect to your Office 365 Exchange Online account.
  $UserCredential = Get-Credential

   Connect-ExchangeOnline -UserPrincipalName <UserPrincipalName> -UserCredential $UserCredential
Replace username <UserPrincipalName> with the actual user principal name.
- Step 2. After you are connected, use “New-MailboxExportRequest” cmdlet to export mailbox to pst Office 365 PowerShell. Use the command given below:
New-MailboxExportRequest -Mailbox <MailboxName> -FilePath \\Server\SharedFolder\mailbox.pst
- Step 3. You can use the Get-MailboxExporrtRequest cmlet to monitor the progress the export request:
Get-MailboxExportRequest
Please replace the actual name with the mailbox you want to export. Additionally, provide the accurate path for the PST file.
Export Mailbox from Office 365 Using Outlook 2021, 2019, 2016, 2013
This is another method through which you can export Office 365 mailbox to PST file format. However, before performing the steps, certain prerequisites for this method are necessary.
First, configure your Office 365 account with POP configuration in Outlook.
Outlook is set to download emails for the past 1 year by default. If you need to upgrade this, kindly update your settings. Open Outlook >> Click on Account Settings >> Account Name and Sync Settings, and move.
Steps to Export Office 365 Mailbox Using Outlook
Step 1. Open Outlook on your computer. In the top left, click on the File.

Step 2. From the drop-down, select Open & Export > Import/Export option.
Step 3. Click on Export to a file > Next.
Step 4. Choose Outlook Data File (.pst)> Next.

Step 5. Select the name of the email account to export, as shown in the picture below. Only a single account can be exported at a time. Make sure that the Include subfolders check box is selected. This ensures that everything in the account will be exported, including inbox, Calendar, Contacts, and Tasks. Choose Next.
Step 6. Click on the Browse button to specify the destination location to save the Outlook Data File (.pst). Enter the desired file name, and click on the OK button to continue.
Step 7. Click on the Finish button to export Office 365 mailbox to PST using Outlook.
This method seems simple from the outside, but once you perform you will feel that there are a lot of shortcomings in this way. Here is the list for you in the section below.
Limitations of This Method
- To perform this method, you need to have a technical knowledge set while configuring the Office 365 email account in the Outlook POP configuration.
- This will not export the metadata (views, permissions, and AutoArchive settings) of the mailbox and block sender lists as well.
- Also, through this method you can export a single account at a time. This will not provide multi-user data export.
- Additionally, if you’re using Cached Exchange Mode, then this method will only export the items in your current cache.
Export Office 365 Mailbox to PST Using Automated Software
There are various user concerns that they face while using this manual, and the complicated process poses a risk of data leakage. So, here is the best email forensic software for you. MailXaminer is for users who need deep, detailed, and defensible data collection from Office 365 mailboxes.
This email forensics software is a complete package for any technical enthusiast or examiner who needs to analyze the data.
So let’s discuss how the software will process Office 365 to PST export.
Detailed Explanation & Working Steps of Software to Export Office 365 Online Mailbox to PST
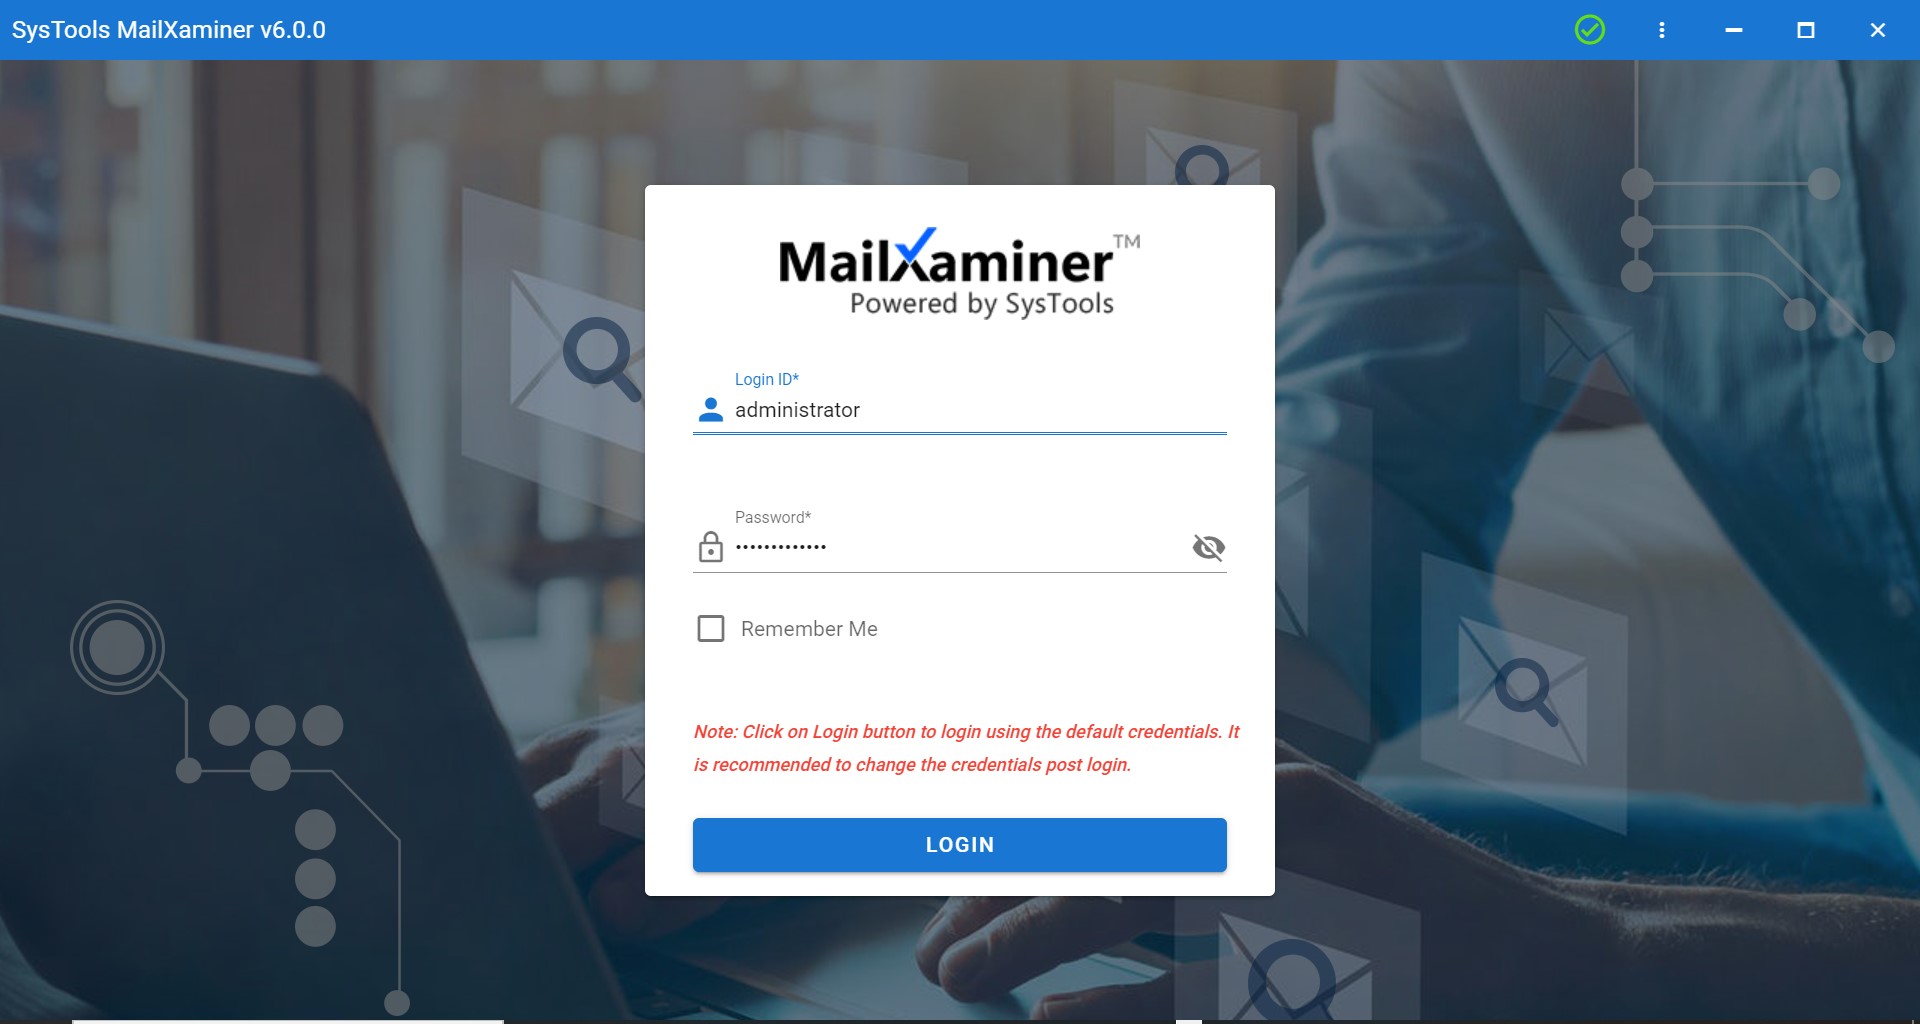
Step 1. Set up the software on your system and log in to the software.
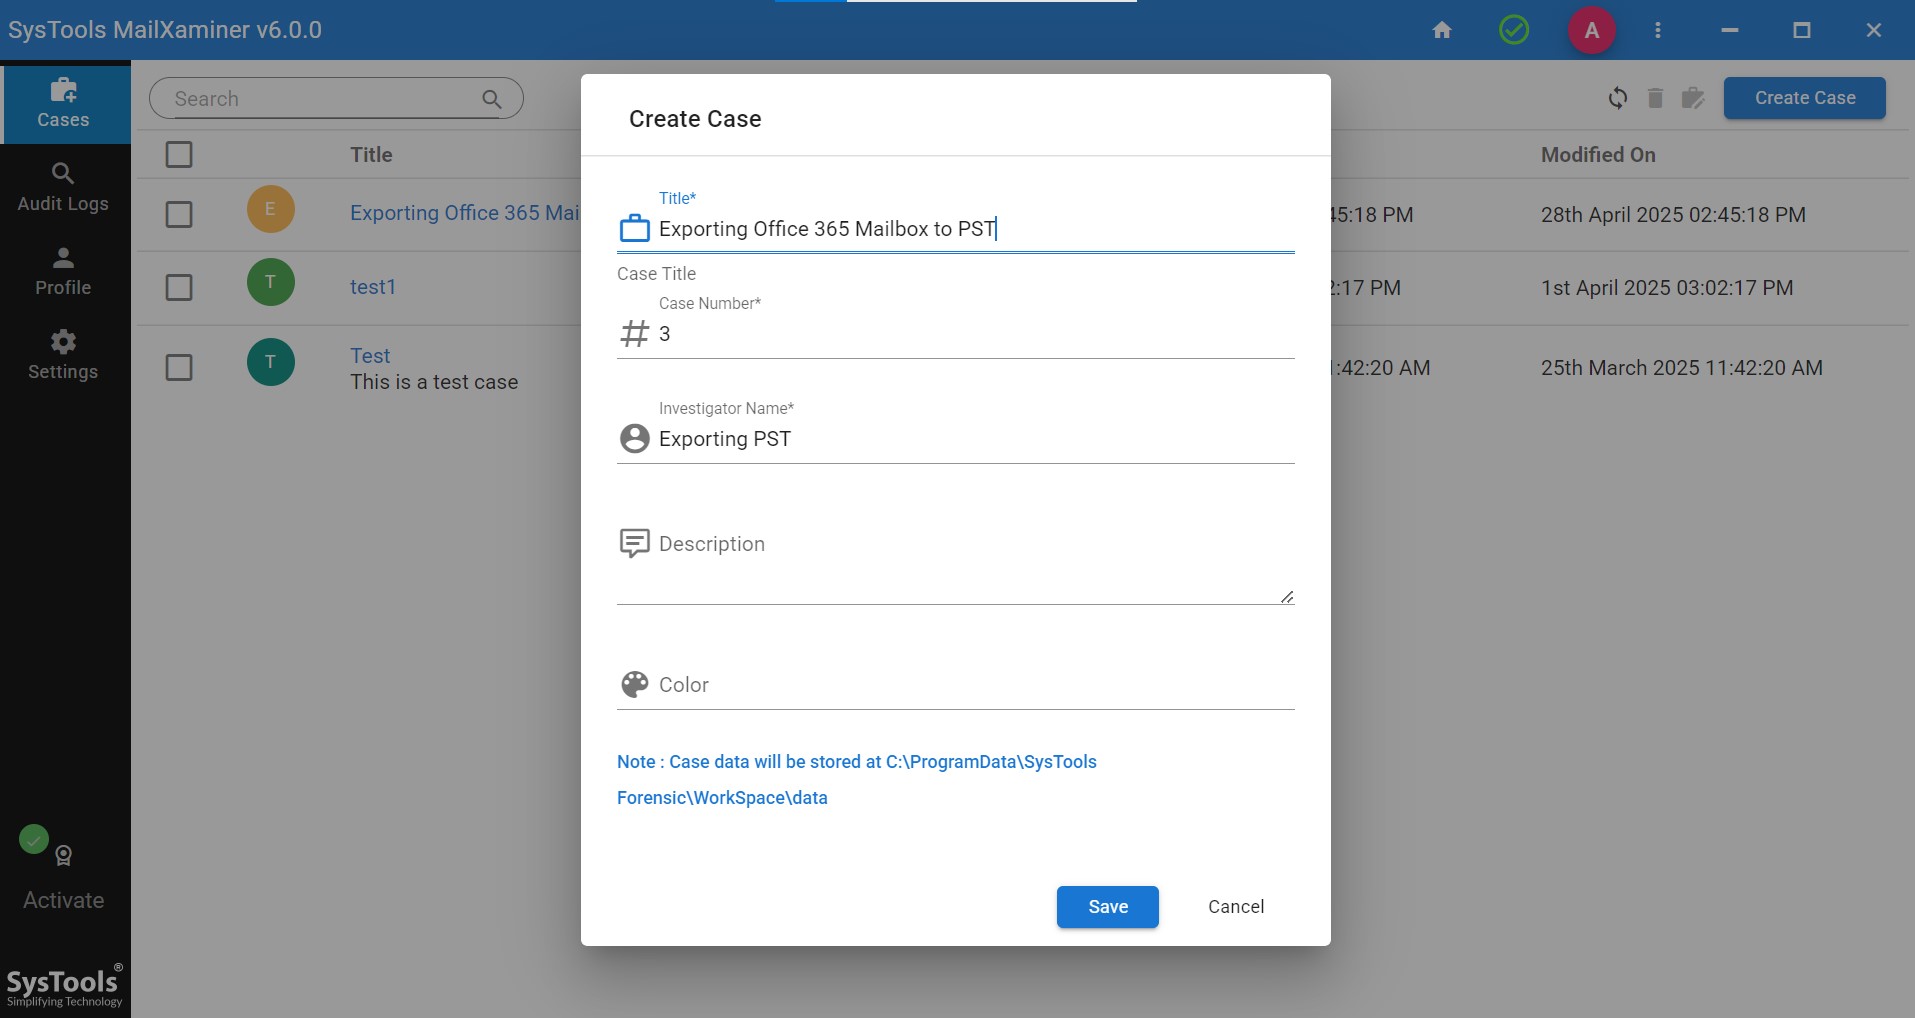
Step 2. Create a new case and add the details, and save the details.
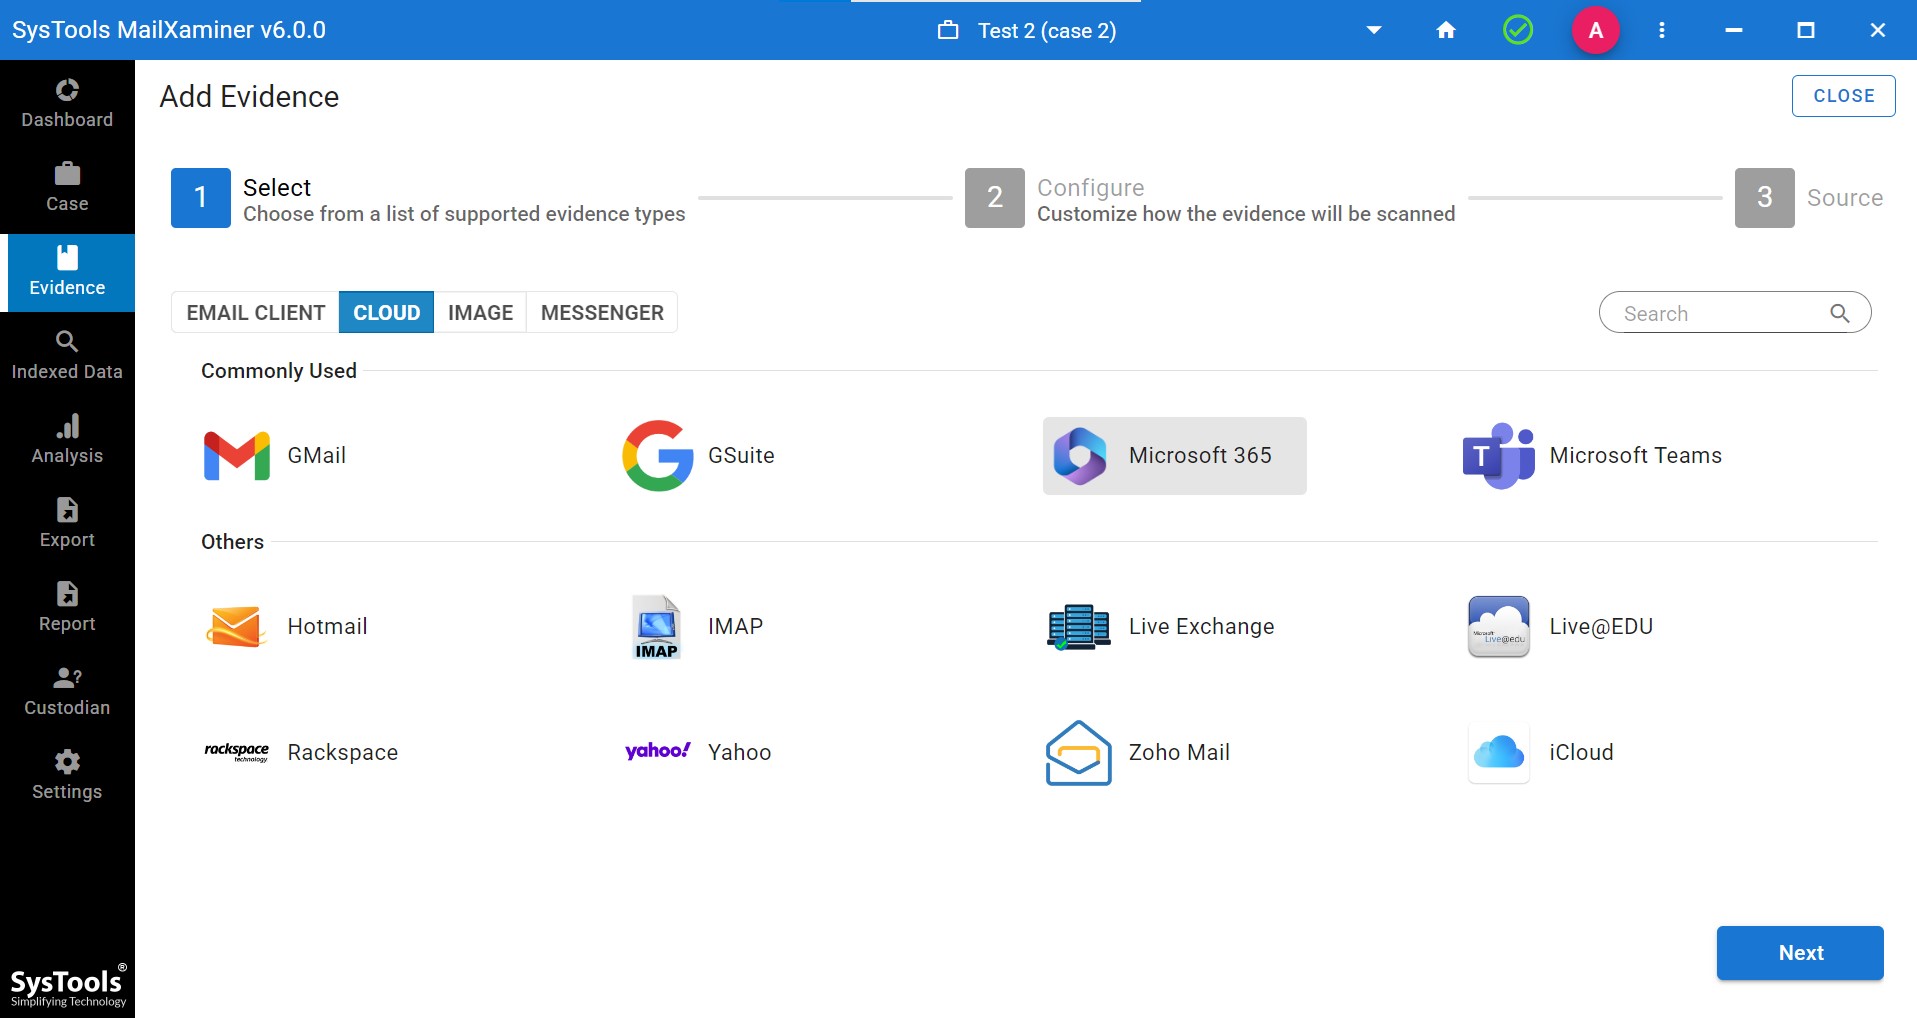
Step 3. Afterthat, option of Add Evidence option will be visible. Now choose Office 365 from the cloud option and click Next.
Step 4. Now, add the domain details. For this, you need to select the domain name first.

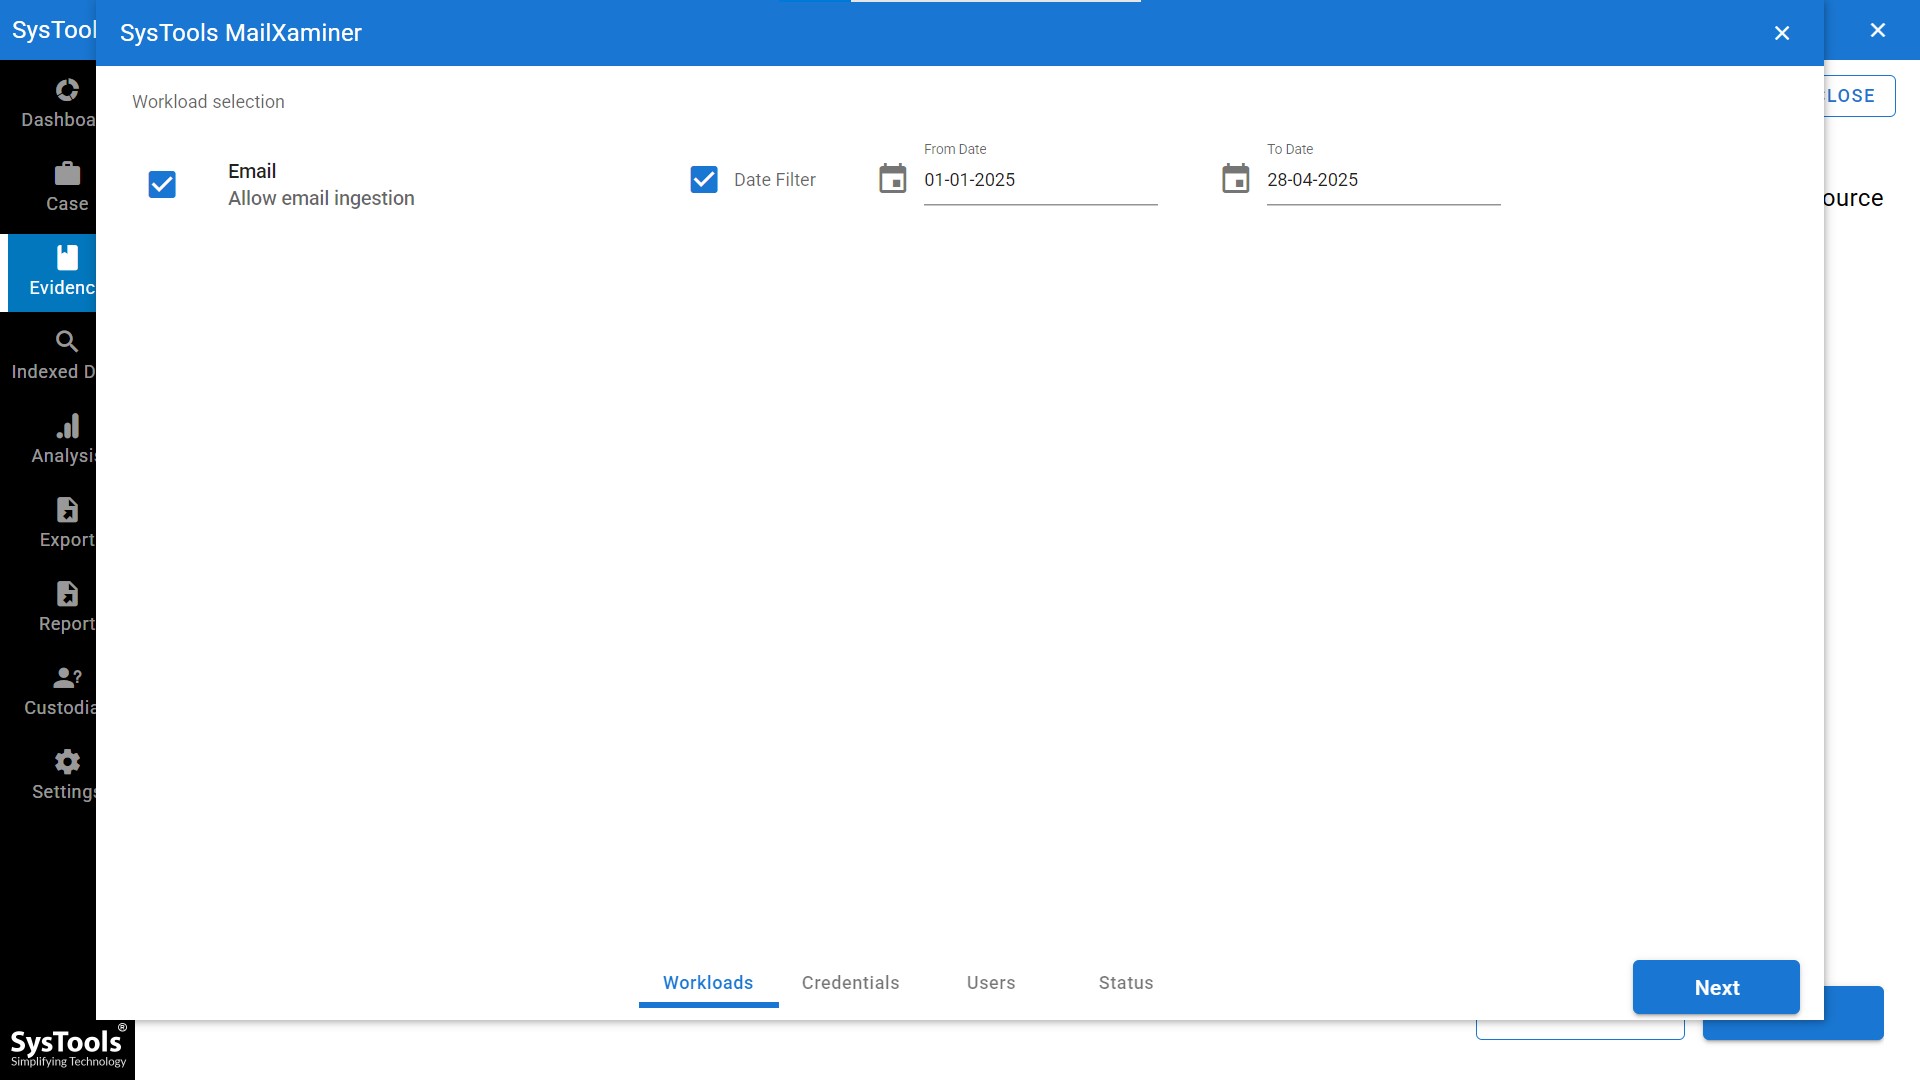
Step 5. Next, the work selection window became visible. Then select email, and also provide a date filter.
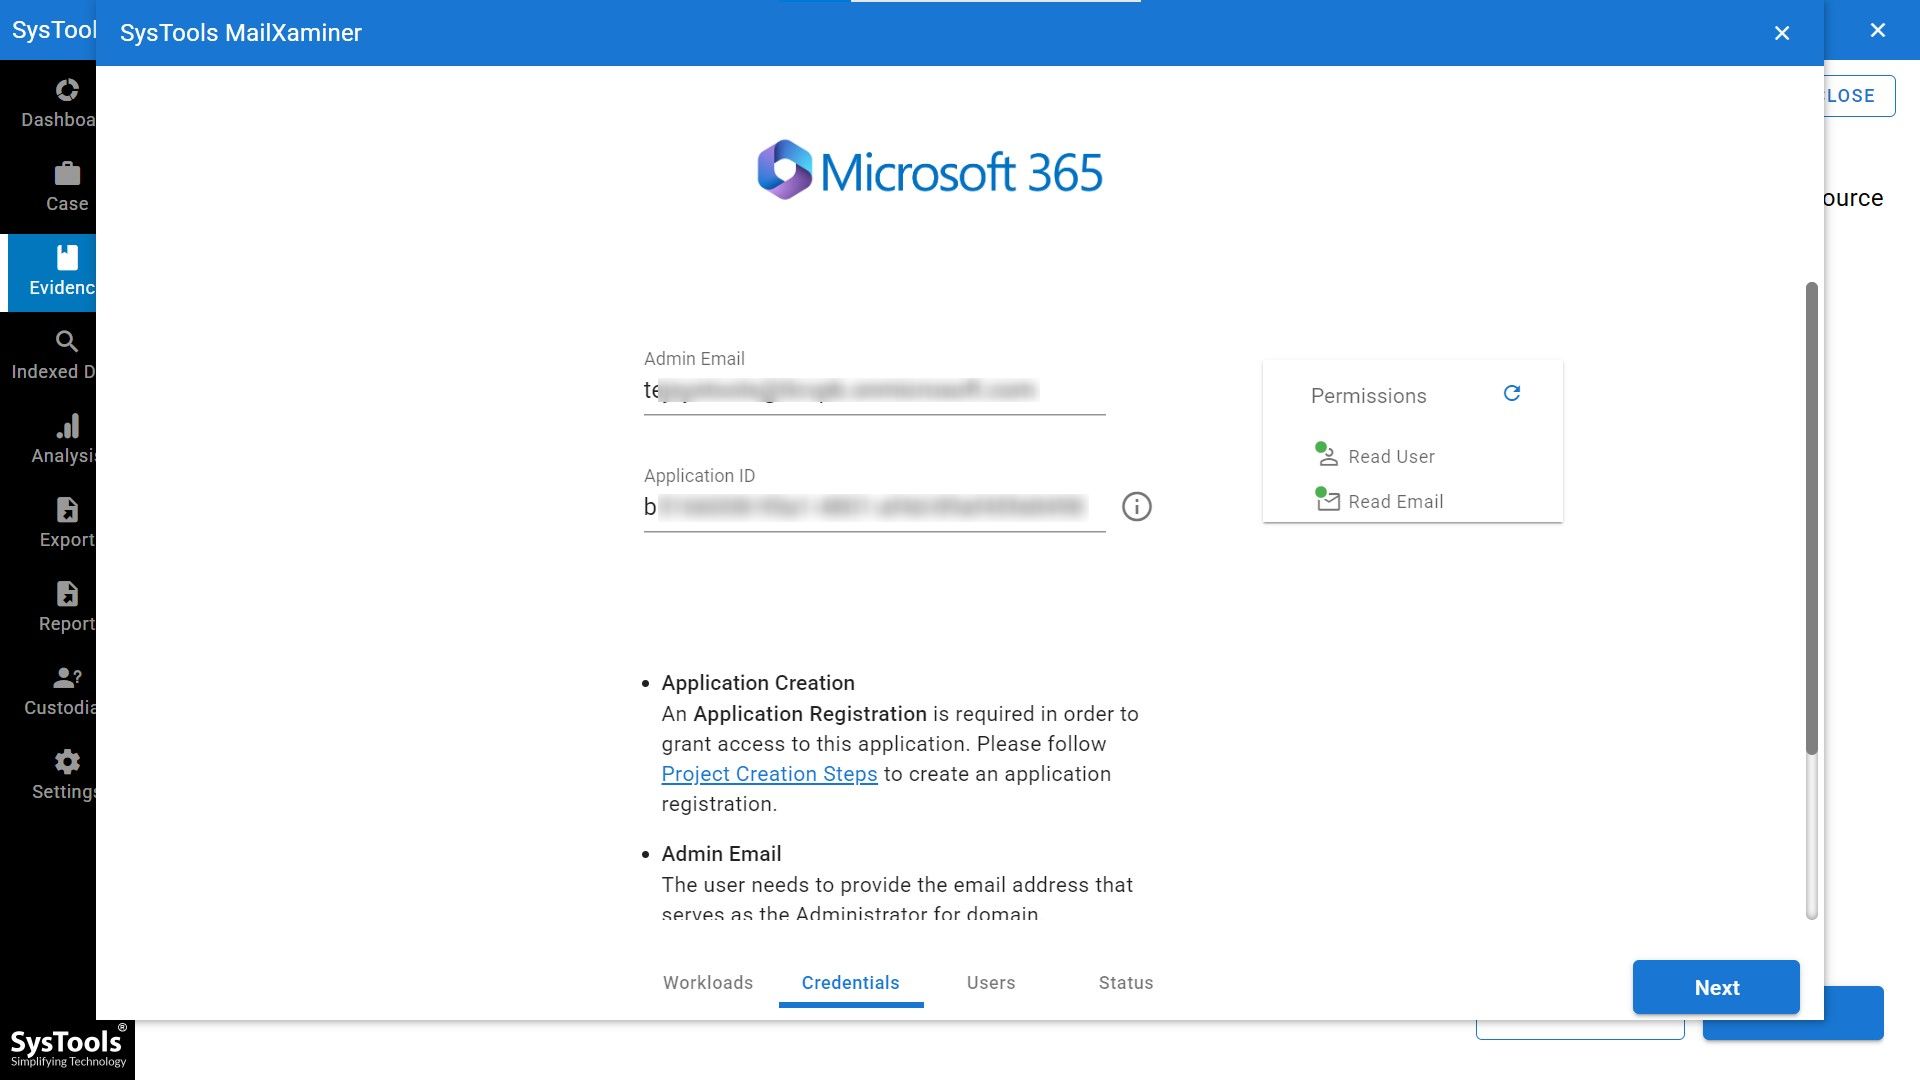
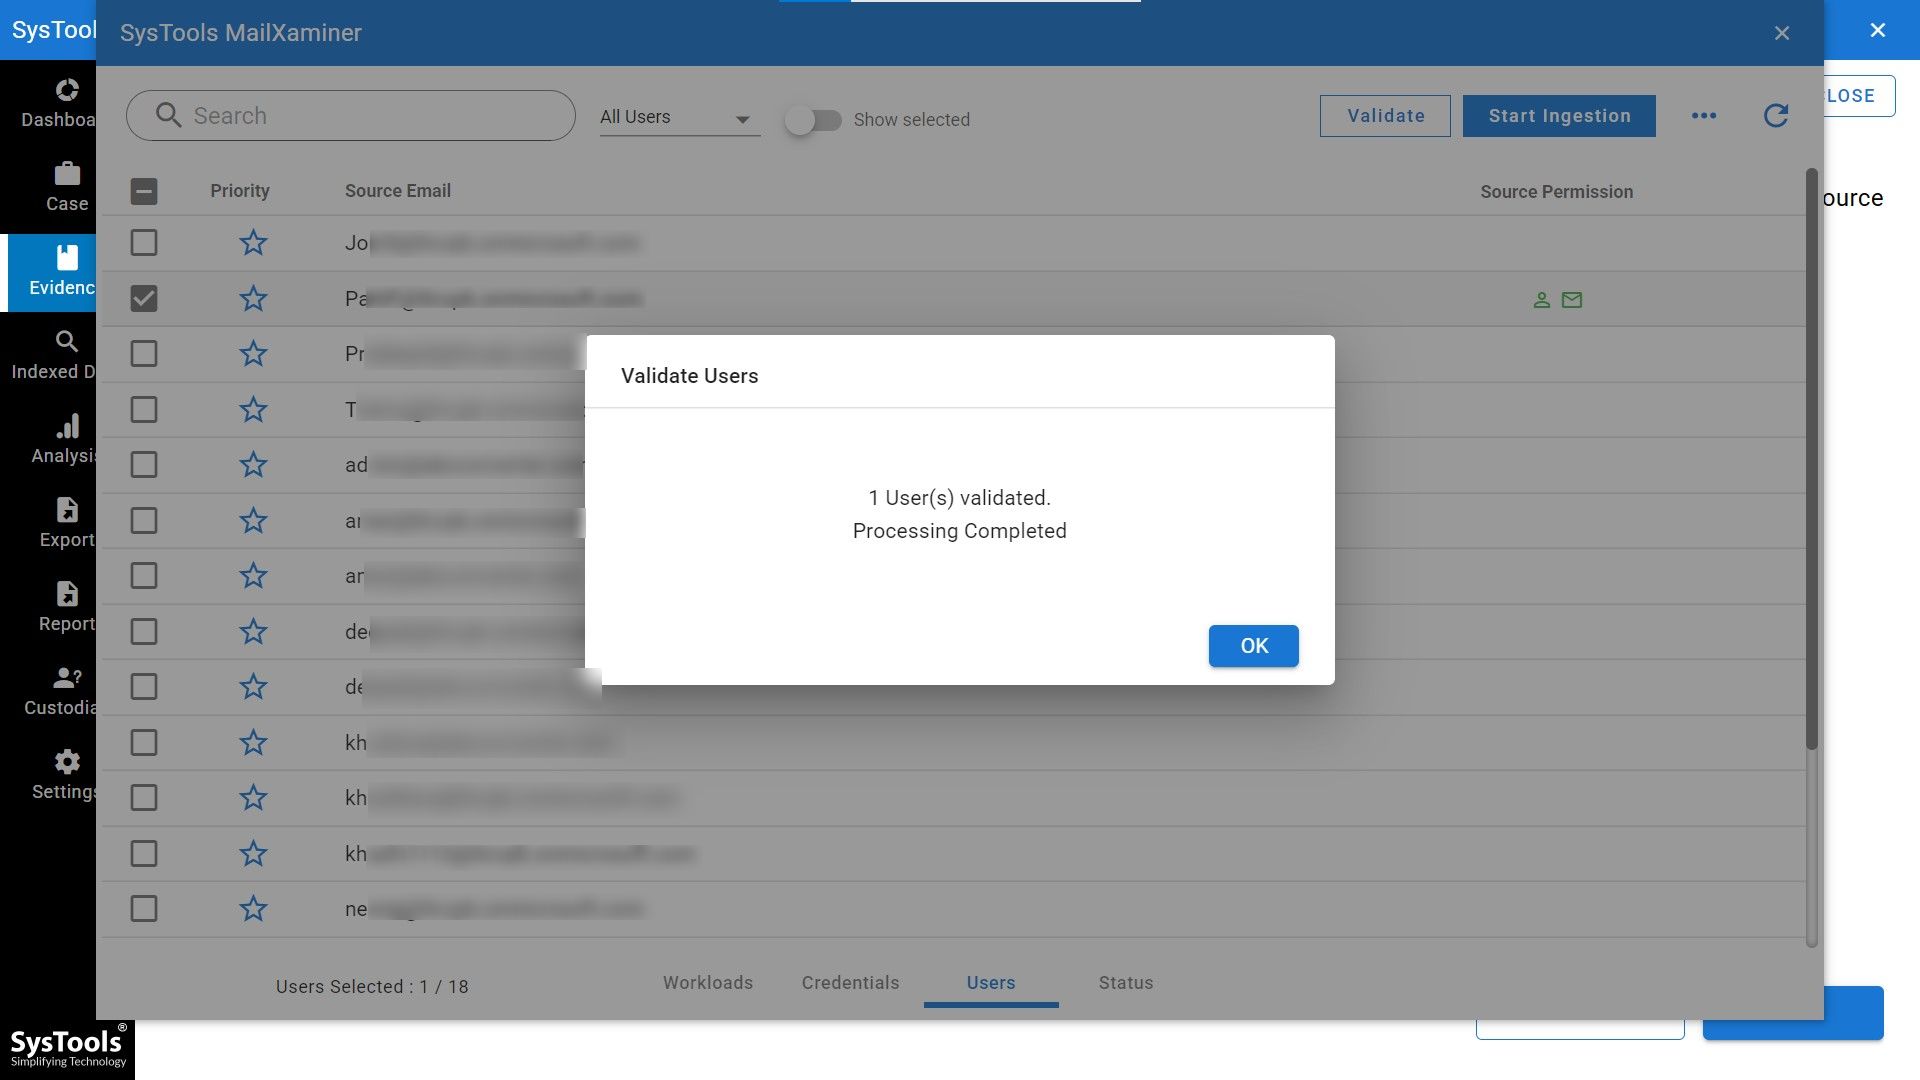
Step 6. Next comes the credentials section. Here, you need to provide the details of your Office 365 domain and validate the permissions.
Step 7. Next, the software will fetch all the user mailboxes from the given account details.
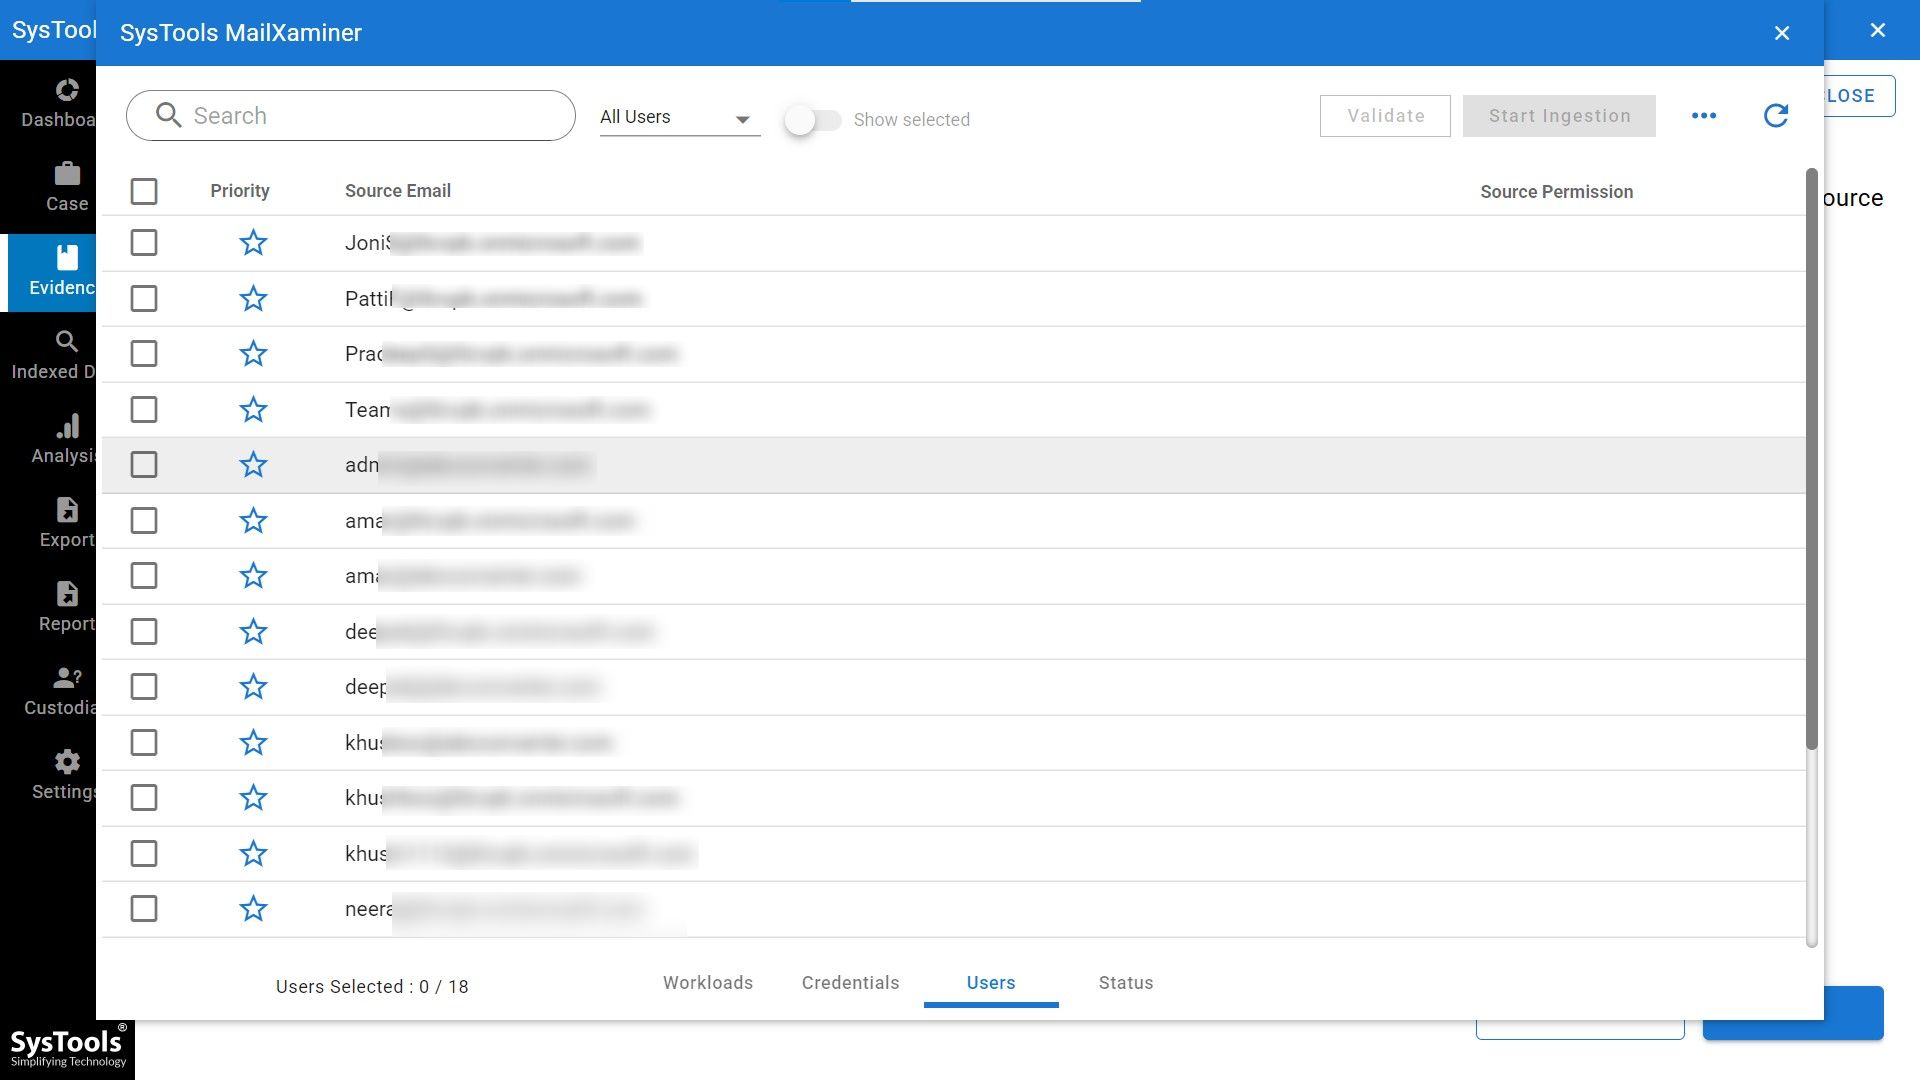
Step 8. Select the mailbox that you want to export and validate the settings. Afterthat, start the ingestion.
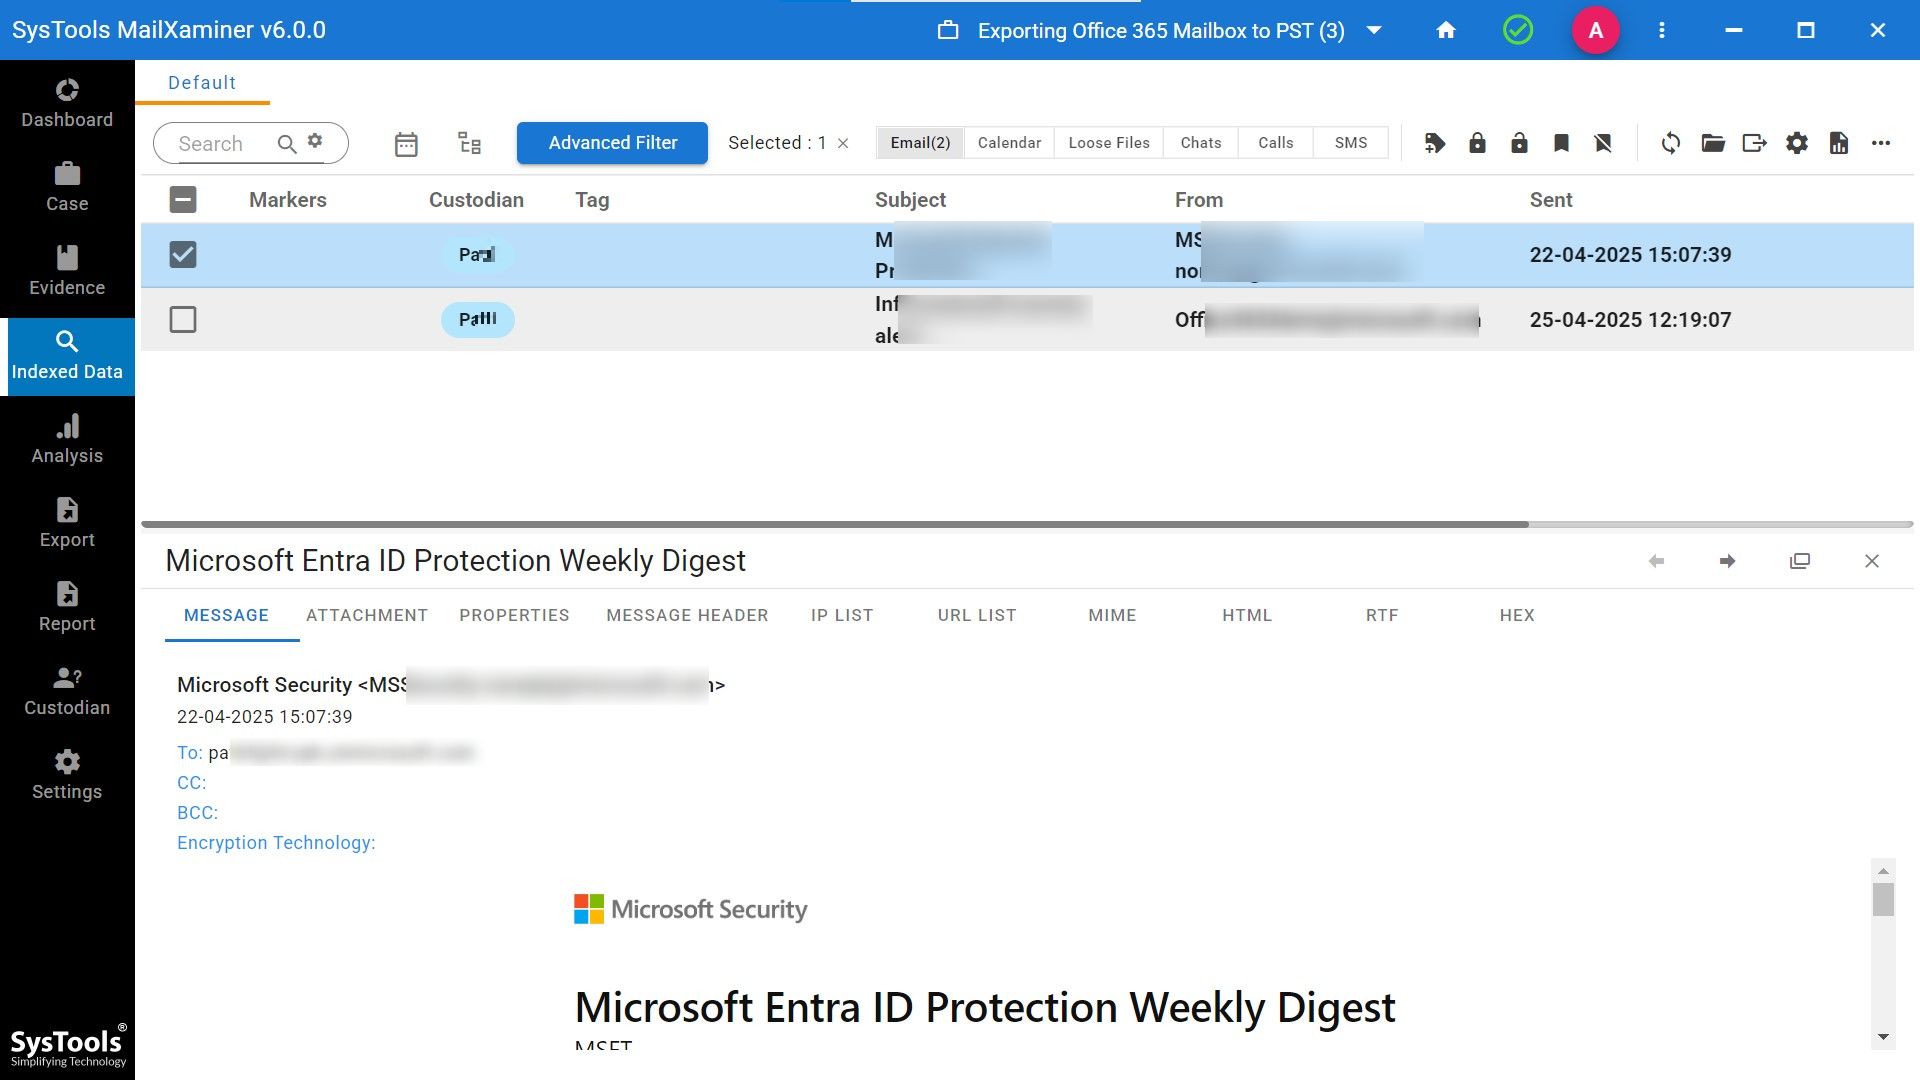
Step 9. Then, complete data will show on the dashboard.

Step 10. Your data will be clearly visible as a evidence and you can deeply analyze the emails with different features of the software.
Step 11. Afterthat, simply export the selected mailbox by selecting the export options.
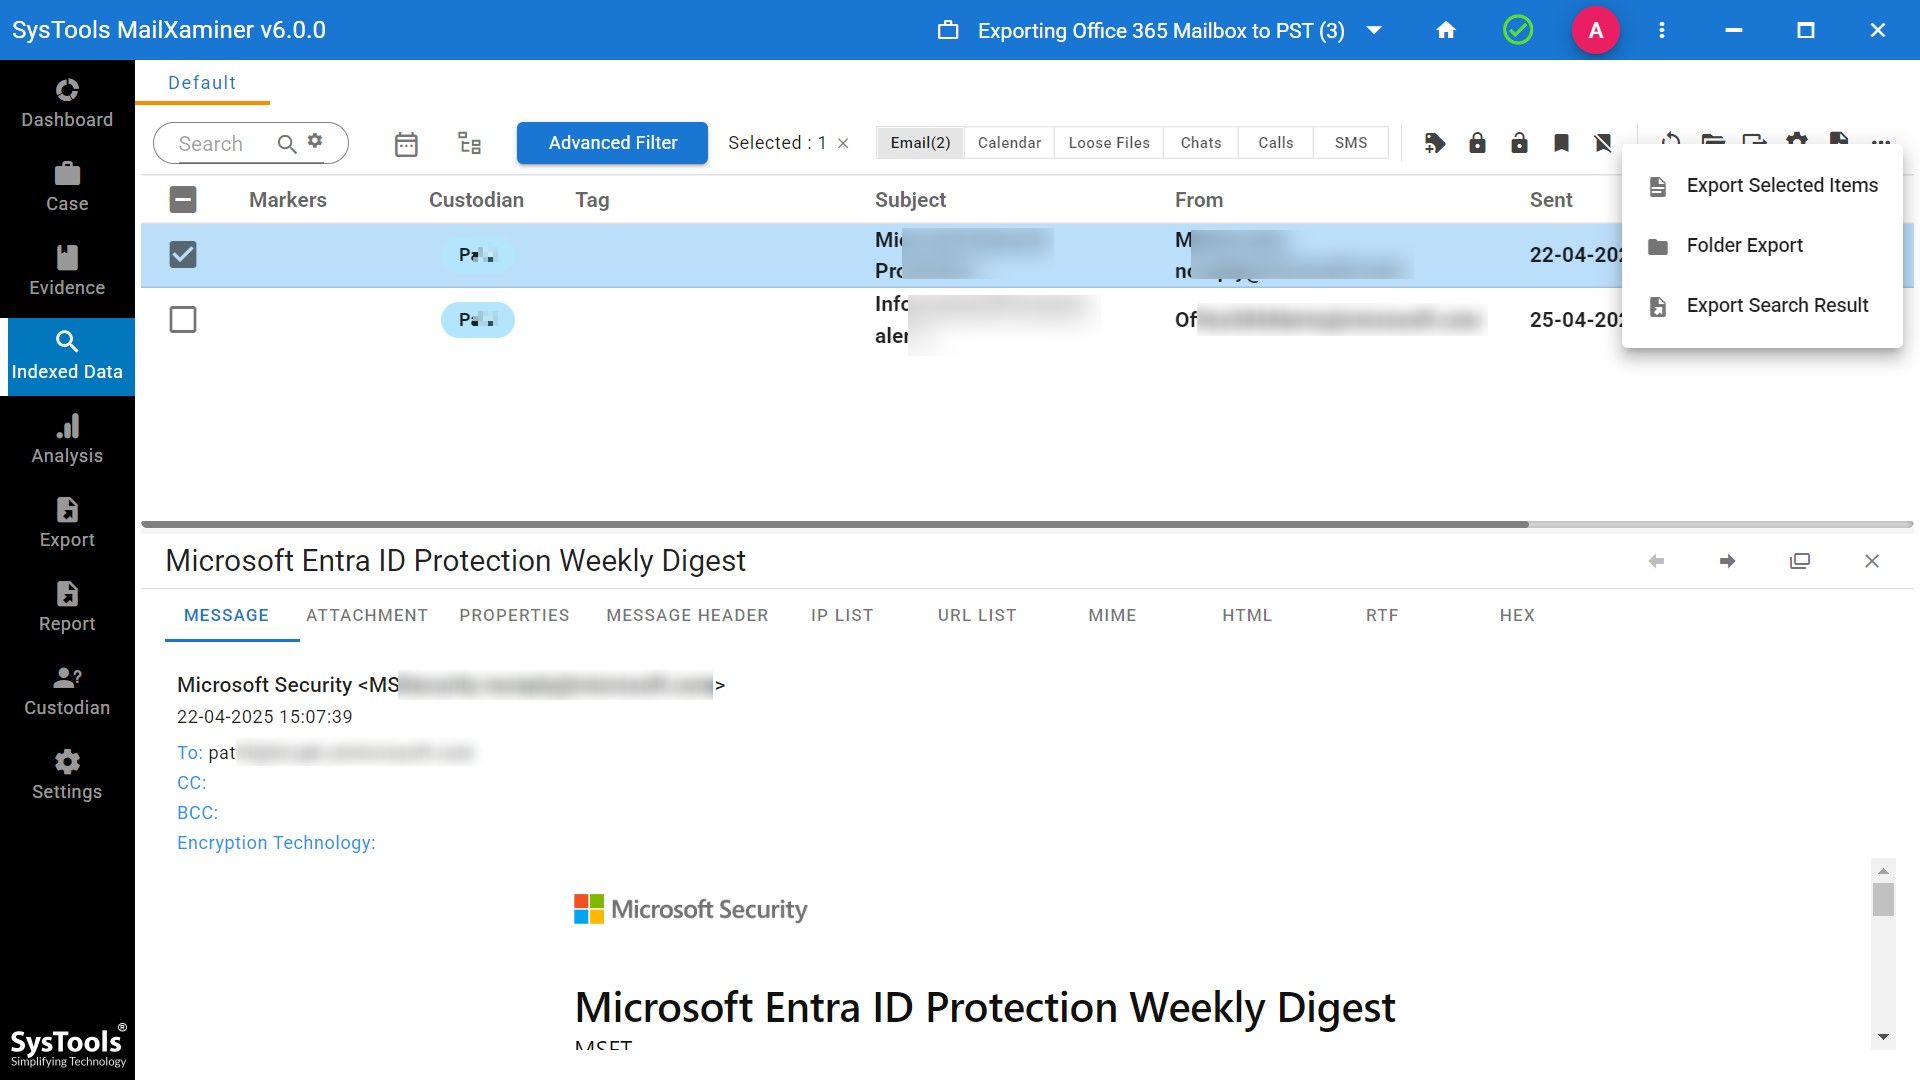
Step 12. Select PST as the file format in which you want your data to be exported.
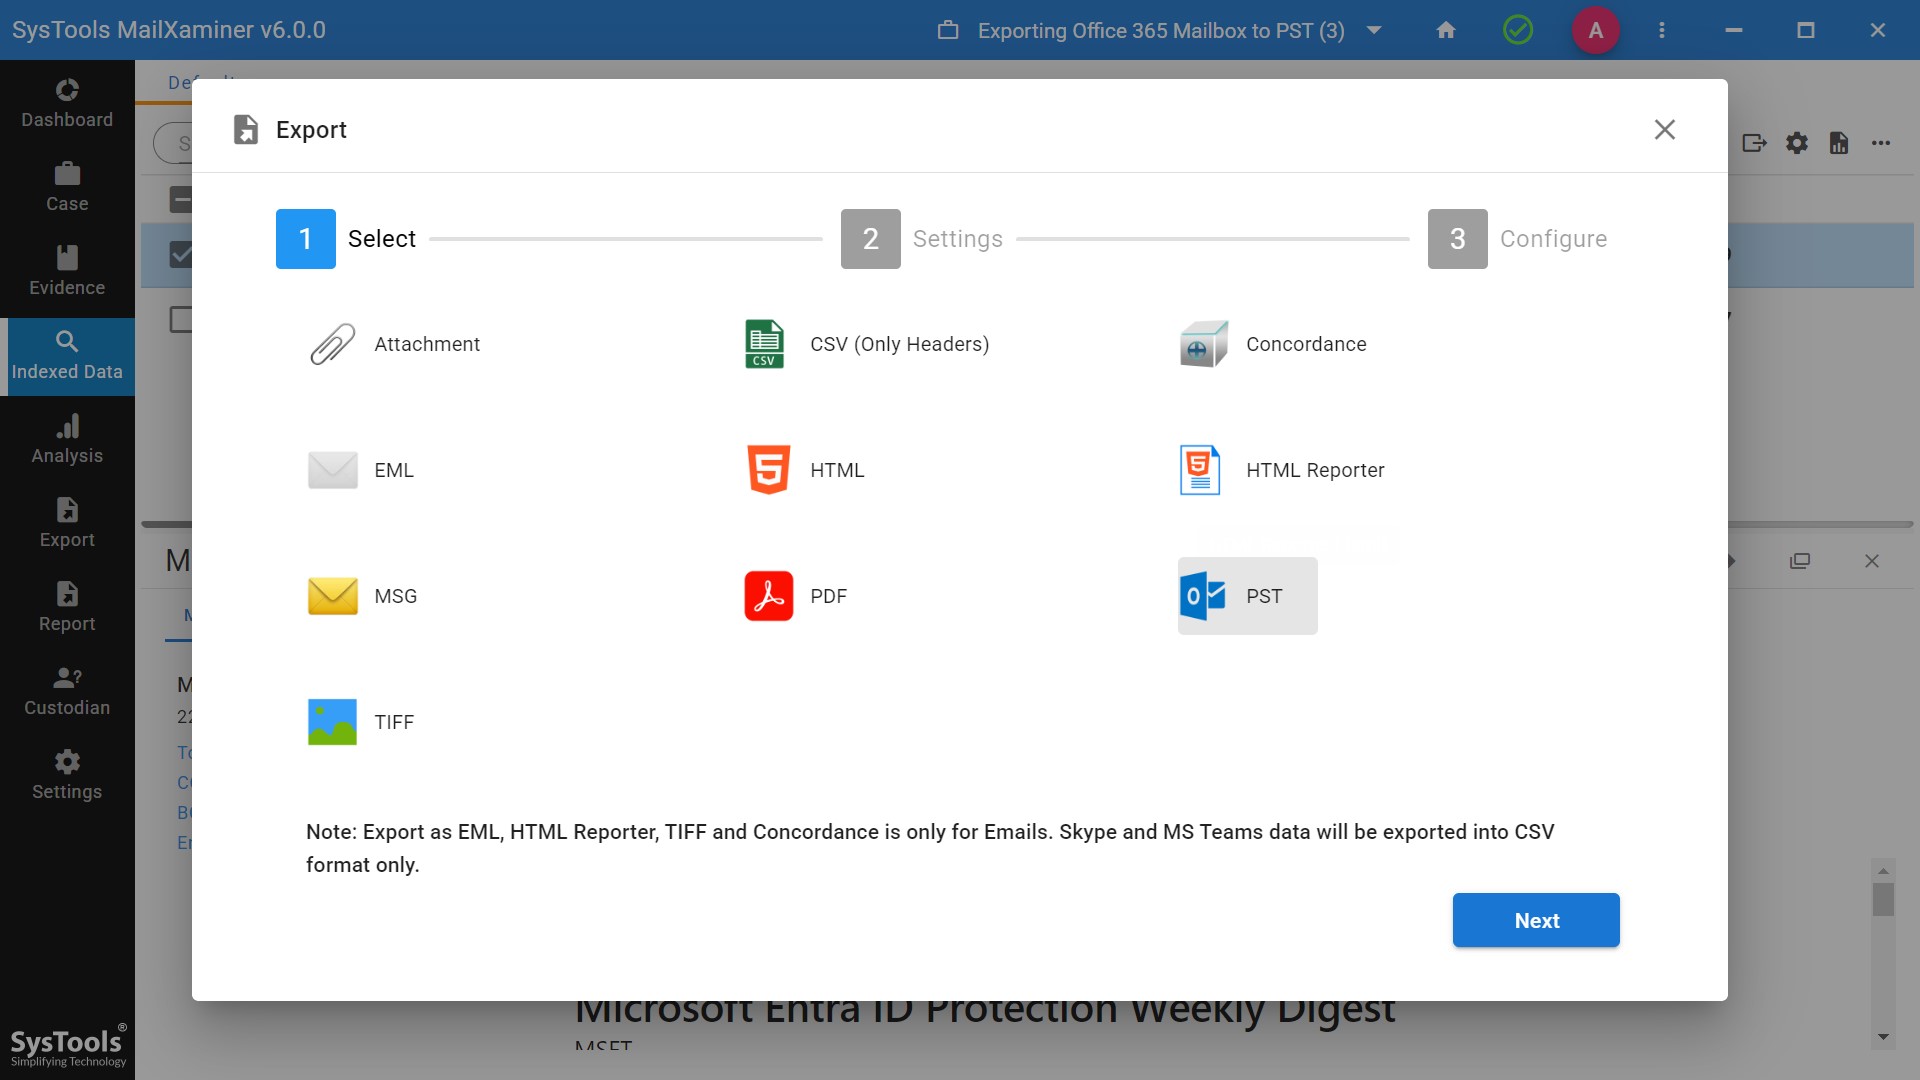
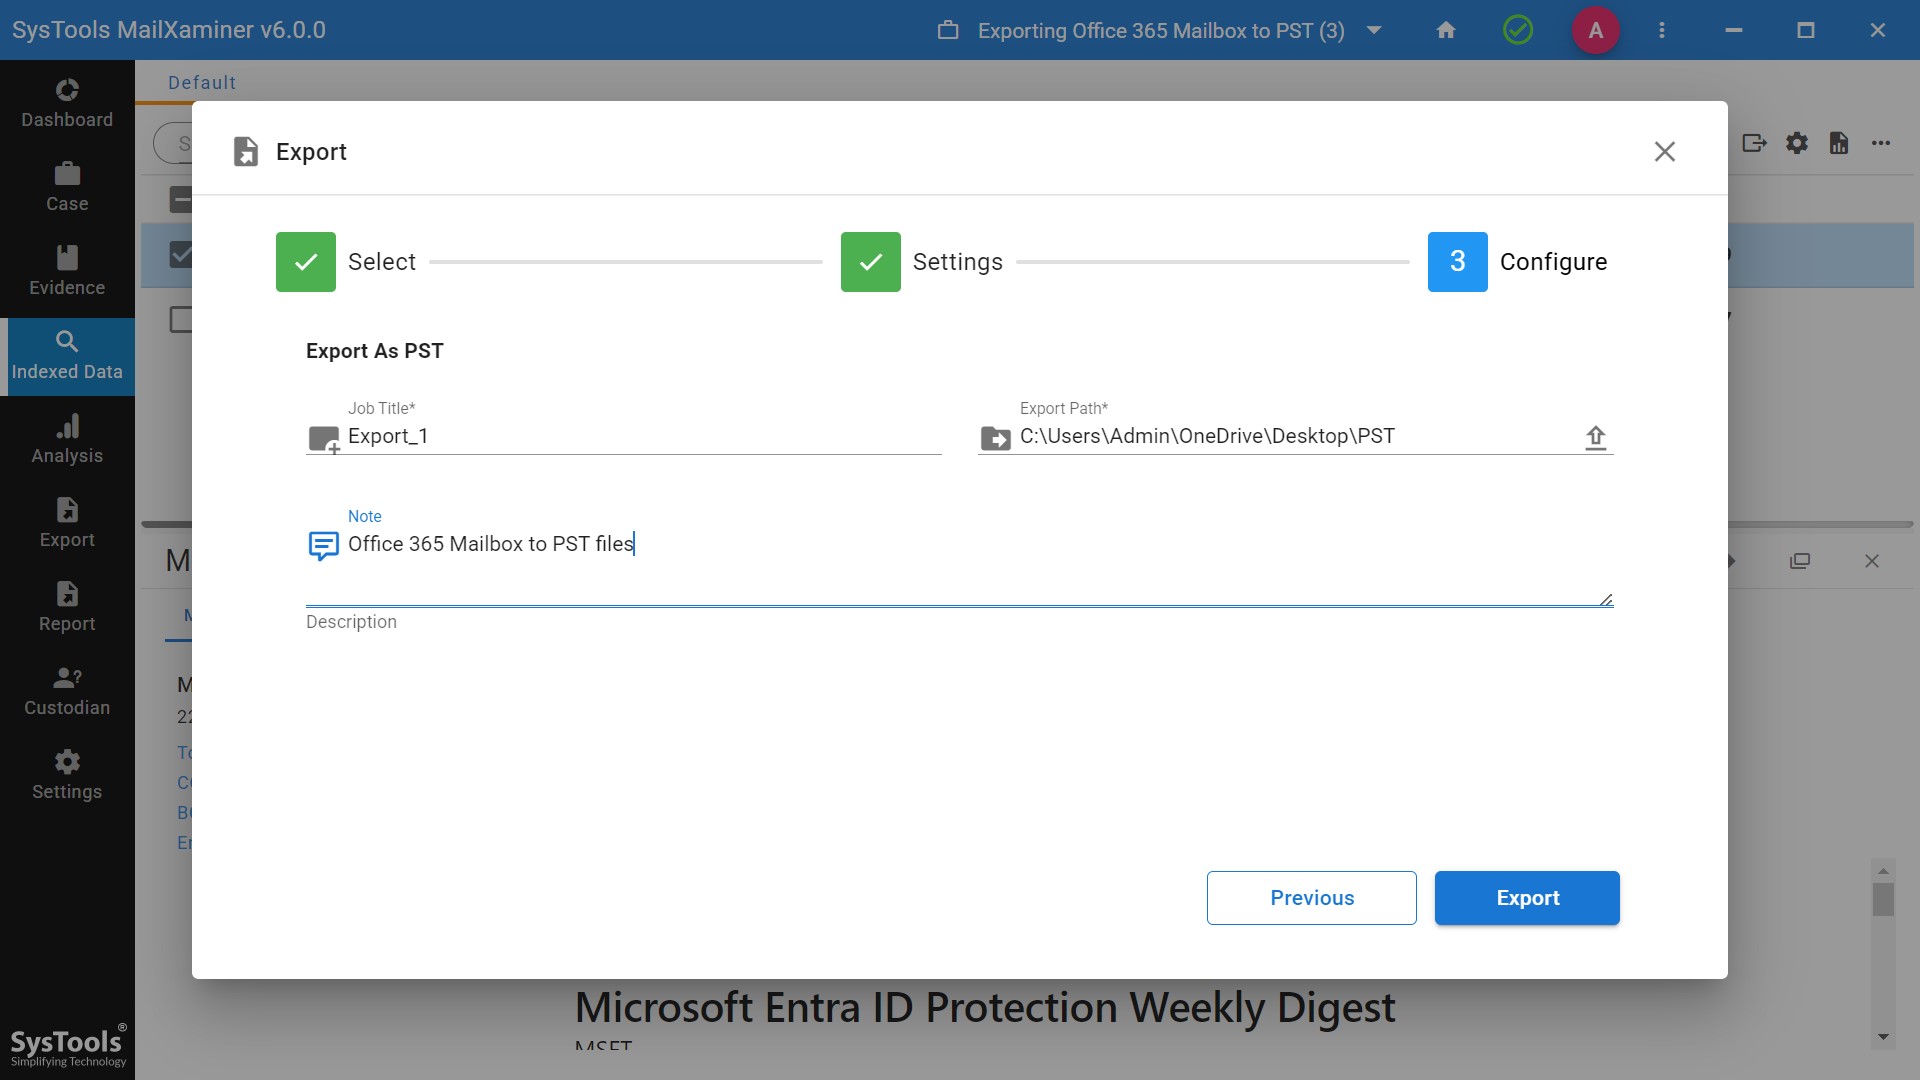
Step 13. Lastly, provide the export path to the software with the export basic settings and tap on the Export option to complete the process.
After the export of Office 365 files into PST mailbox for analysis of files, the investigator will typically proceed with several critical steps. The goal is to ensure that all evidence is properly preserved, analyzed, and interpreted by forensic protocols.
Now that we have uploaded the Office 365 mailbox files into Outlook PST, let us understand the next steps in the forensic investigation of these files.
Verify the Integrity of the PST File
You need to ensure that the exported PST mailbox has not been tampered with during the export process. After performing the above steps, you will get the option of generating a complete report of the case.
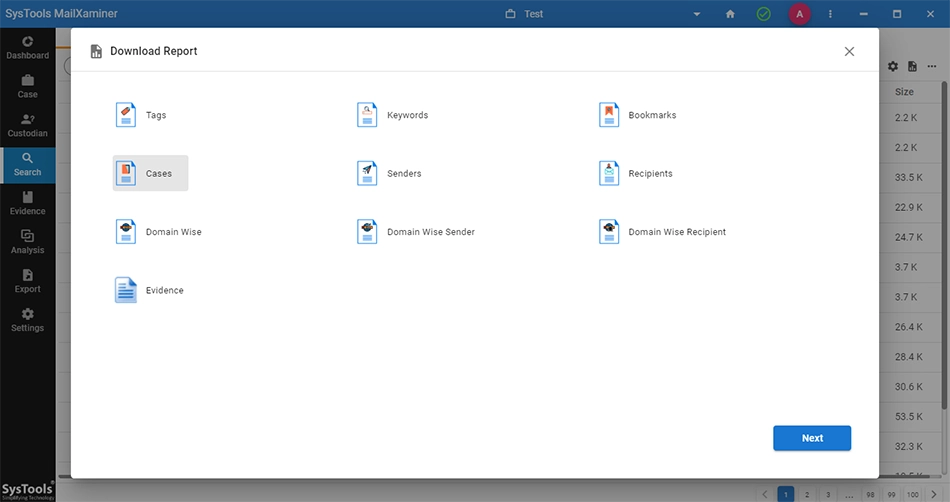
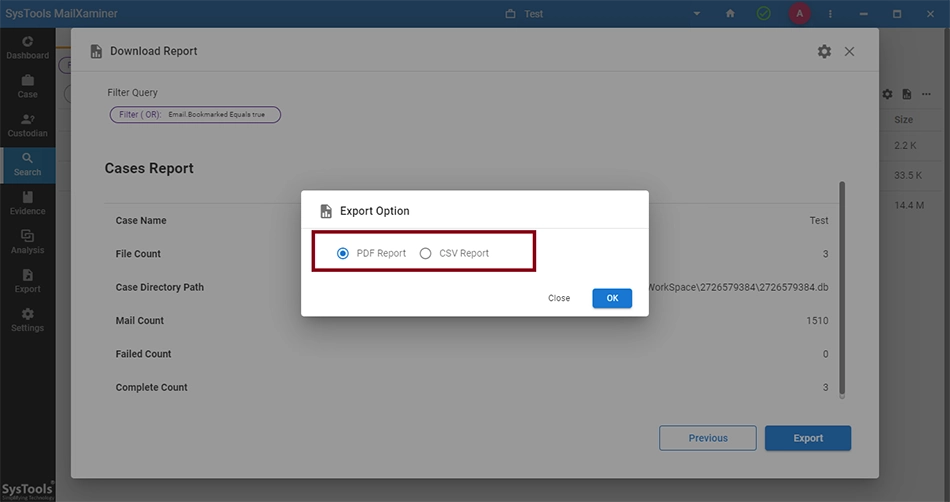
This helps to generate a cryptographic hash (e.g., MD5, SHA-1, or SHA) of the exported PST file to ensure the integrity. This software will allow you to export your generated report into multiple file formats to track the handling and movement of the PST file and its contents.
Conclusion
These steps can ensure that the investigator analyzes the PST file thoroughly and in compliance with forensic standards.
Exporting Office 365 mailboxes to PST is crucial for data security, legal compliance, and forensic investigations. While manual methods like eDiscovery, PowerShell, and Outlook exist, they can be complex and limited. For a faster, more secure, and more comprehensive solution, professional tools like MailXaminer ensure reliable, error-free mailbox export with advanced features.