Remote Team Collaboration Feature for Efficient Case Investigation

When ever multiple peoples work for the samething the team collaboration or teamwork is an important factor for a successful completion of the work. Most importantly in forensic investigation, a single investigator can’t work alone to efficiently complete the case. So that during each investigation process they will create a team and cooperatively work together. The team and collaboration feature of the email forensics tool help the investigators to work as a team more easy and safe manner.
The remote team Collaboration feature enables multiple individuals (corporates, reviewers, investigators, paralegals, etc.) to associatively work by interconnected on the same network for analyze and review evidences related to the same case. This feature allows its user to work independently and simultaneously with one case administrator. The Client comes with all the features that are already available in the stand alone version of the software.
This makes the software an ideal email investigation and eDiscovery tool for an agency, law firm, or investigative team that needs to coordinate the search and analysis of emails in large volumes. It has been designed for corporates, law enforcement, and professional digital forensic services firms, and features the powerful indexing search engine and unique cloud based review platform.
Team Collaboration Feature have Two Components:
The computer forensics tool provides the basic case management functionality with teamwork feature which allows the investigators to manage their case portfolios in an efficient manner and cooperatively work together. The Case Management functionality is essentially a package of the following mentioned features.
Administrator/Server is the primary component and will perform three critical functions:
- Indexing & preparation of the case data or evidence
- Sharing details of case data between team members to associatively work
- Admin can Add or Edit User details & Change level of permissions of users
- Add, Remove, Edit, Register, and Unregister the devices from Server
- Create New case & share the case with the client from Server side
- Maintain logs details of different client & export logs file details into CSV file format
- Easy to Use & Quick deployment process
Client will provide the ability for team members to:
- Independently search, filter, bookmark, tag, and comment on the case data
- Transfer their work back to the Administrator for review and approval.
How to Work As a Team Using Forensics Tool Feature
Investigators can quickly and easily search, review, and analyze emails through this remote team collaboration tools tool. User friendly interface allows you to find critical data, visualize relevant relationships, and drill down to the most pertinent evidence in very easy manner. With the email analysis tool, you can index and search multiple email sources, file types, and metadata. View results in a visual layout of your choice and export the documents of interest in a wide variety of file formats. The tool includes the most advanced export and sharing features. Analysts and reviewers work can be consolidated into a single result facilitating collaborative investigations. To know more about how to work as a team through teamwork feature of MailXaminer, refer the bellow section.
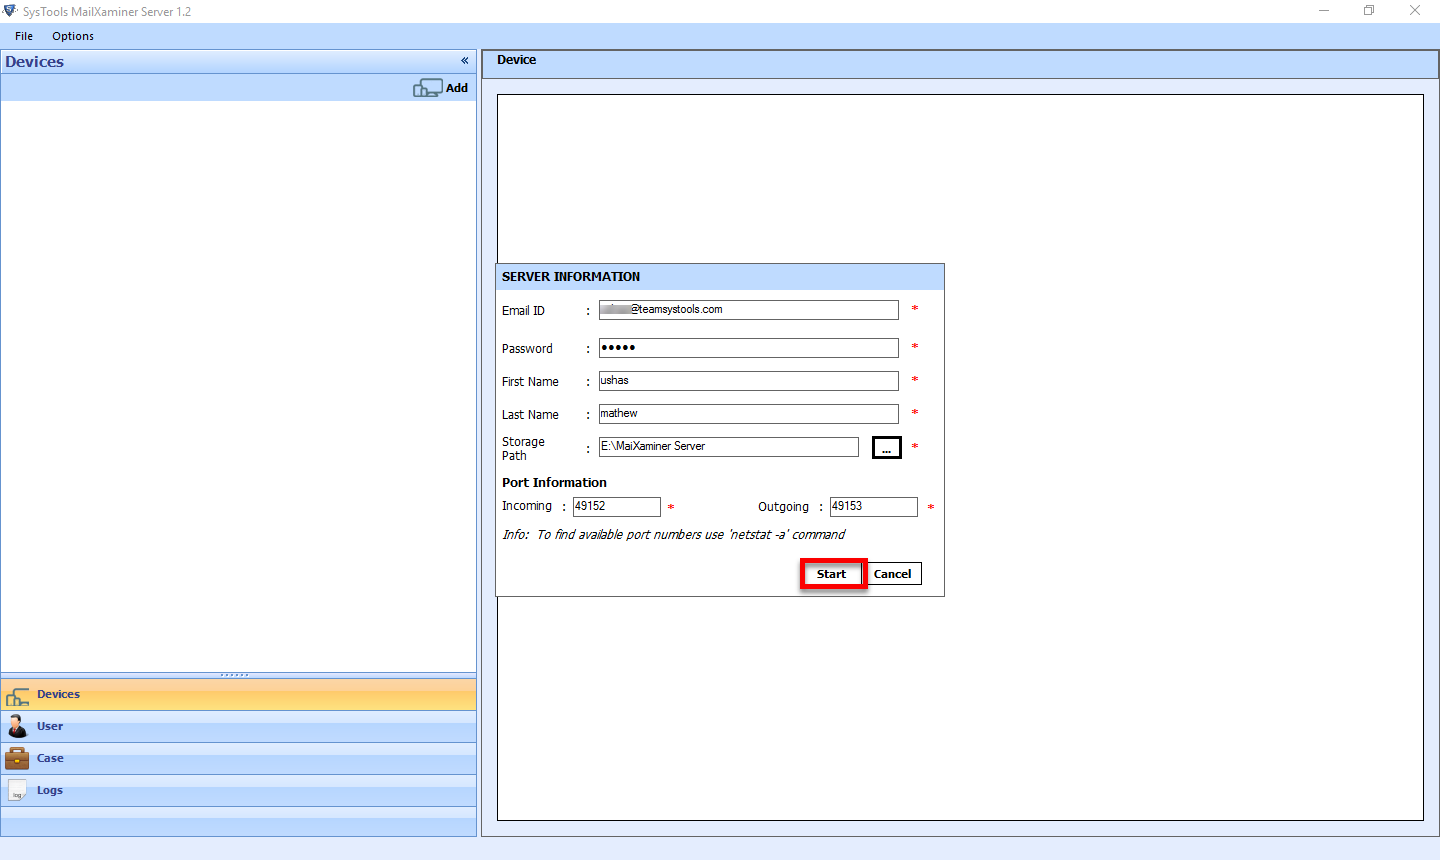
Before starting the investigation process user need to Configure MailXaminer Server for cooperatively work together same case. To Create Admin, first set the admin details. Provide all details such as Email, Password, First Name, Last name and Storage Path. By default remote team collaboration software access Incoming & Outgoing Port Information.
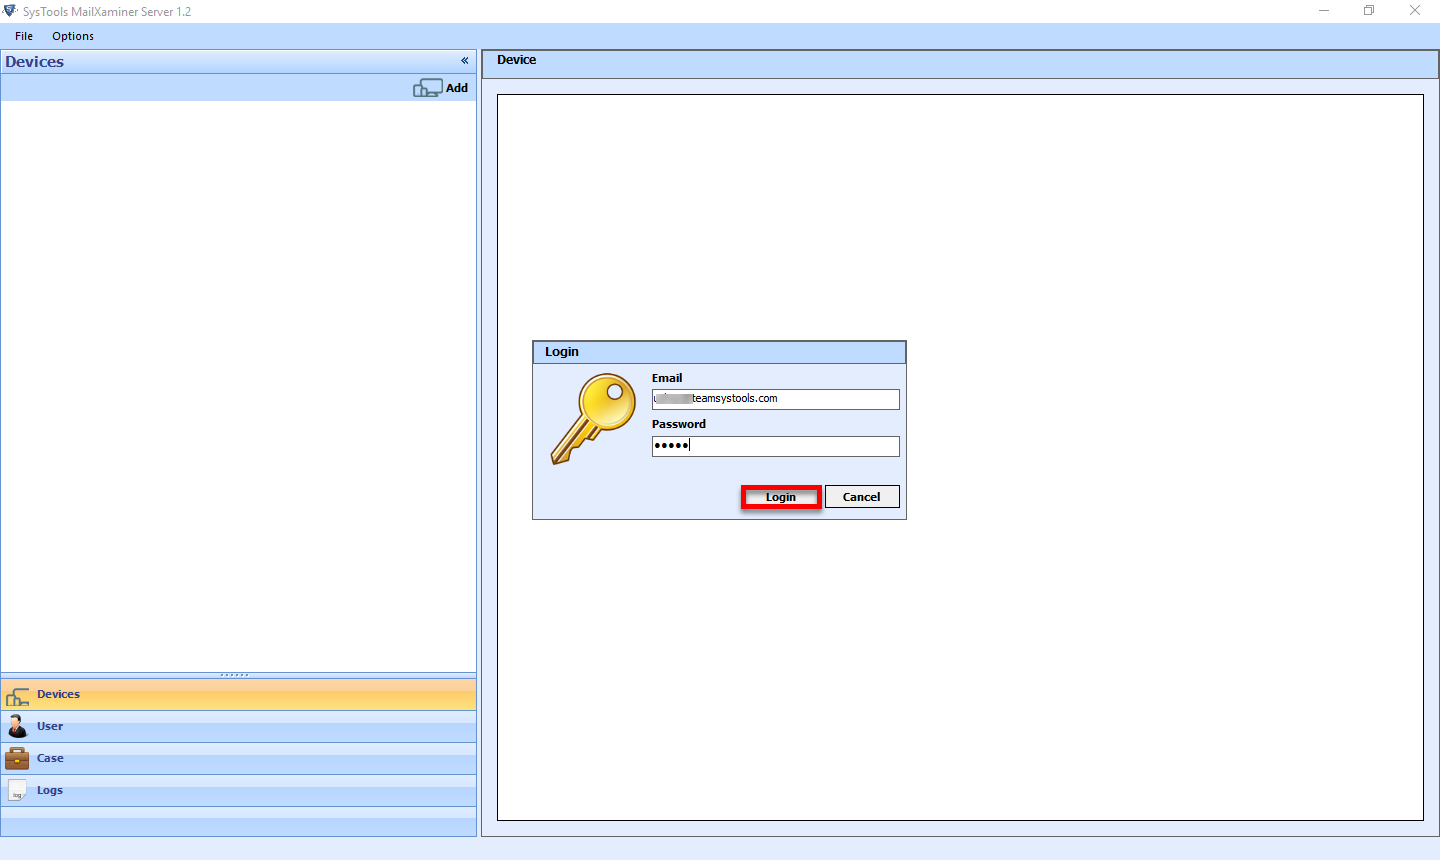
After configure the admin account give the Username and Password in Server to open Server side of MailXaminer. Then click on Login Button
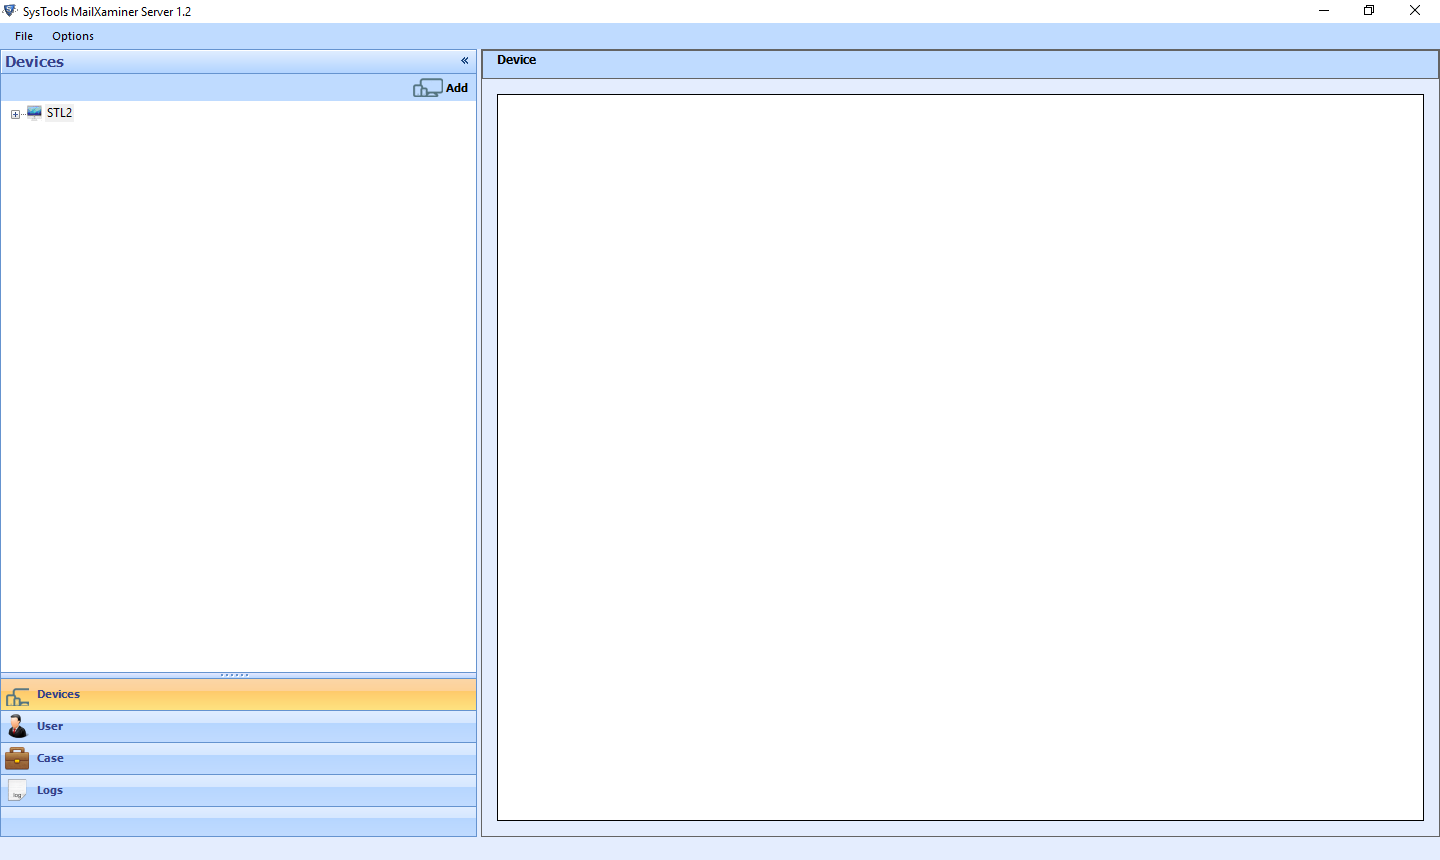
In Server Interface, Admin can browse & view the different option available to associatively work as a team.
- Devices: Used to Add/Remove Client Devices from server.
- User: Used to Add different users and change the permission level of the users.
- Case: View all created Case and details of each case.
- Logs: View all logs details of all activity of Client and Server machine
Select Device option from left-pane of Server interface to manage the devices which are going to use in the teamwork.

Add the device in to the working network through Add option.
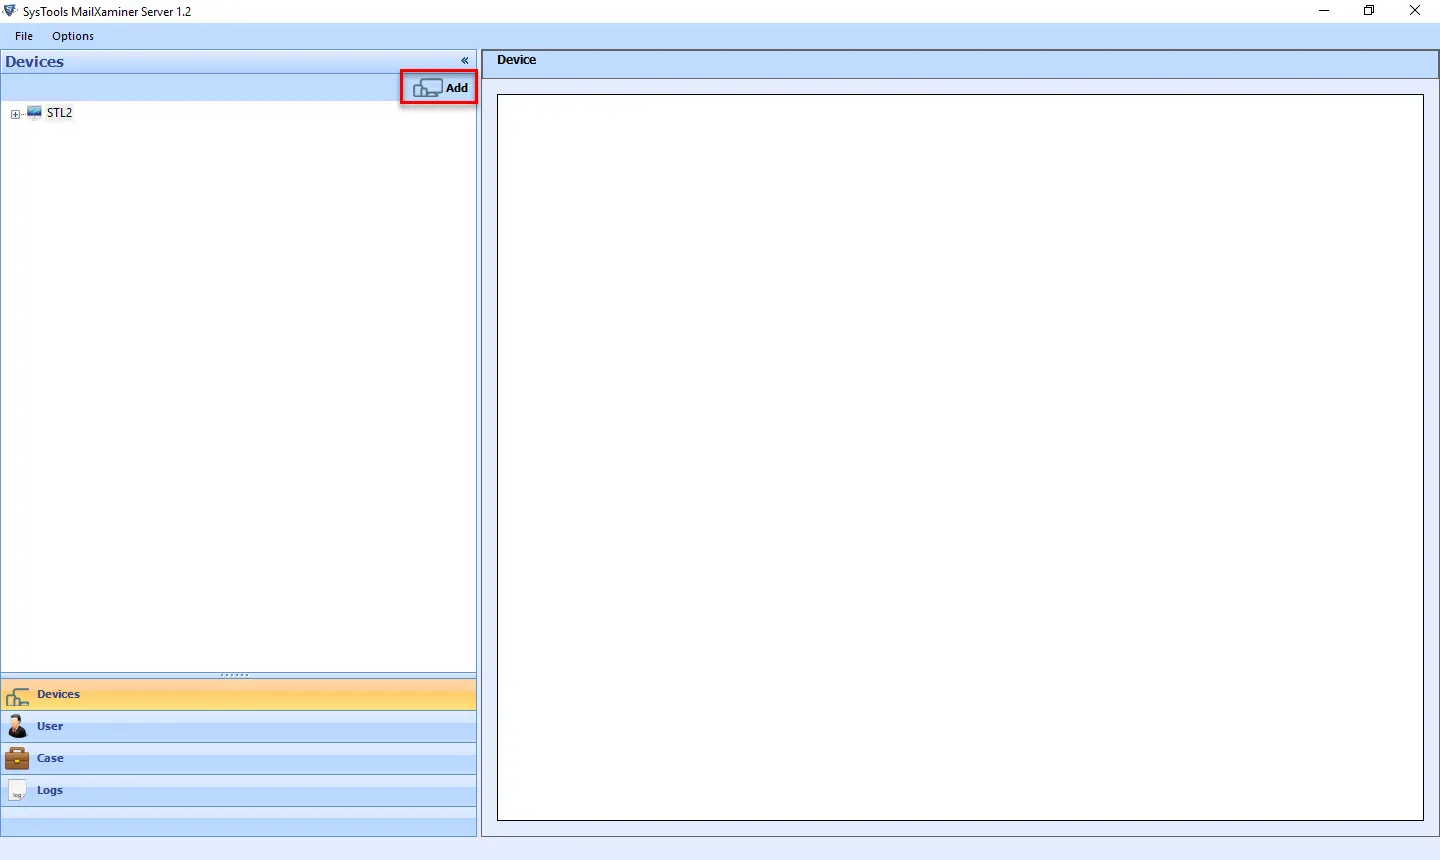
Provide IP Address & Machine Name of the Client machine and click on the add button to join the machine into the group. Through these added devices only the user can cooperatively work together.

From the device panel user can view the added devices in the Systools MailXaminer Server.
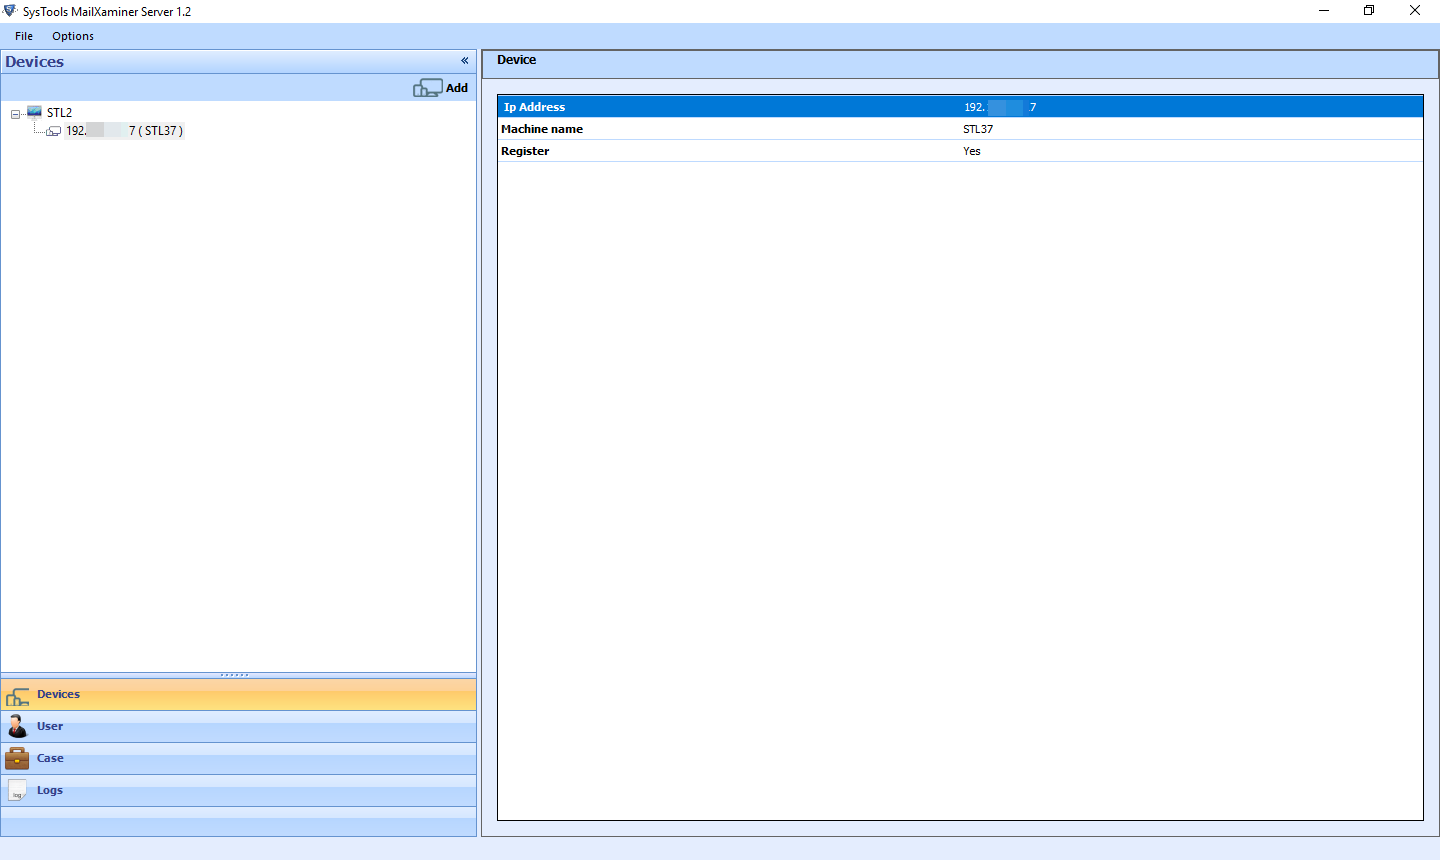
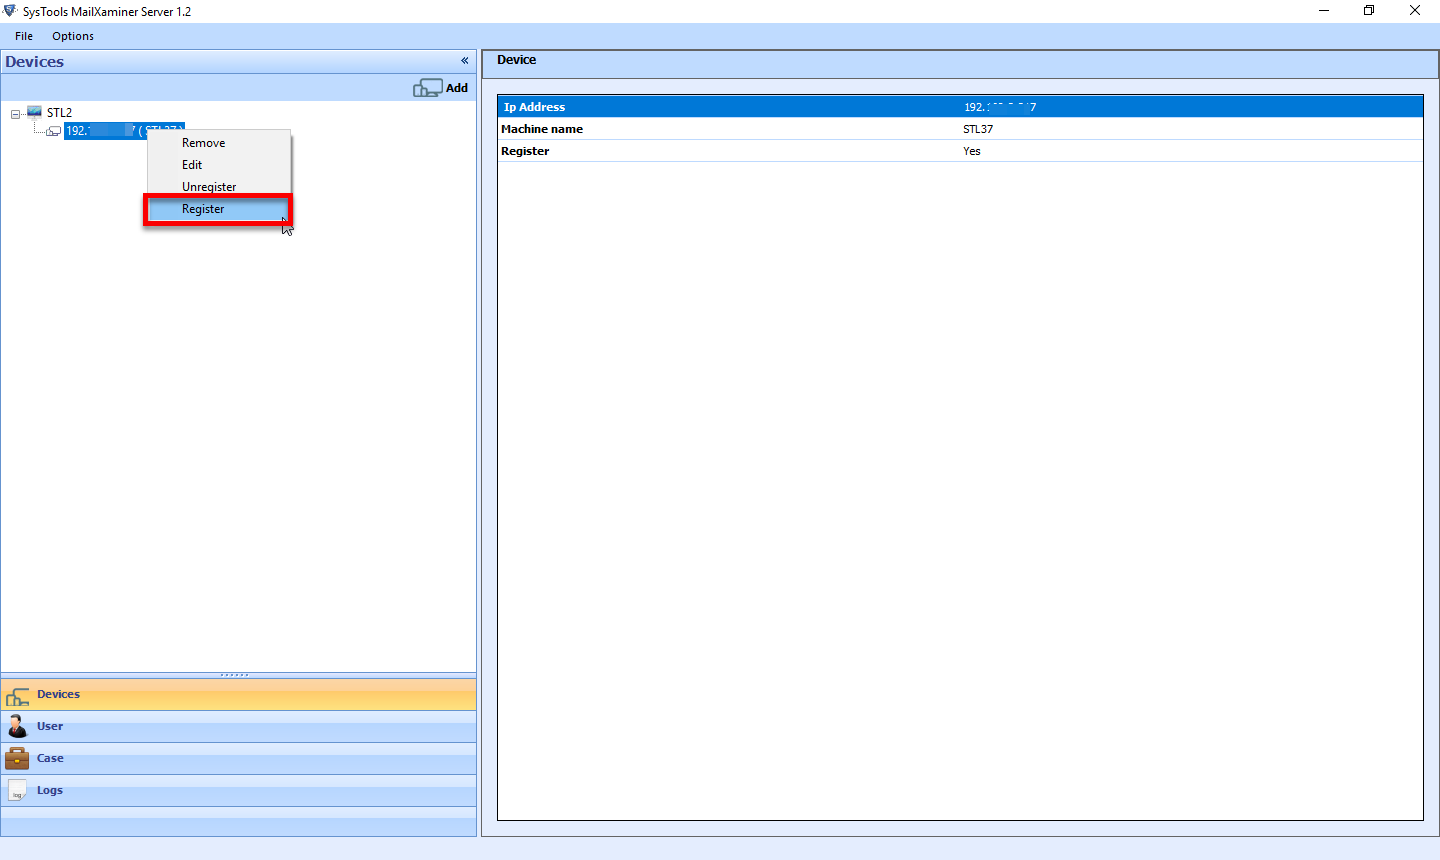
After Adding Device in the Server, Admin have to Register the device in the MailXaminer Server
To Register Client Device in the server, Select the Device &then right click and Choose Register option from the drop-down menu.
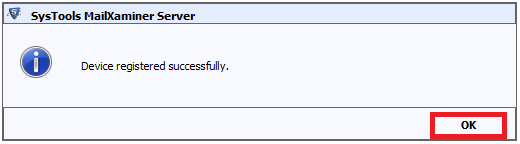
User gets message prompt of "Device Successfully Registered". Click Ok to finish the process.
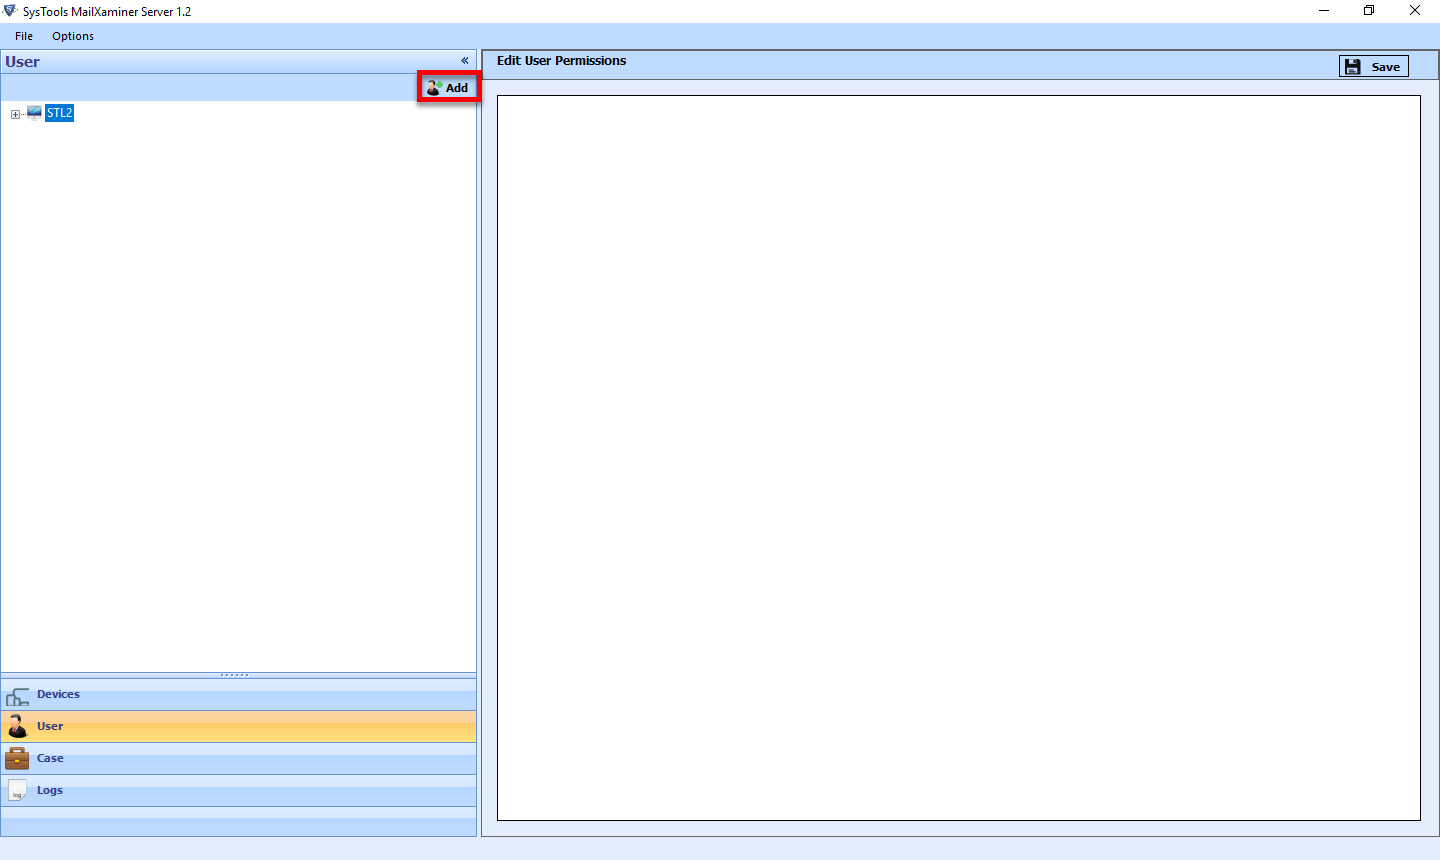
If users wants to work with team collaboration feature first admin need to Add User from Server Side. For that from User Section click on ADD option similar to the below screen.
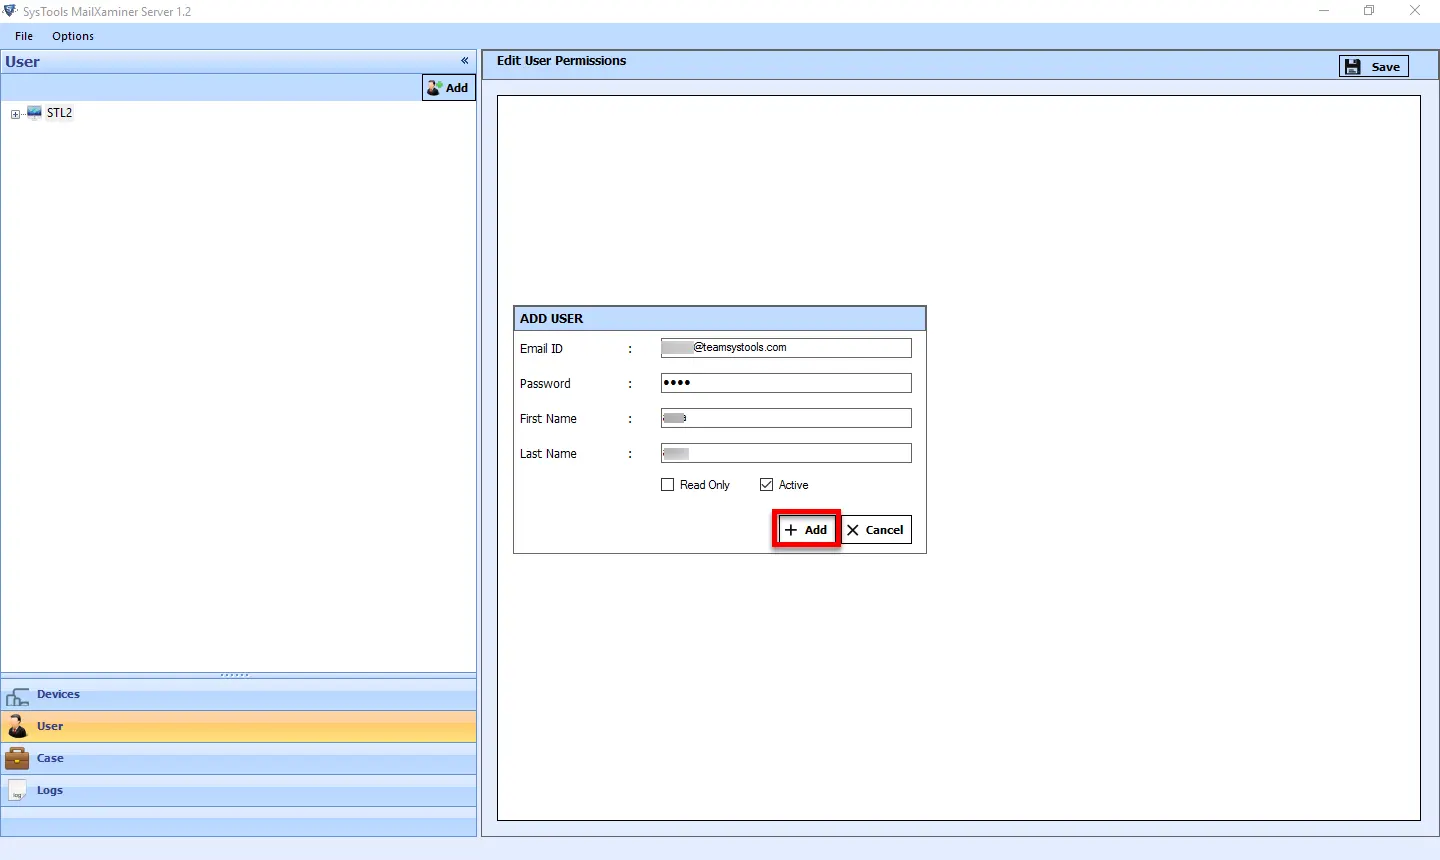
Provide Credentials of New Users such as Email, Password, First name and Last name. These are the credentials that users need to use in the client side to associatively work as a team.
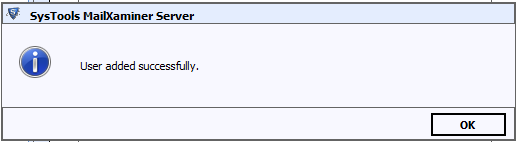
Admin gets the prompt message User added Successfully when a new user successfully added.
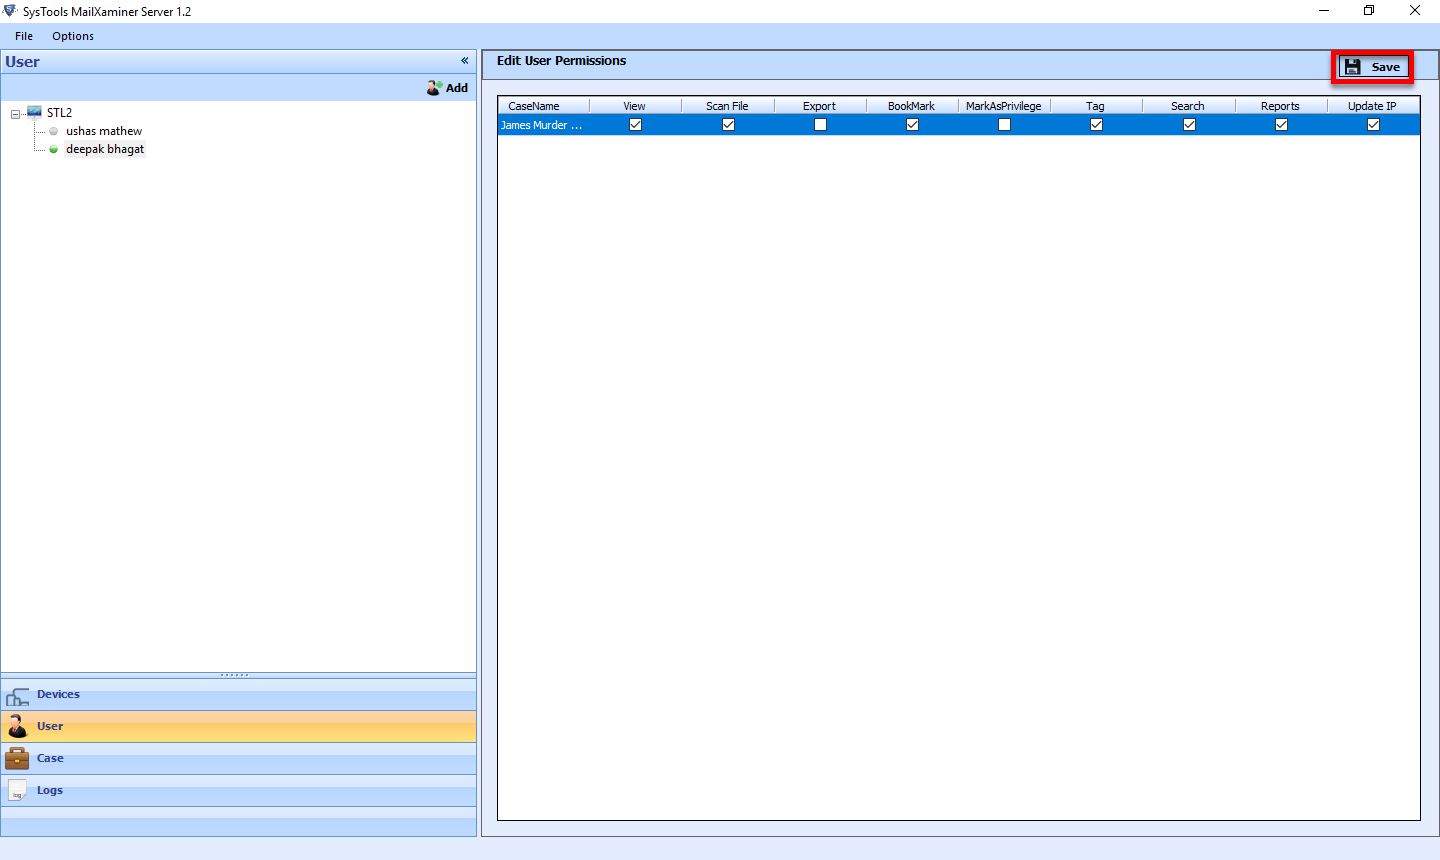
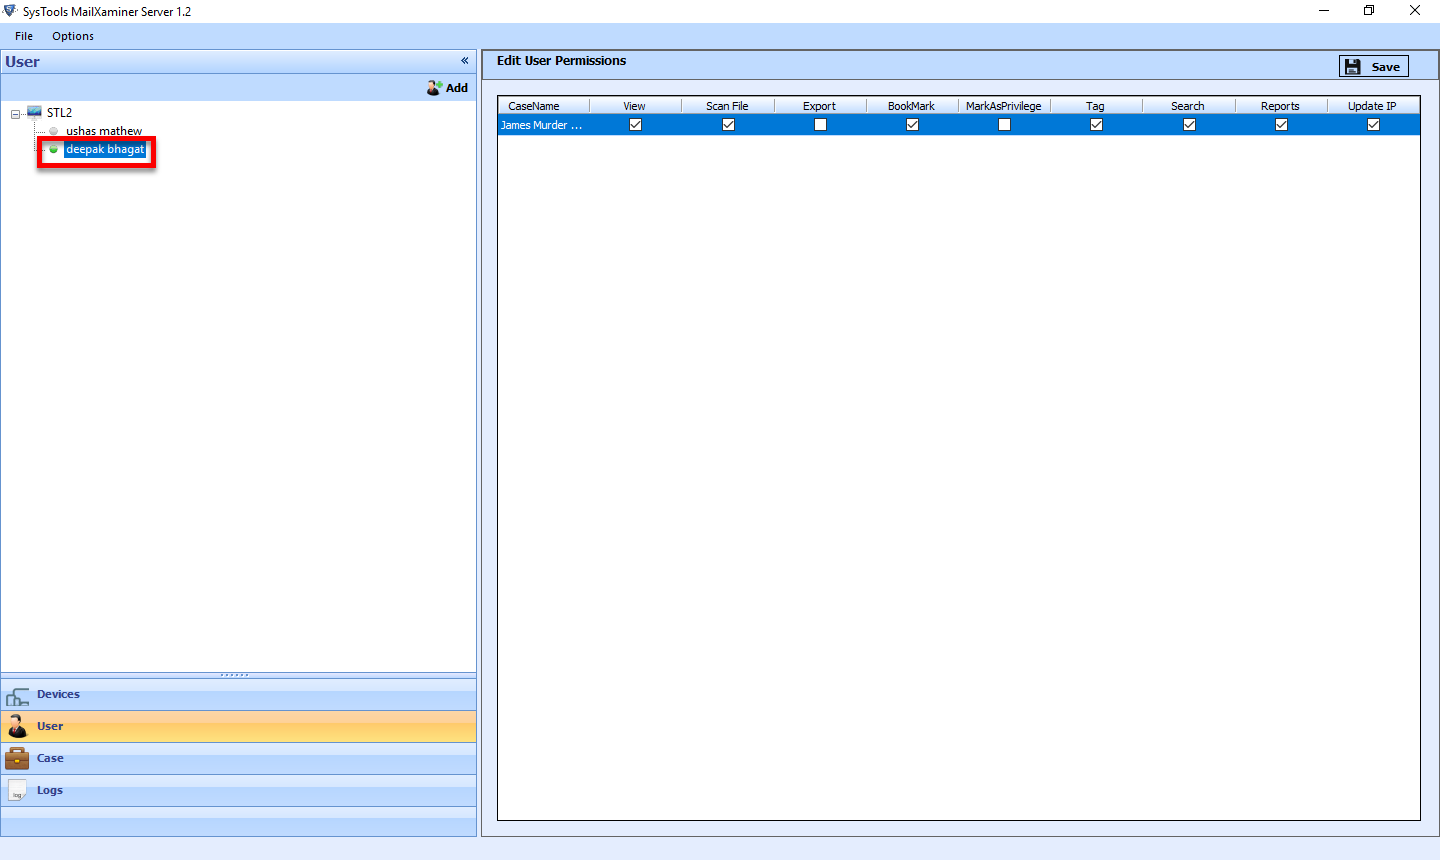
Admin can view the recently added User and also change the Level of Access of each user. To grant permission, Admin has to Check the box related to the section. To Deny Access, Admin have to uncheck the Check-Box. Click on Save.
When a Client User connected successfully with the Server, Admin can view whether client Active or Inactive from Server side.
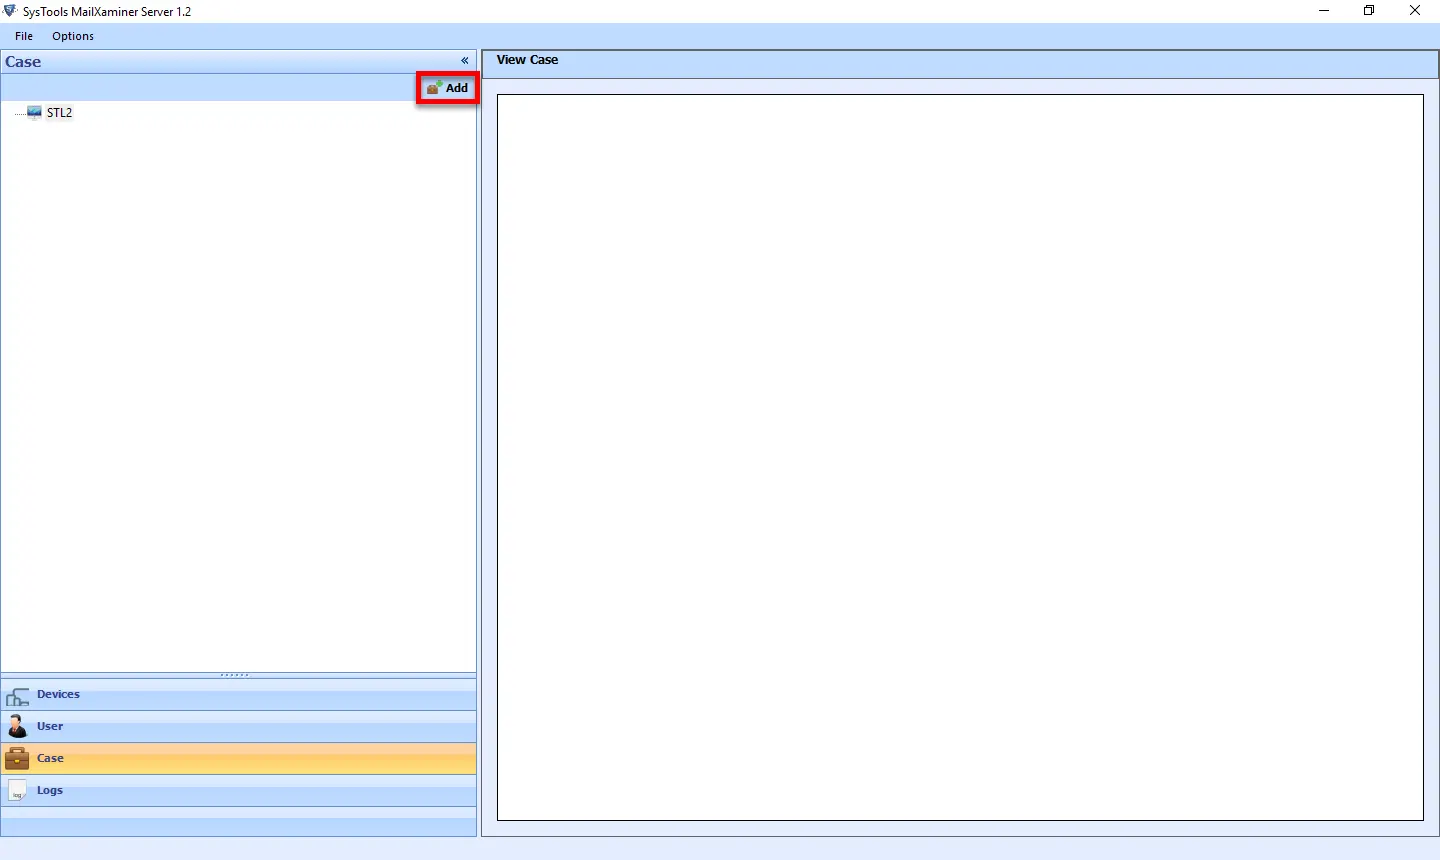
To use remote team collaboration feature & cooperatively work together with the other members, first the admin need to create New Case in Server side. Select the Case Section and Click on Add option.
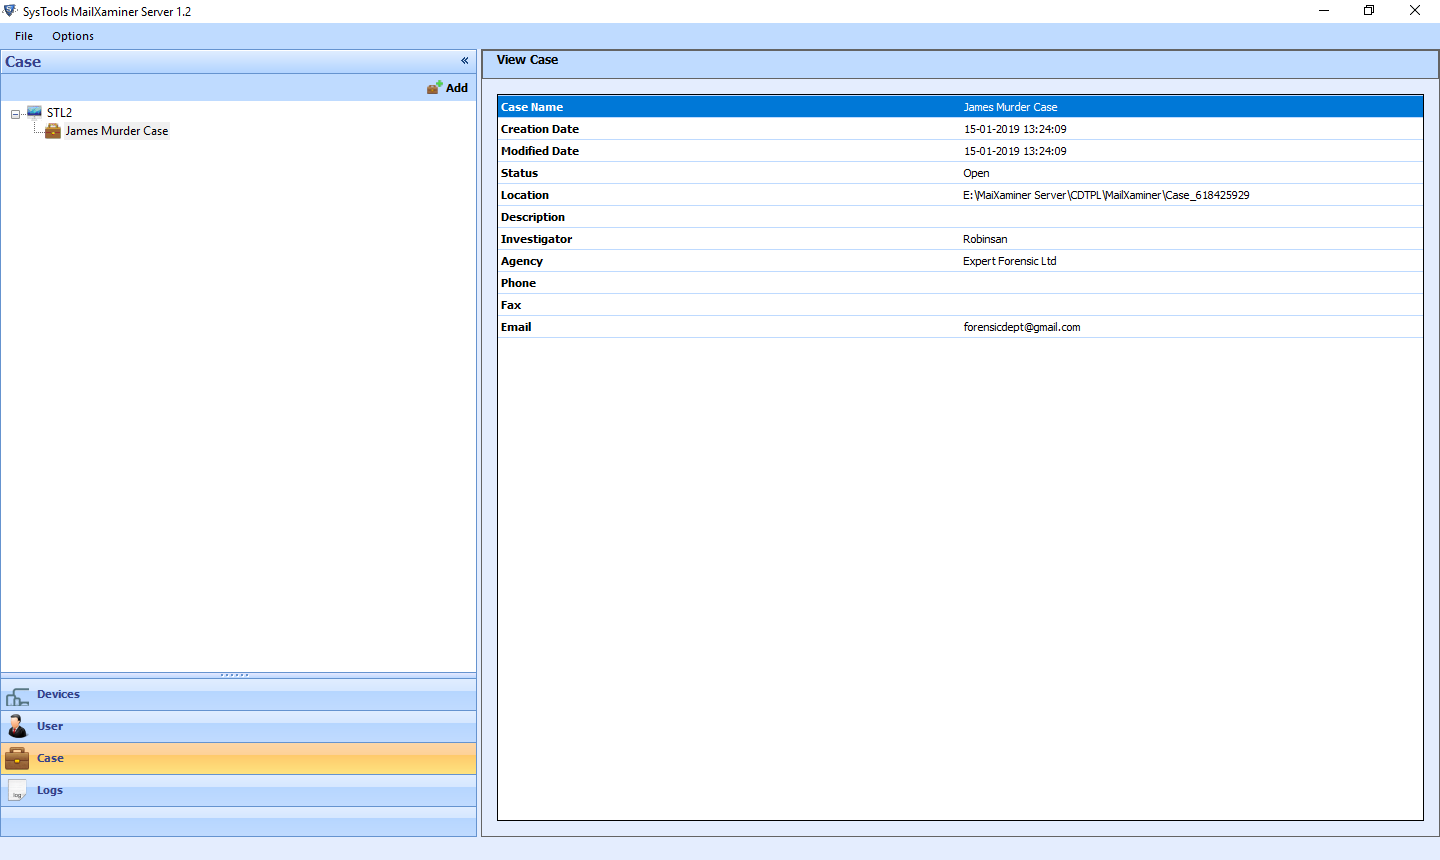
Provide the new case details such as Title, Description, Keyword list, Investigator, Agency, Fax, Email etc. in the respective fields.
- Title: The related case title of the case should be filled in this field.
- Description: Fill it with a case regarding important information like Case Type, Environment, industry or system involved in the case.
- Keyword List: To categorize the scanning of emails with particular word or data and show those emails separately add keywords user want to highlight once scanning is done.
- Browse CSV: User can even browse the CSV file with the keyword to add them to the tool to customize search within the bulk data scanned.
- Investigator: Give the name of the investigator and his team member who are handling the case.
- Agency: Fill the name of the company who is filing the case.
- Fax: Insert Fax no. of the company.
- Email: Email of the custodian

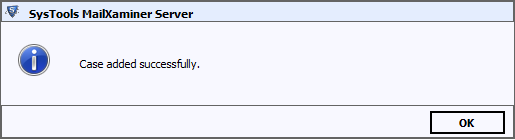
After adding the case successfully the message box will appear. Click OK to proceed further.
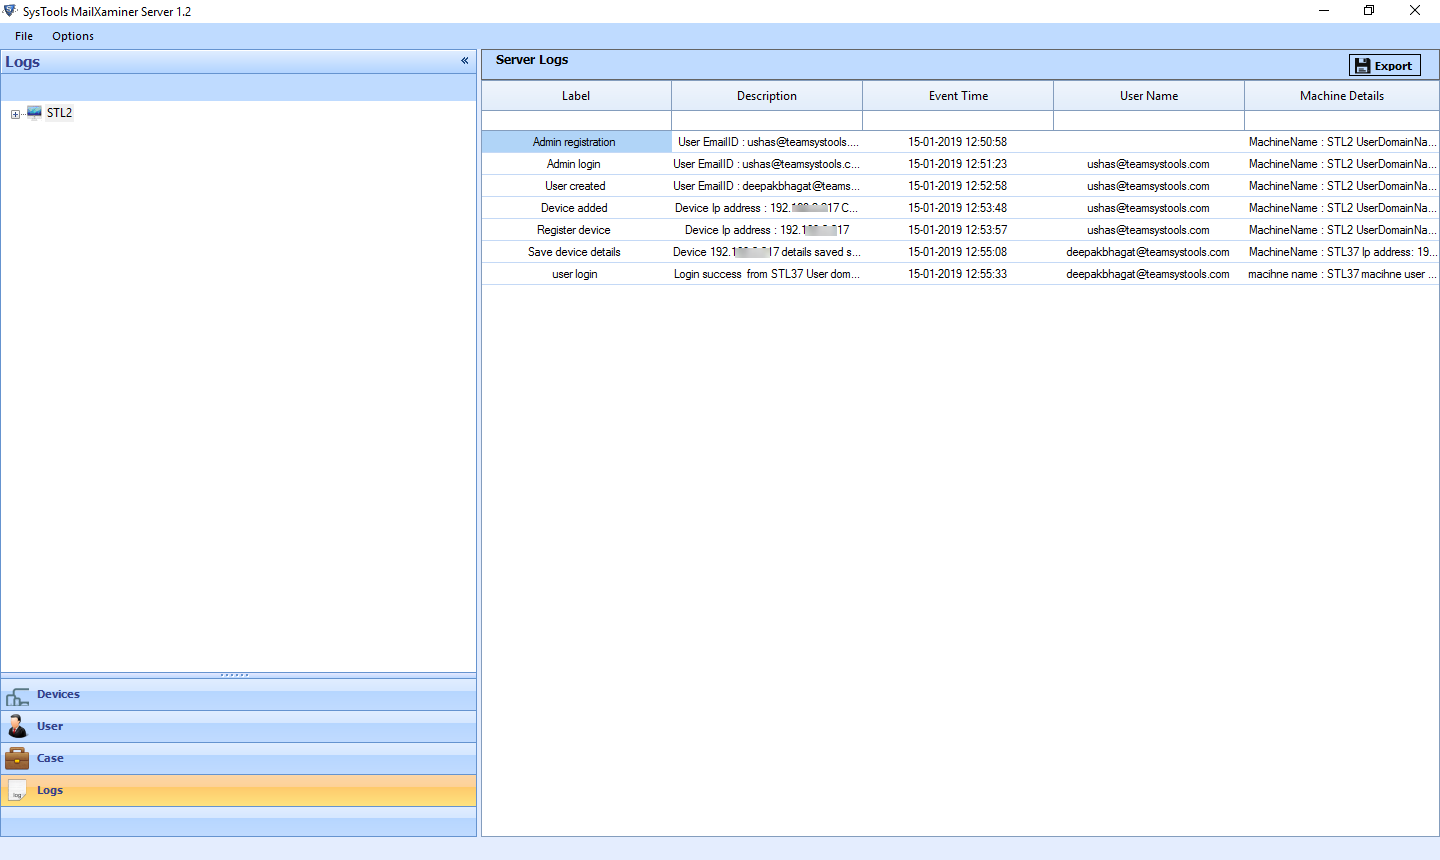
Select the case from the case panel to view the details of the recently added case. The remote team collaboration software creates Logs repositories from which you can view all the activity details done by them as well as different client users through the team collaboration feature.
To open Logs section. Click on Logs Section. Here Admin can view all activities details done while working with the application. It includes Label, Description, Event Time, User Name & Machine Details.
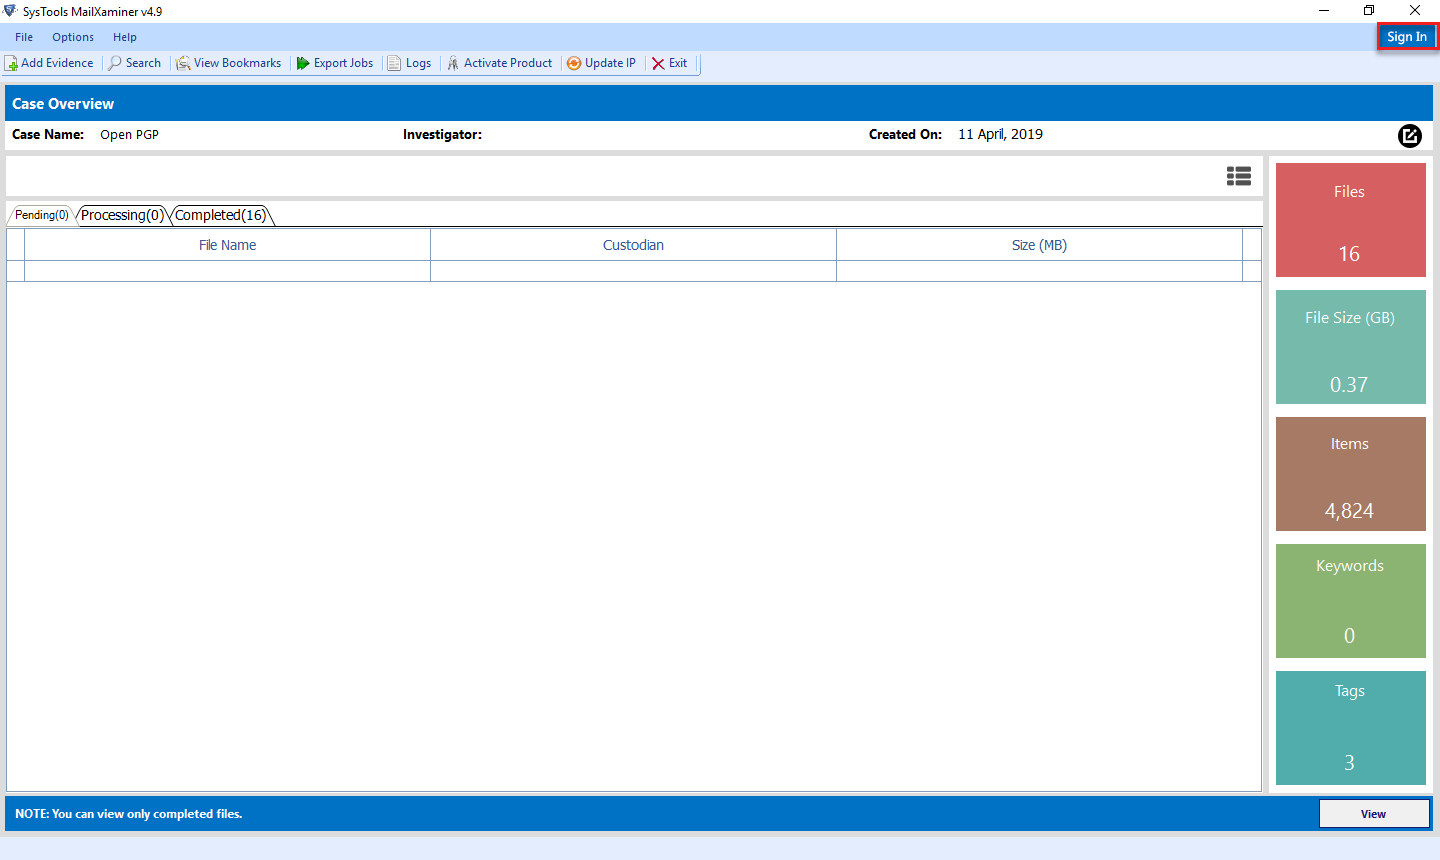
To associatively work as a team with team collaboration feature of the tool user need to connect the client with MailXaminer Server Application. For that User have to SignIn through providing the server details in their machine.
Click on SignIn Button from the Top-Right corner of the Systools MailXaminer Interface.
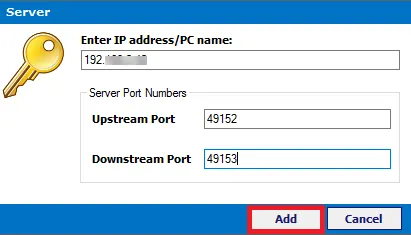
Provide Server details carefully it includes IP Adddress or PC name, Upstream Port & Downstream Port Numbder
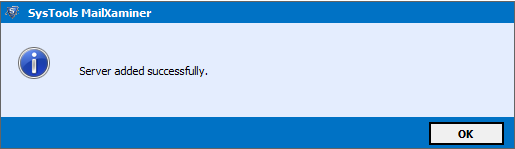
When Server details added successfully, user gets a prompt with message "Server Added Successfully"..
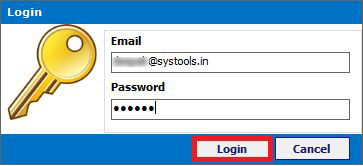
Now the client has to fill the Credentials details such as Email & Password is given by Admin which is created at the time when user added in Server side.
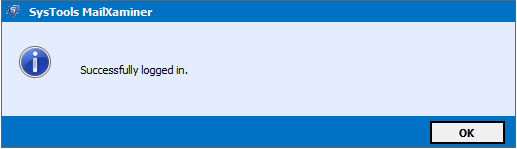
When a Client user Successfully login, a message-box prompt appear with message "Successfully logged in".
When a Client User connected successfully with the Server, Admin can view whether client Active or Inactive from Server side.

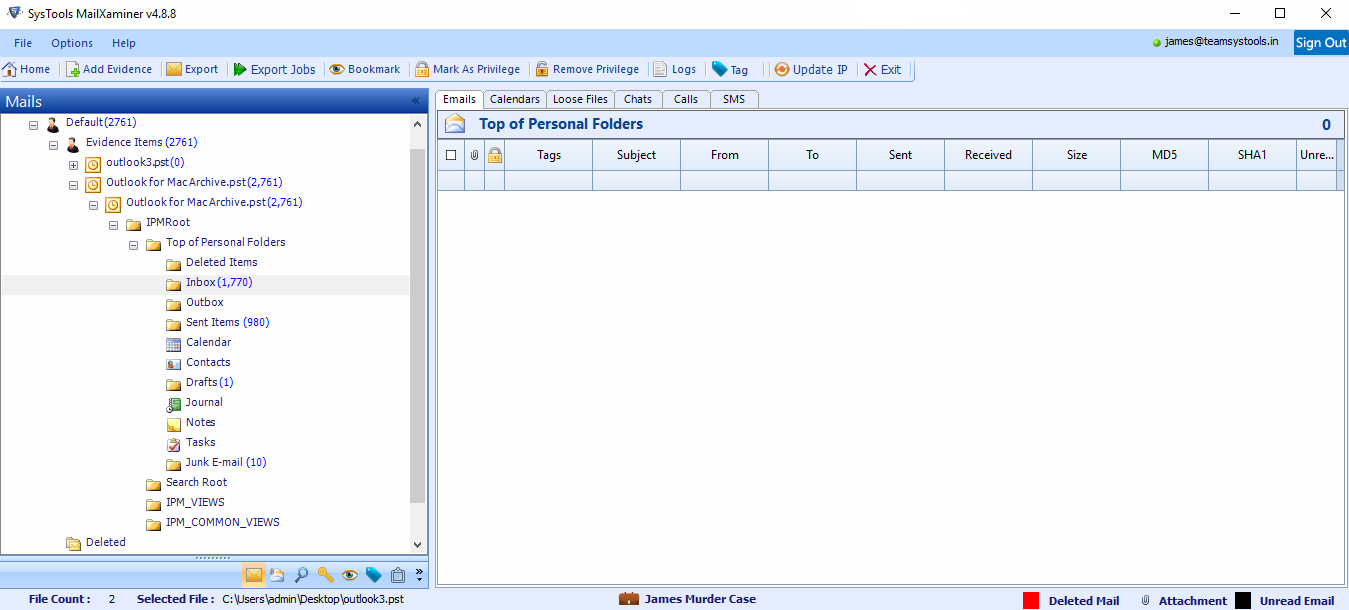
Client users can Open the Case Created from by Administrator from Server Side on which they need to work as a team. Select the Open case option from the File menu and open the case you want to work
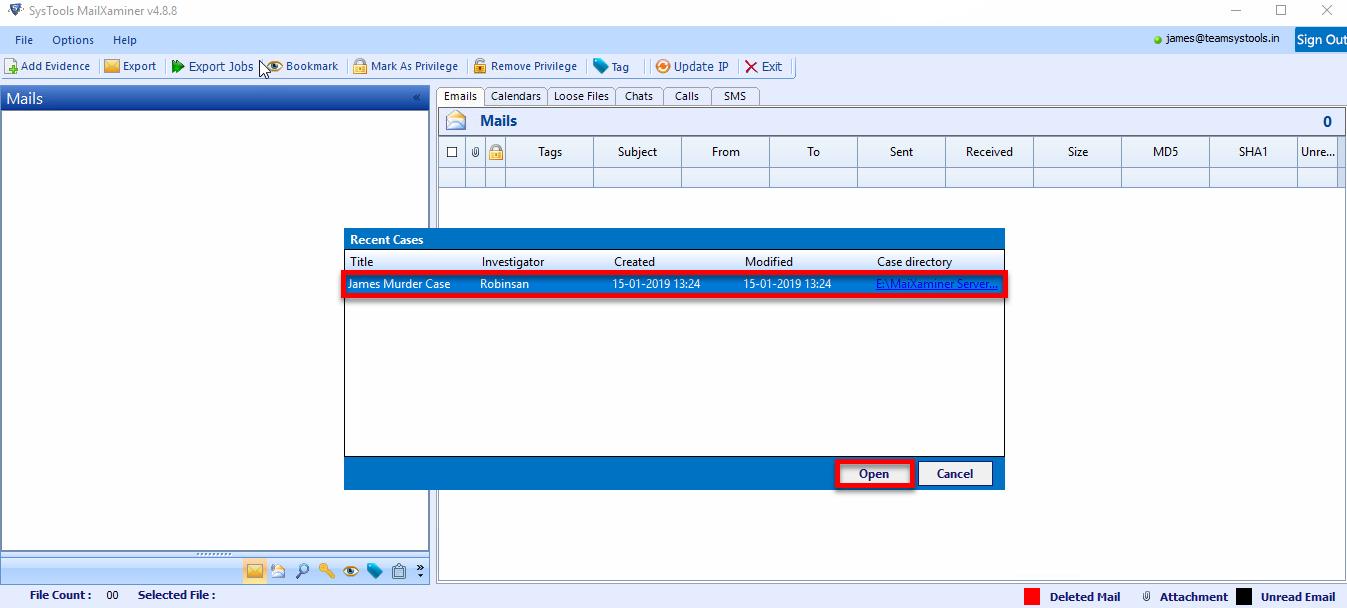
Now User can view all details of selected Case and can work independently on the case to improves productivity.