Advanced eDiscovery Search in Office 365 to Carve Evidence by Forensic Investigators


Carrying out eDiscovery search in Office 365 is not an easy task because it demands a complete integrated strategy that starts from a definite and robust excavatory content search and export content in court-admissible format.
Microsoft Purview provides a basic tool i.e. eDiscovery (standard) that can be used by organizations to search and export content in the form of evidence in Microsoft 365 and Office 365. For the deployment of eDiscovery, nothing is needed, however, IT admins and eDiscovery managers need to complete some prerequisite tasks to search, export, and preserve content.
Quick Note: Necessary Prerequisites to Use eDiscovery Platform Effectively:
- Assign proper licenses for using the eDiscovery tool
- Enable required eDiscovery apps
- Allocate eDiscovery permissions
Table of Contents:
Before moving ahead further, let’s first under the basic concept of the standard eDiscovery tool.
What is eDiscovery (Standard)?
If you go by definition, eDiscovery is a tool that is used to perform searches on mailboxes, SharePoint online, Microsoft Teams, and Microsoft 365 groups. Here, you can add mailboxes under hold so that the search is preserved for future use. All the searching can be done in the Office 365 Security & Compliance Center. To access eDiscovery in Microsoft 365 compliance center and to use the hold & export feature, your organization must have supported licenses. Also, to run a search or to export search results in eDiscovery, you must be a member of the eDiscovery Manager role group.
eDiscovery Workflow for Content Search in Microsoft Office 365
Here is the practical approach for using the eDiscovery tool. Carefully follow the below-mentioned steps, otherwise, there might be a chance of data loss.
Step 1: Provide appropriate permission
- From Microsoft 365 admin center, go to compliance. It will redirect you to Microsoft 365 compliance center.
- Click on Permissions.
- Under the compliance center, click on roles. This will list all the permissions that are required to manage certain tasks.
- Next, for eDiscovery permissions, click on eDiscovery manager and make sure all the necessary roles such as Export, Hold, and Preview are added to the roles. If not added, click on the edit role group to add the required roles.
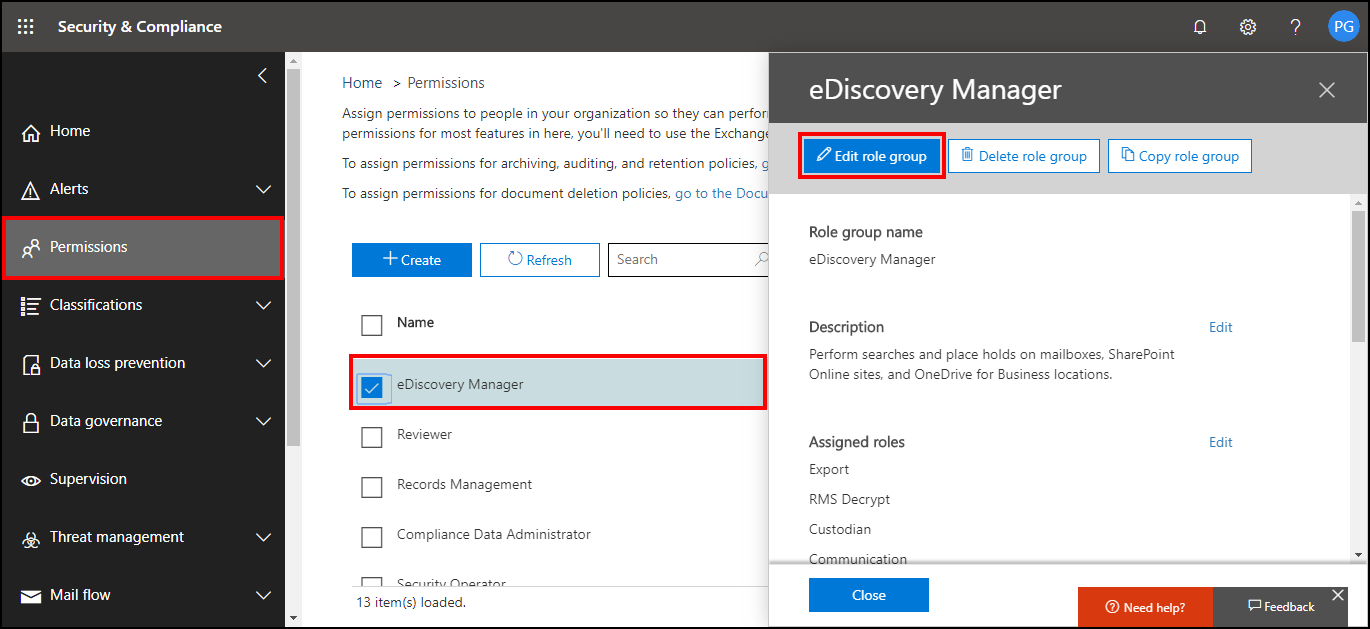
- For adding global admins, click on Choose eDiscovery Administrator & select the Edit option.

- Click the button + Add to add the user as an eDiscovery Administrator
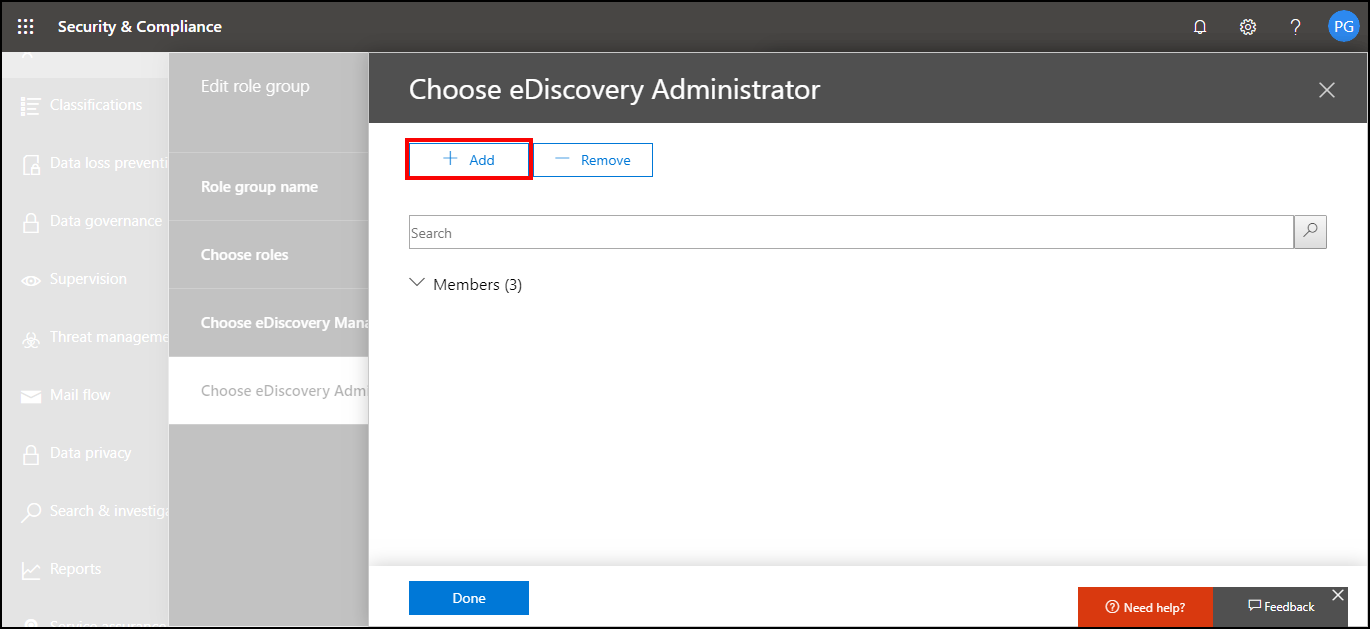
- Choose the user you need to be added as a member and click on the Add button.
Important Note: Once you make changes within a eDiscovery manager, it can take upto 24 hr to reflect the changes. So, you might have to wait for some time to access all the features of the eDiscovery.
After you see the changes are replicated, you can move to the next step.
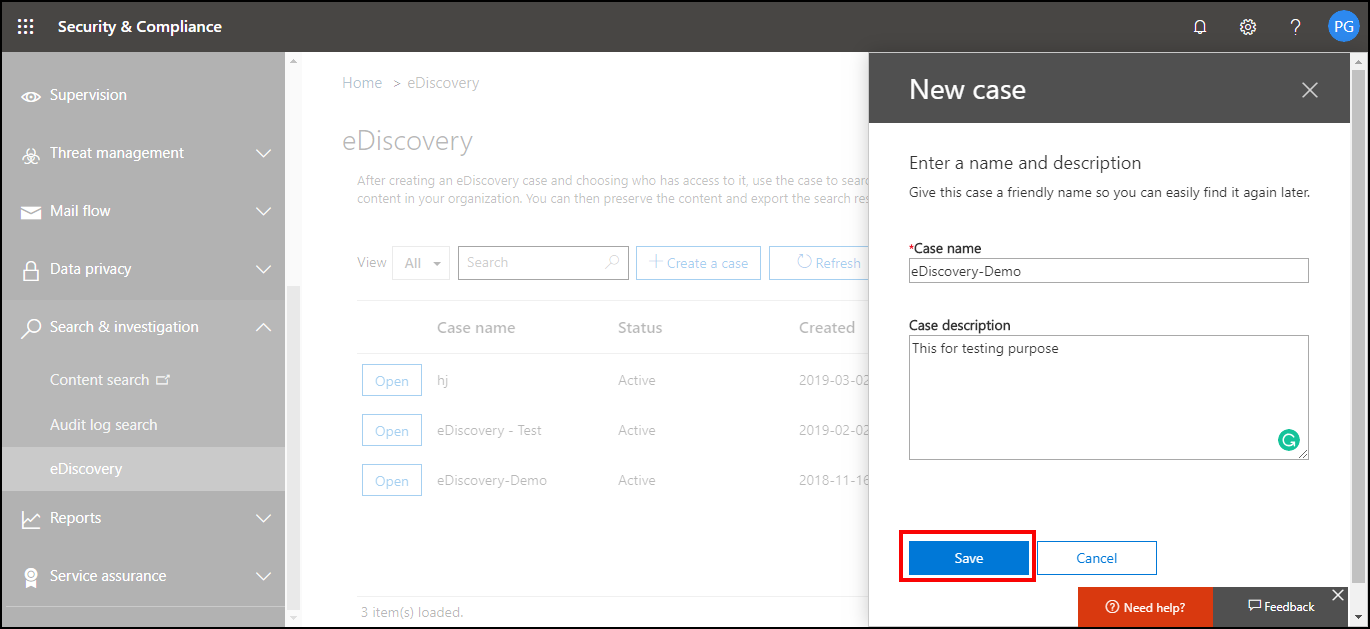
Step 2: Create a new case
- For creating a case, click on eDiscovery >> Core >> Create a Case.
- Then, a dialog box will pop up. You can enter the Case name & Case description and click the Save button.
Step 3: Add members to the case
To access and manage the newly created case, you need to add members to it. For that follow the below given steps.
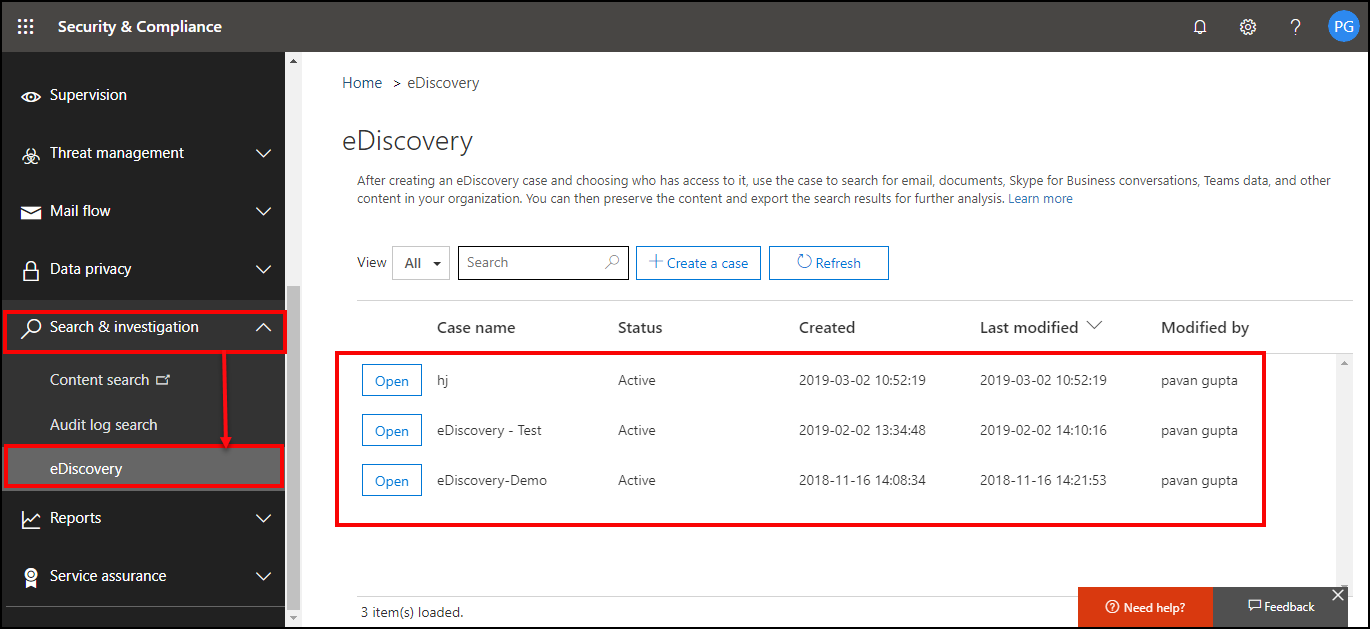
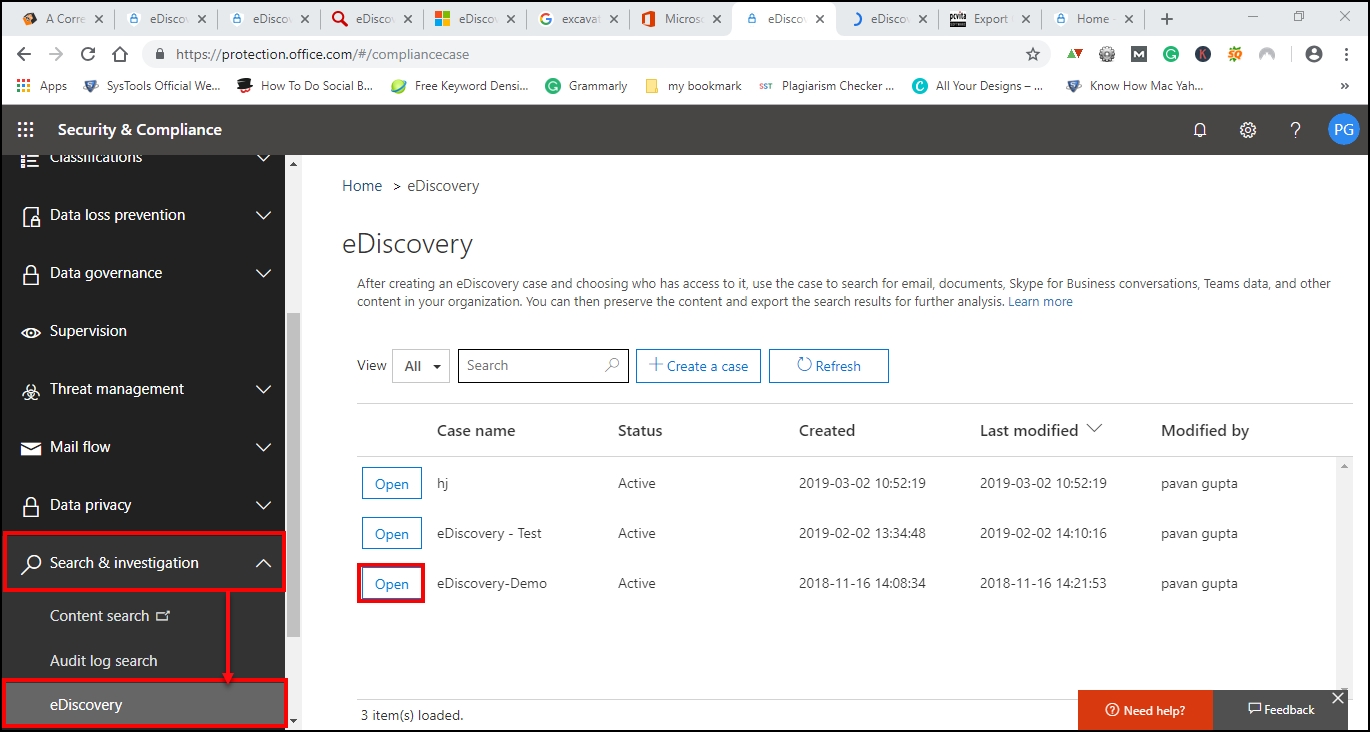
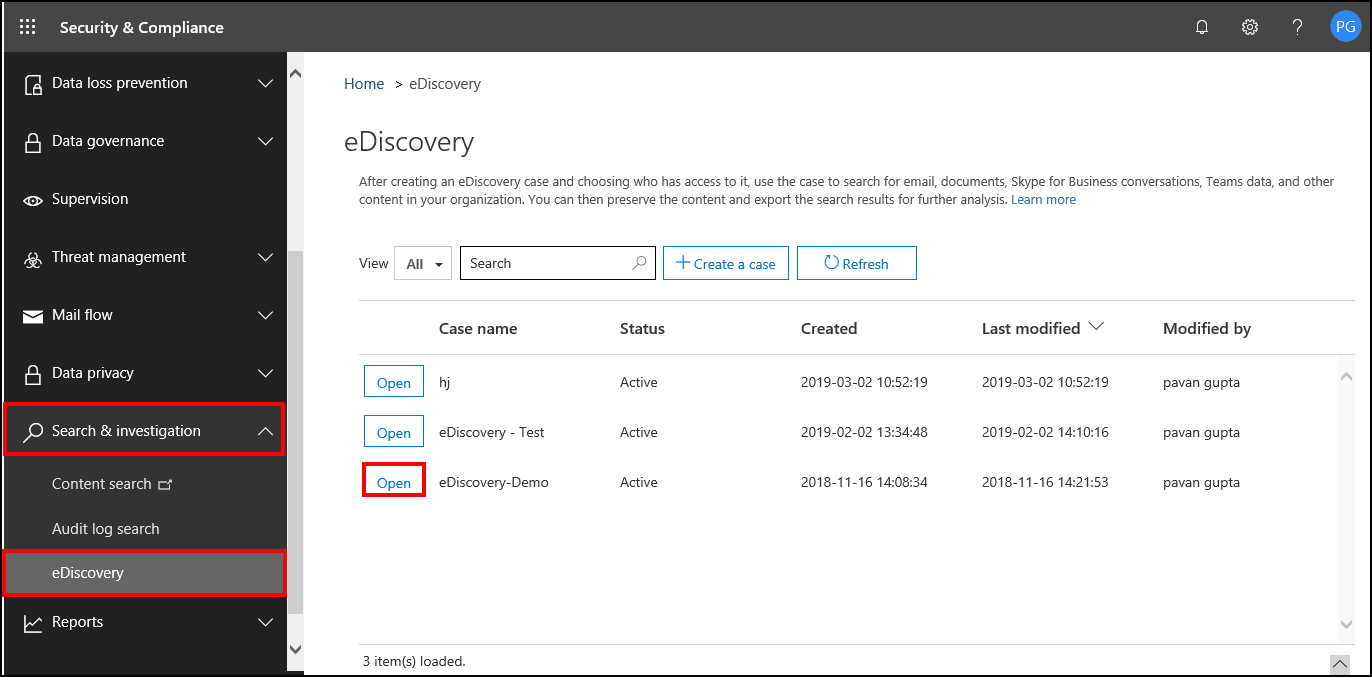
- Click the Search & Security option from the Security & Compliance Center and select eDiscovery to see the list of created cases.
- Select the newly created case and click on + Add button under the manage members section
Note: If you want to add a new role group to the case to do an eDiscovery search in Office 365 click on the +Add button under the Manage role group.
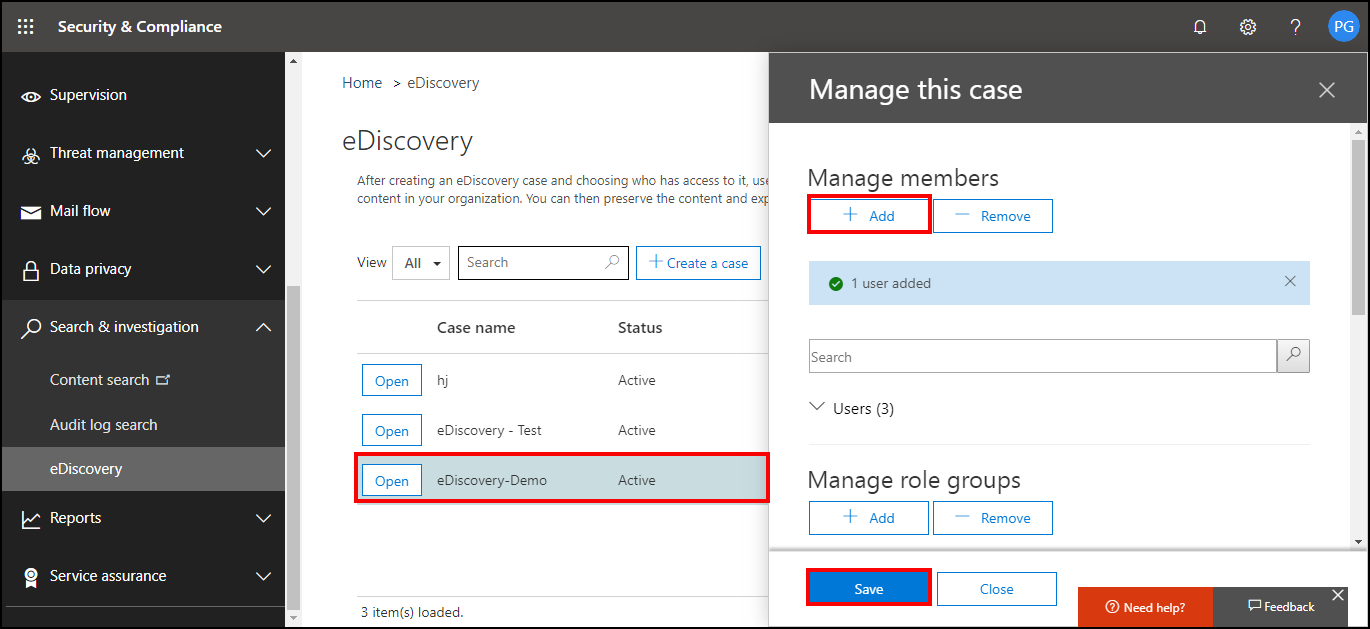
- Select the members and click the Save button to select the new list of members.
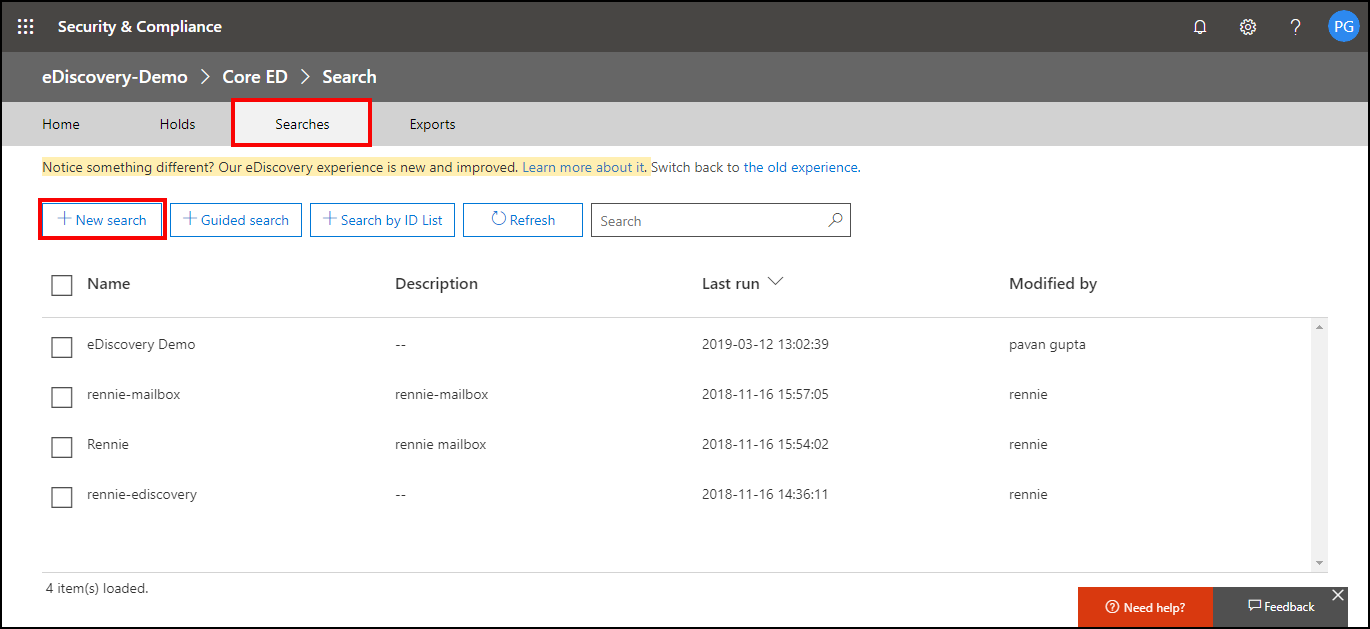
Step 4: Perform a content search on the case
You can perform the content search in Office 365 mailbox to extract the electronic evidence. The content search related to the case can access only by the members of the case or members of the manager role group.
- Go to Security & Compliance Center > > Search & investigation > > eDiscovery and open the case to perform a content search.
- Click the + New Search from the search tab
- On the new search page, you can create a search query by adding keywords.
- Under the Location option select the location to perform the content search in Office 365.
- Click the Modification option to search for any users, groups, teams, or site locations.
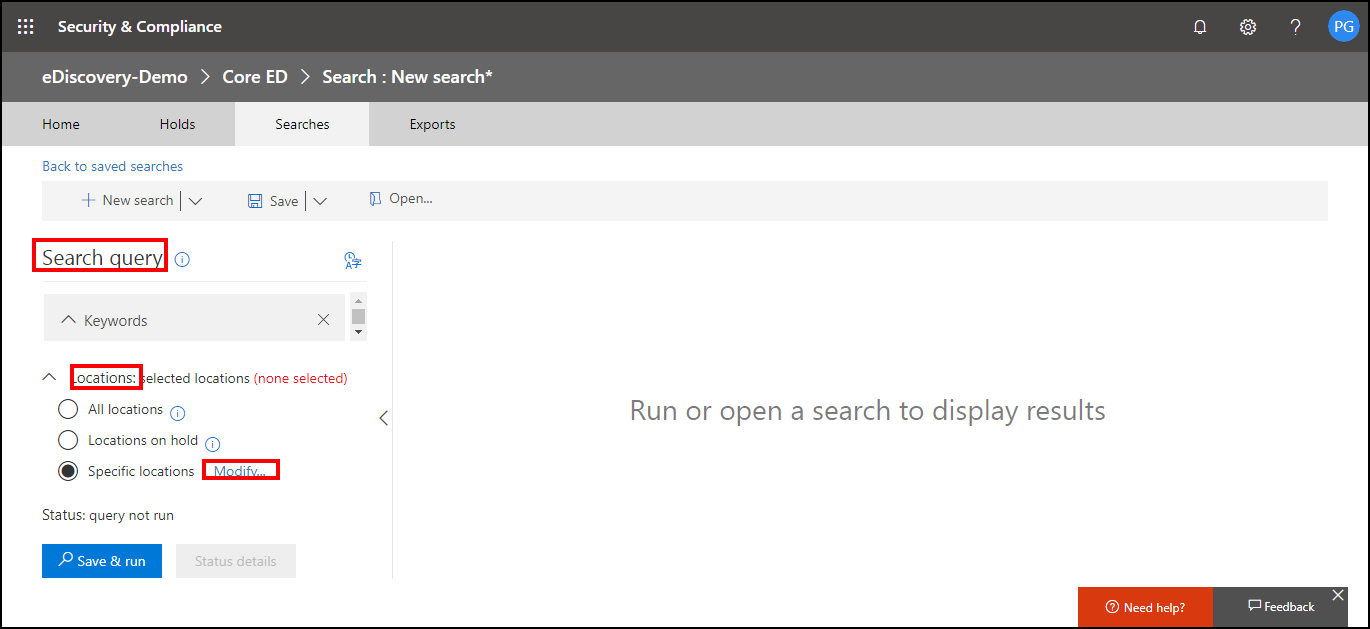
- Click on the save & run option and provide Name and Description to save the search settings during the eDiscovery search in Office 365.

Step 5: Export content search results into the PST file
After completing the process of content search in Office 365 now it’s time to export Office 365 mailbox to the PST file. To perform the exporting process follow the below steps.
- Go to Security & Compliance Center >> Search & investigation >> eDiscovery
- Choose the case and click n the Open button.
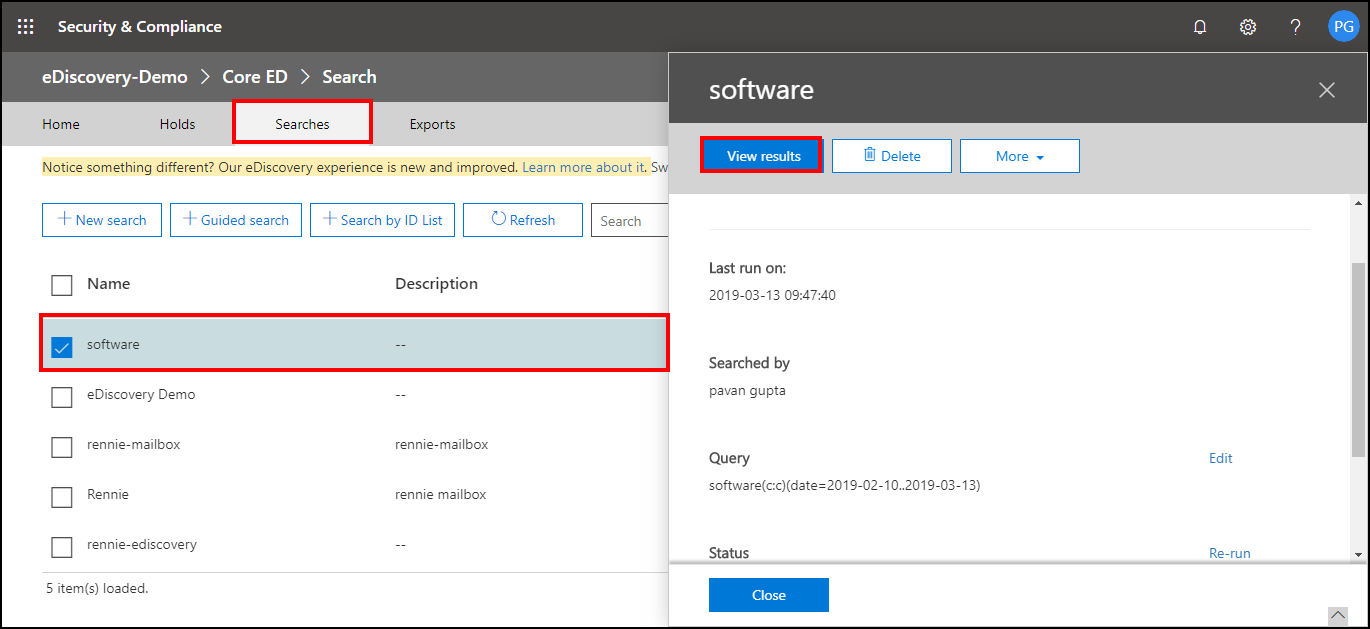
- Select the Search tab >> Choose the content search result you wanted to export >> View result
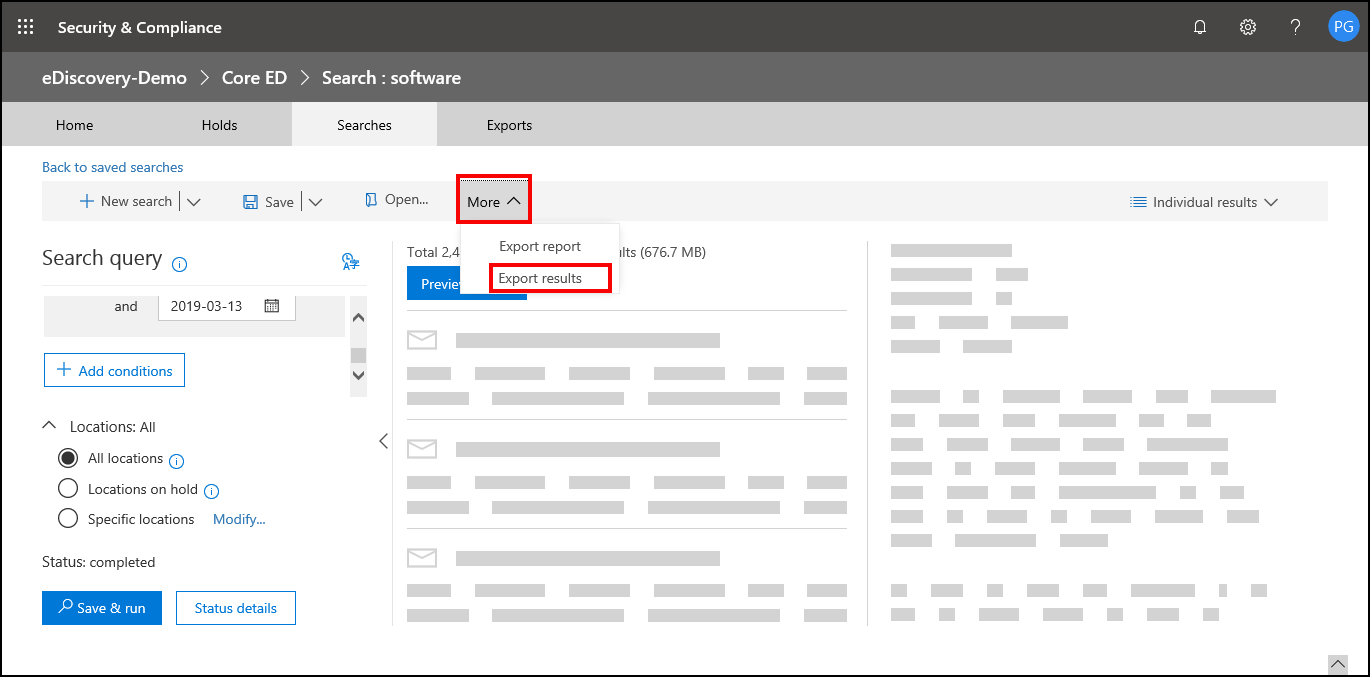
- click on More and select Export Results to export the result of the eDiscovery search in Office 365 into PST.
- From the export result tab user can change Output, Export exchange content as, etc, and then click the Export button.

- Select the Export tab to see the list of exported results.
- Choose the Export result which you needed to download and click on the Download results button.
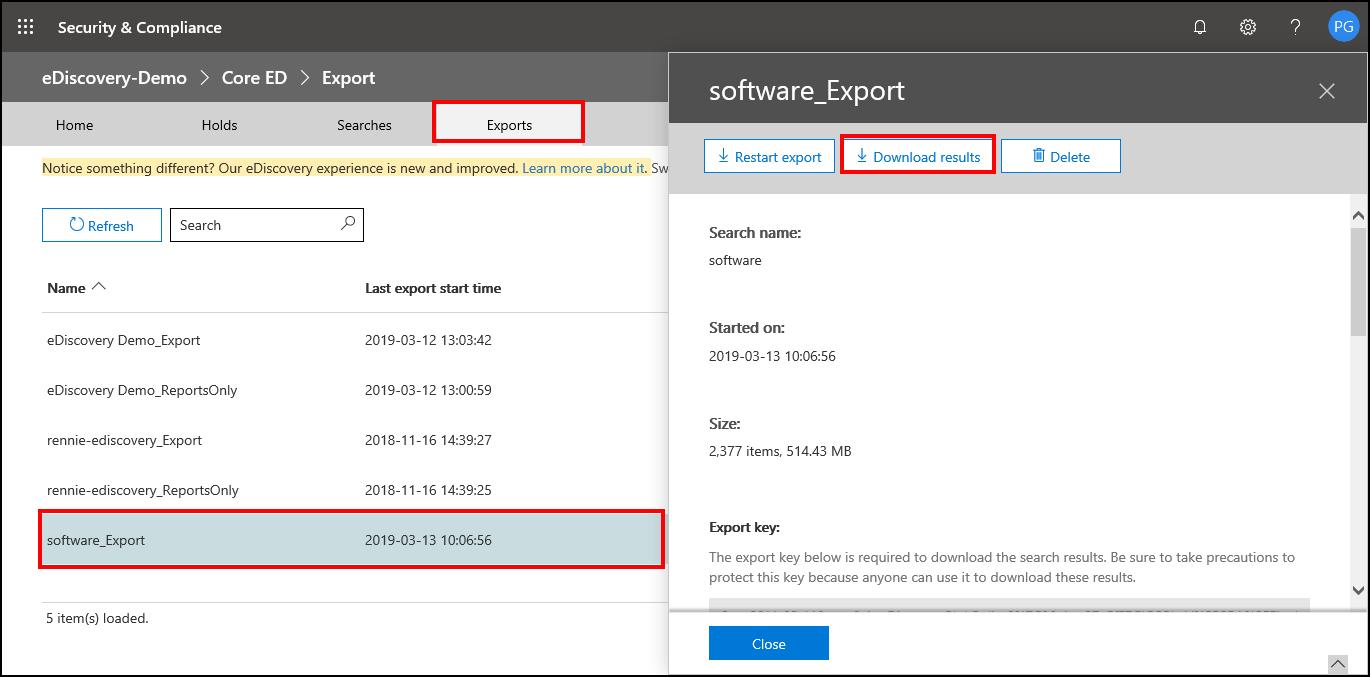
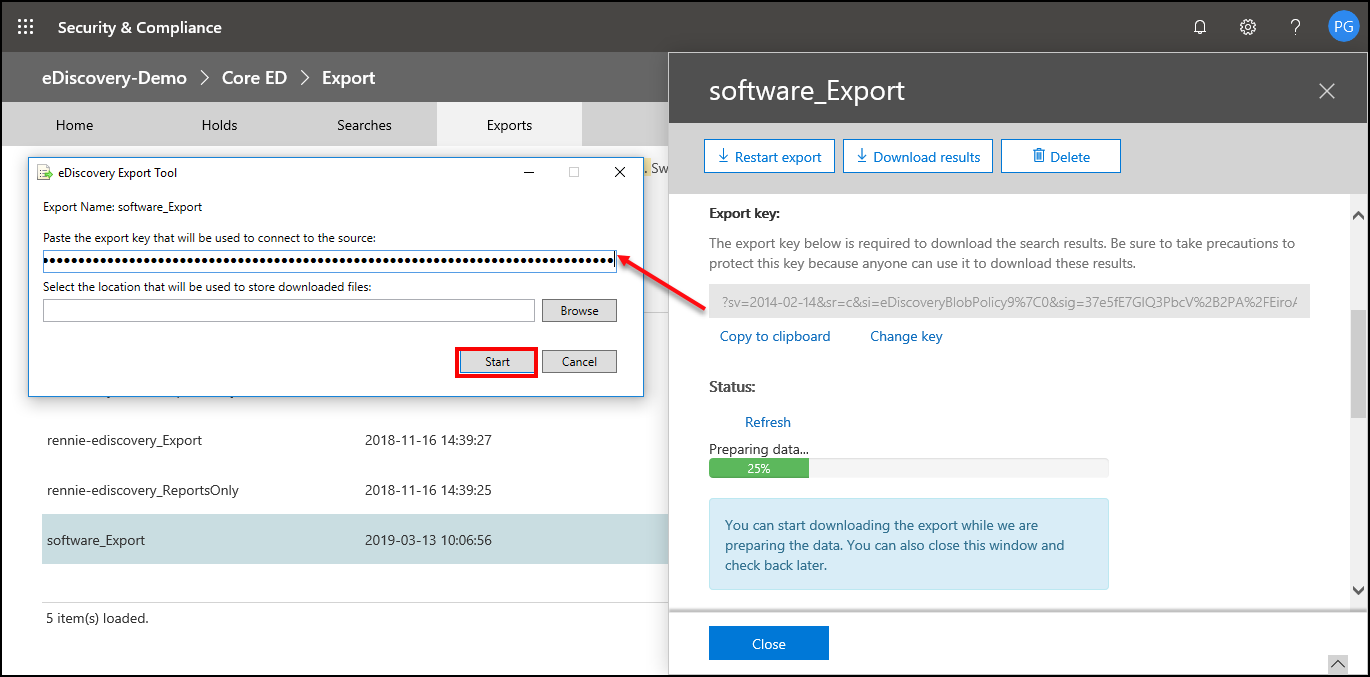
- Copy and paste the export key in the popup window and browse the destination location to which you wanted to save the search result.
- Then click the Start button to start the downloading process.
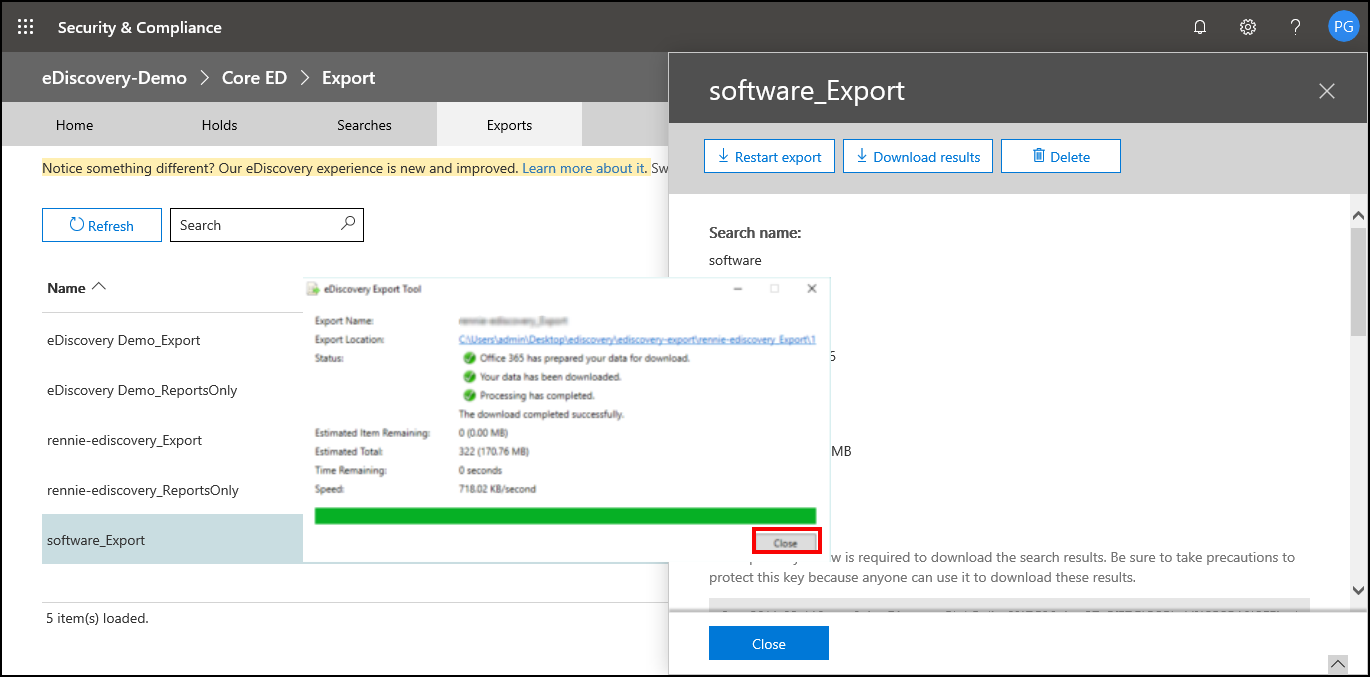
- When the process is completed click close and finish the downloading process.
Quick Recap of eDiscovery Work Flow:
- Must have appropreate licences.
- Assign necessary permissions.
- Create a case
- Perform content search on required mailboxes
- Place search/contents on hold
- Export search reults
The above-mentioned process of content search and exporting the result Via the eDiscovery tool on Office 365 is a very tiring and time-consuming method. Apart from time limitations, various limits are applied to eDiscovery search tools in terms of Search limit, Export limit, Indexing limits for email messages, etc. During the Forensic Investigation searching the content and exporting the Office365 mailbox to PST format in a faster way could be helpful in legal proceedings. To perform eDiscovery in Office 365 without investing too much time and effort, forensic experts can take the help of the Professional Email Forensics Tool. It allows them to dig into the mailbox as well as preserve the carved evidence in suitable and appropriate formats.
Reliable Solution Designed Especially for the eDiscovery & Forensic Experts
A tried and tested tool i.e. MailXaminer has been specially designed for investigators to perform eDiscovery searches in Office 365 and other web-based email mailboxes. The software is an allrounder that follows all the eDiscovery investigation guidelines and assures investigators get a suitable result that can be presented as evidence in the courtroom.
So, first, download and launch the software on your Desktop/Laptop. Then, follow the below steps.
Simple Steps to Add Evidence Using the Tried and Tested Tool–
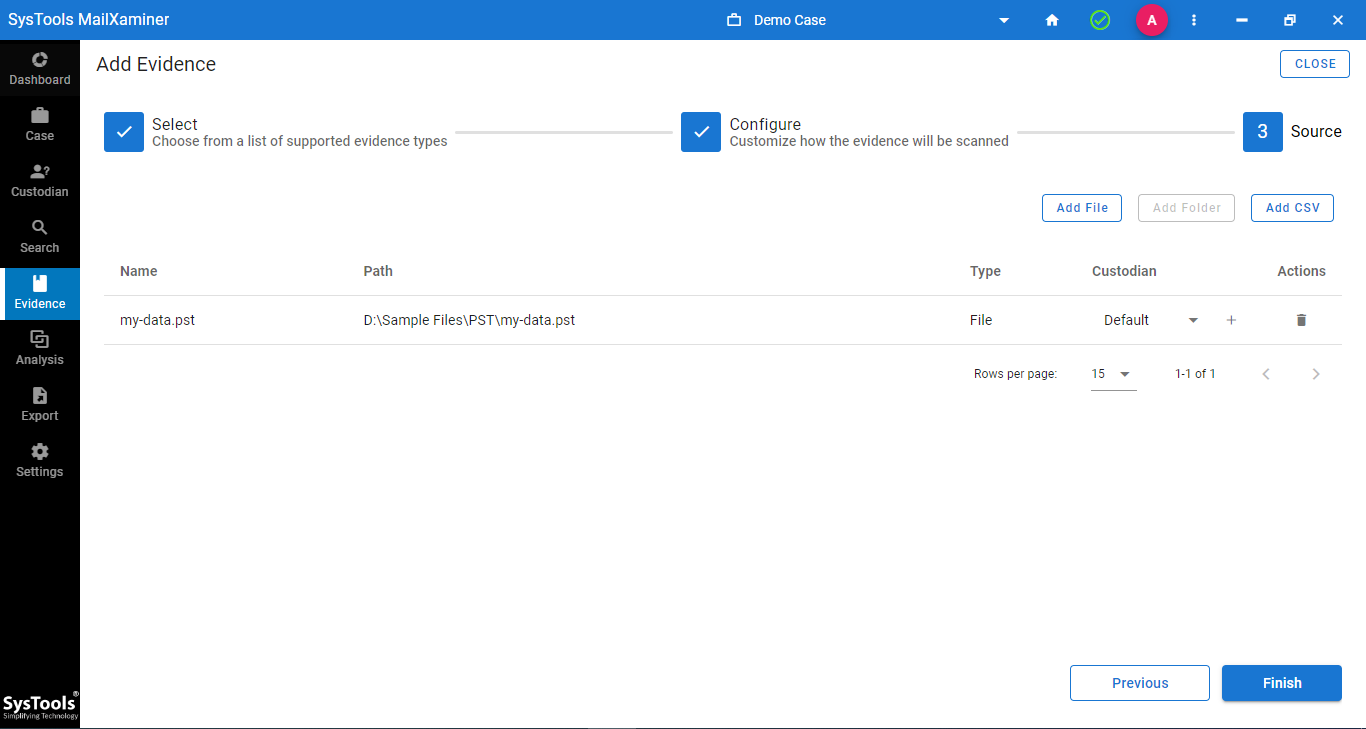
Step-1. In order to start the investigation, create a new case. To do so, select Create Case from the Cases screen and enter the necessary case-related information.

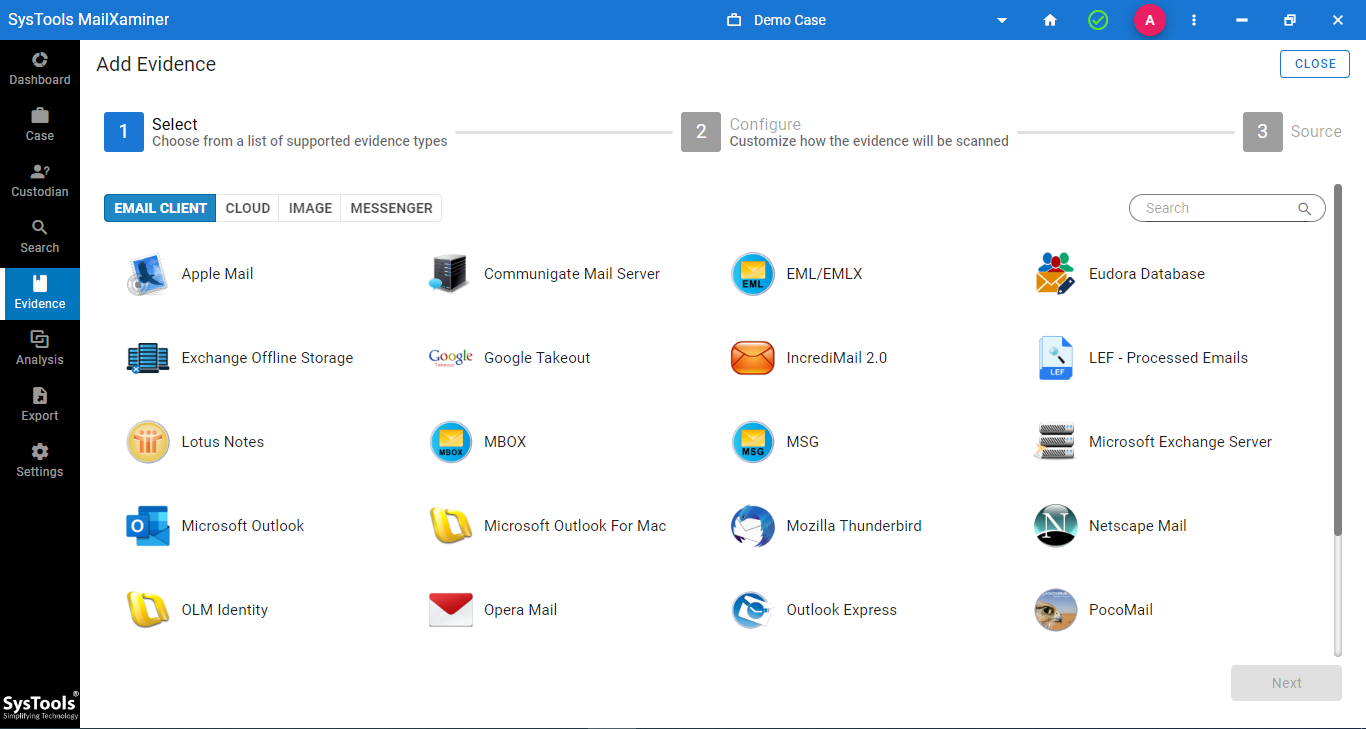
Step-2. Click the Add New Evidence option to add the evidence file to the software for scanning.
Step-3. The window for adding evidence will then appear. Select the email client here.
Step-4. Afterward, click Finish after utilizing the Add File option to browse the evidence file.
Step-5. Go to the “Search” tab after the file has been scanned. Here, the program will preview all emails, including those that have been deleted.
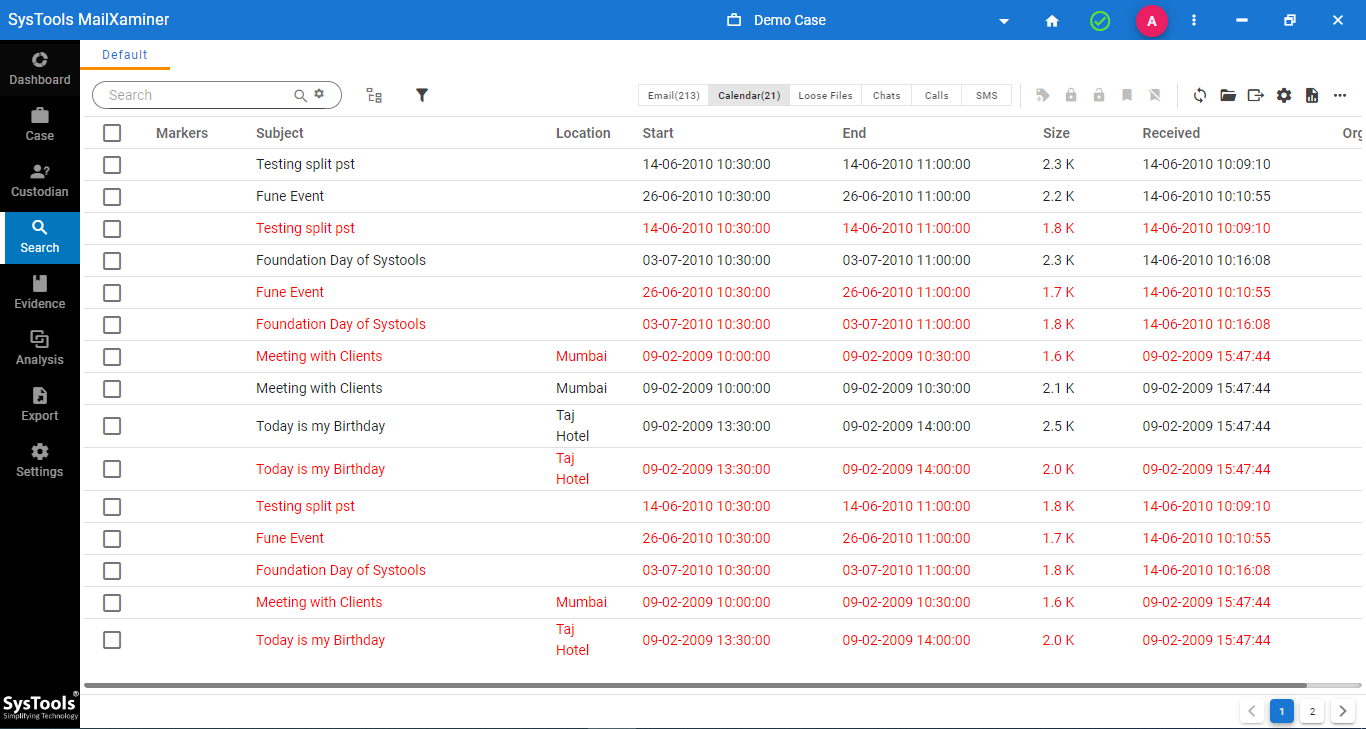
There are different searches that can be performed using this tool. Such as:
1. General Search
General search is used to fetch the email data related to the keyword used to search over the entire mailbox or selected attributes.
- The general search operation is acquainted with the various search algorithms such as General, Wildcard, Regular Expression, Stem & Fuzzy search which help the investigators to search and extract the evidence from Office 365 Outlook mailbox during the eDiscovery process.
To perform content search more specifically the general search allows to filter the data more specifically with the help of Logic operators such as AND, OR & NOT and metadata such as Subject, To, From, etc.
2. Proximity Search
Proximity search allows the investigator to perform an eDiscovery search in Office 365 mailbox based on the approximate word combination. That means this search operation is useful when the known with more than one keyword and the approximate character distance between them. This will help to filter the results more specifically.
3. Keyword search
The keyword search helps to search the content with a list of keywords. Either the user can insert a set of keywords manually into the tool can add them as the CSV file. Click on Add Keywords button to insert a keyword list for performing a content search in Office 365 mailbox.
While dealing with a large forensic case, saving the search results can be helpful for the investigators to further investigate the case. Users can easily save these search results by clicking on the Save button of the eDiscovery supporting tool and providing the Search Result Name & Note.
After completing a content search in Office 365 Outlook mailbox by using various search mechanisms present in the tool. The final process of eDiscovery is Exporting the Office 365 mailbox to a PST file.
The most helpful part of the tool that comes into use for the investigators during Office 365 eDiscovery case management is the Export feature. It helps in presenting the evidence in the courtroom. As a matter of fact, various file formats supported by the software can be accepted in the litigatory proceedings including PST PDF, Concordance, and many more.
Conclusion
Exporting Office 365 Outlook mailbox into PST file format – the most demanding file format. That’s why, users prefer to select PST format as the first option for exporting the result of eDiscovery Search in Office 365. But, without proper knowledge, it could be difficult for users to select the best option to export the result. So, to make things easier, we have discussed both Manual and Automated methods. Since the manual method is time consuming and needs more effort to obtain an accurate result, the automated method (which uses the tried and tested tool) seems to be the best fit for performing searches in Office 365 and extracting evidence. Hence, try the software now!